Table of Contents
- 1. Introduction
- 2. Installation and Startup
- 3. GettingStarted
- 4. Viewing Data
-
- 1. Colour Coding
- 2. Table Columns
- 3. Synchronisation
- 4. Highlighting
- 5. Filtering
- 6. Find and Replace
- 7. Reports
- 8. View Artwork Full size
- 9. Links with other Applications
-
- 9.1. View this Song at MusicBrainz
- 9.2. View this Artist at MusicBrainz
- 9.3. View this Album at MusicBrainz
- 9.4. View this Album Group at MusicBrainz
- 9.5. View this Acoustid at Acoustid
- 9.6. View this Original Album at MusicBrainz
- 9.7. View this Song at Amazon
- 9.8. View this Album at Discogs
- 9.9. View this Album at Wikipedia
- 9.10. View this Artist at Discogs
- 9.11. View this Artist at Wikipedia
- 9.12. View this Song in AcousticBrainz
- 9.13. Play Song
- 9.14. Copy Paste with other Applications
- 5. Editing Data Manually
- 6. Correcting Data Automatically
-
- 1. Remote Correct
-
- 1.1. What is MusicBrainz ?
- 1.2. What is Discogs ?
- 1.3. What is Acoustid ?
- 1.4. What is the JThink Music Server ?
- 1.5. How Does Jaikoz Use MusicBrainz and Acoustic Fingerprinting ?
- 1.6. Retrieve Acoustic Ids
- 1.7. Auto correct Metadata from MusicBrainz
- 1.8. Auto correct Metadata from Discogs
- 1.9. Manual Correct Metadata from MusicBrainz
- 1.10. Update Metadata from MusicBrainz
- 1.11. Update Metadata from Discogs
- 1.12. Match Songs to one MusicBrainz Album
- 1.13. Match Songs to Specified MusicBrainz Album...
- 1.14. Match Songs to MusicBrainz Album by Barcode...
- 1.15. Match Songs to MusicBrainz Album by Catno...
- 1.16. Match Songs to one Discogs Album
- 1.17. Match Songs to Specified Discogs Album...
- 1.18. Match Songs to Discogs Album by Barcode...
- 1.19. Match Songs to Discogs Album by Catno...
- 1.20. MusicBrainz Server
-
- 1.20.1. MusicBrainzServerPreferences
- 1.20.2. Submit MusicBrainz/Acoustid Pair
- 1.20.3. Submit MusicBrainz Genres
- 1.20.4. Submit MusicBrainz Barcodes
- 1.20.5. Submit MusicBrainz Ratings
- 1.20.6. Submit New Release
- 1.20.7. Add to your MusicBrainz Collection
- 1.20.8. Remove from your MusicBrainz Collection
- 2. Local Correct
-
- 2.1. Correct Artwork
- 2.2. Delete Duplicates
- 2.3. Correct Track Nos
- 2.4. Cross Referencing Correct - Correct Artists/Albums/Titles/Genres/Recording Times/Composers
- 3. File and Folder Correct
- 4. Delete Duplicates
- 5. Auto Correcter
- 7. ITunes
- 8. Export and Import
- 9. Data Fields
-
- 1. Metadata Fields
-
- 1.1. Jaikoz Fields
- 1.2. File Location Fields
- 1.3. Metadata Fields
-
- 1.3.1. Artist
- 1.3.2. Album
- 1.3.3. Track No
- 1.3.4. Title
- 1.3.5. Genre
- 1.3.6. Year
- 1.3.7. Comment
- 1.3.8. Album Artist
- 1.3.9. Composer
- 1.3.10. Artwork
- 1.3.11. Grouping
- 1.3.12. Disc No
- 1.3.13. BPM (beats per minute)
- 1.3.14. MusicBrainz Artist Id
- 1.3.15. MusicBrainz Release Id
- 1.3.16. MusicBrainz Release Artist Id
- 1.3.17. MusicBrainz Recording Id
- 1.3.18. MusicBrainz Disc Id
- 1.3.19. Puid
- 1.3.20. Amazon Id
- 1.3.21. Release Status
- 1.3.22. Release Type
- 1.3.23. Release Country
- 1.3.24. Lyrics
- 1.3.25. Is Compilation
- 1.3.26. Sort Artist
- 1.3.27. Sort Album Artist
- 1.3.28. Sort Album
- 1.3.29. Sort Title
- 1.3.30. Sort Composer
- 1.3.31. Encoder
- 1.3.32. ISRC
- 1.3.33. Bar code of the release
- 1.3.34. Catalog No
- 1.3.35. Label
- 1.3.36. Lyricist
- 1.3.37. Conductor of the music.
- 1.3.38. Remixer
- 1.3.39. Mood
- 1.3.40. Media
- 1.3.41. Release Official Url
- 1.3.42. Release Discogs Url
- 1.3.43. Release Wikipedia Url
- 1.3.44. Artist Official Url
- 1.3.45. Artist Discogs Url
- 1.3.46. Artist Wikipedia Url
- 1.3.47. Lyrics Url
- 1.3.48. Disc Total
- 1.3.49. Track Total
- 1.3.50. Custom1
- 1.3.51. Custom2
- 1.3.52. Custom3
- 1.3.53. Custom4
- 1.3.54. Custom5
- 1.3.55. Floating Bpm
- 1.3.56. MB Release Group Id
- 1.3.57. MB Work Id
- 1.3.58. Occasion
- 1.3.59. Original Album
- 1.3.60. Original Artist
- 1.3.61. Original Lyricist
- 1.3.62. Original Release Year
- 1.3.63. Quality
- 1.3.64. Script
- 1.3.65. Tags
- 1.3.66. Tempo
- 1.3.67. Rating
- 1.3.68. Producer
- 1.3.69. Mixer
- 1.3.70. DJ Mixer
- 1.3.71. Arranger
- 1.3.72. Engineer
- 1.3.73. Language
- 1.3.74. Acoustid Fingerprint
- 1.4. Audio Fields
- 2. ID3 Fields
-
- 2.1. ID3 Fields
-
- 2.1.1. Unique File Identifier
- 2.1.2. Artist
- 2.1.3. Album
- 2.1.4. Title
- 2.1.5. Track No
- 2.1.6. Cover Art
- 2.1.7. Genre
- 2.1.8. Year
- 2.1.9. Comment
- 2.1.10. User Defined URL
- 2.1.11. User Defined Text Information
- 2.1.12. Composer
- 2.1.13. Copyright Info
- 2.1.14. Encode By
- 2.1.15. Original Artist
- 2.1.16. BPM (beats per minute)
- 2.1.17. Encoding Time
- 2.1.18. Playlist Delay
- 2.1.19. Original Release Time
- 2.1.20. Release time
- 2.1.21. Tagging Time
- 2.1.22. Lyricist
- 2.1.23. File Type
- 2.1.24. Involved People List
- 2.1.25. Grouping
- 2.1.26. Title/Songname/Content Description
- 2.1.27. Initial Key
- 2.1.28. Language(s)
- 2.1.29. Length
- 2.1.30. Musician Credits List
- 2.1.31. Media Type
- 2.1.32. Mood
- 2.1.33. Original Album
- 2.1.34. Original Filename
- 2.1.35. Original Lyricist(s)
- 2.1.36. File Owner/Licensee
- 2.1.37. Album Artist (Accompaniment)
- 2.1.38. Conductor/Performer refinement
- 2.1.39. Remixed
- 2.1.40. Disc No (Part of a Set)
- 2.1.41. Produced Notice
- 2.1.42. Publisher
- 2.1.43. Internet Radio Station Name
- 2.1.44. Internet Radio Station Owner
- 2.1.45. Sort Album
- 2.1.46. Sort Artist
- 2.1.47. Sort Title
- 2.1.48. ISRC
- 2.1.49. Encoding Preferences
- 2.1.50. Set Subtitle
- 2.1.51. URL: Commercial Information
- 2.1.52. URL: Copyright/Legal Information
- 2.1.53. URL: Official Song Web Page
- 2.1.54. URL: Official Artist Web Page
- 2.1.55. URL: Official Audio Source Web Page
- 2.1.56. URL: Official Internet Radio Web Page
- 2.1.57. URL: Payment
- 2.1.58. URL: Publishers Official Web Page
- 2.1.59. Play Counter
- 2.2. ID3 Extended Fields
- 2.3. Tag Field Groups
- 2.4. Data Formats common to multiple Fields
- 2.5. ID3 Tag Compatibility
- 3. Ogg Vorbis Fields
- 4. Mp4 Fields
- 5. Flac Fields
- 10. Menus
-
- 1. Main Menu
-
- 1.1. File
-
- 1.1.1. Open Folder...
- 1.1.2. Add Folder...
- 1.1.3. Open Files...
- 1.1.4. Add Files...
- 1.1.5. Open Playlist...
- 1.1.6. Add Playlist...
- 1.1.7. Open Recent
- 1.1.8. Close Files
- 1.1.9. Play Song
- 1.1.10. Update License
- 1.1.11. Preferences
- 1.1.12. Save Preferences
- 1.1.13. Save Changes
- 1.1.14. Save And Move...
- 1.1.15. Save And Copy...
- 1.1.16. Force Save
- 1.1.17. Revert Changes
- 1.1.18. Save Artwork to File system
- 1.1.19. Exit
- 1.2. Edit
-
- 1.2.1. Undo
- 1.2.2. Redo
- 1.2.3. Copy from View Pane
- 1.2.4. Copy from Edit Pane
- 1.2.5. Paste
- 1.2.6. Paste First Value
- 1.2.7. Paste to Start
- 1.2.8. Paste to End
- 1.2.9. Remove Whitespace
- 1.2.10. Remove Widespace
- 1.2.11. Delete
- 1.2.12. Set Value...
- 1.2.13. Find and Replace...
- 1.2.14. Capitalizer...
- 1.2.15. Swap Columns...
-
- 1.2.15.1. Swap Artist with Album
- 1.2.15.2. Swap Artist with Title
- 1.2.15.3. Swap Artist with Track No
- 1.2.15.4. Swap Artist with Comment
- 1.2.15.5. Swap Album with Title
- 1.2.15.6. Swap Album with Track No
- 1.2.15.7. Swap Album with Comment
- 1.2.15.8. Swap Title with Track No
- 1.2.15.9. Swap Track No with Comment
- 1.2.15.10. Swap Title with Comment
- 1.2.16. Empty Columns...
- 1.2.17. Swap
- 1.2.18. Prepend to Left
- 1.2.19. Prepend to Right
- 1.2.20. Renumber Track Nos
- 1.3. View
-
- 1.3.1. Show View Pane
- 1.3.2. Show Tag Browser
- 1.3.3. Show Detail Pane
- 1.3.4. Show Tool Bar
- 1.3.5. Show ID3 Tabs
- 1.3.6. View Artwork Full-size
- 1.3.7. View this Song at MusicBrainz
- 1.3.8. View this Artist at MusicBrainz
- 1.3.9. View this Album at MusicBrainz
- 1.3.10. View this Acoustic Id at MusicBrainz
- 1.3.11. View this Song at Amazon
- 1.3.12. View this Album at Discogs
- 1.3.13. View this Album at Wikipedia
- 1.3.14. View this Artist at Discogs
- 1.3.15. View this Artist at Wikipedia
- 1.4. Action
-
- 1.4.1. Auto Correct
- 1.4.2. Match To Album
-
- 1.4.2.1. Match Songs to one MusicBrainz Album
- 1.4.2.2. Match Songs to Specified MusicBrainz Album...
- 1.4.2.3. Match Songs to MusicBrainz Album by Barcode...
- 1.4.2.4. Match Songs to MusicBrainz Album by Catno...
- 1.4.2.5. Match Songs to one Discogs Album
- 1.4.2.6. Match Songs to Specified Discogs Album...
- 1.4.2.7. Match Songs to Discogs Album by Barcode...
- 1.4.2.8. Match Songs to Discogs Album by Catno...
- 1.4.3. Local Correct
- 1.4.4. File And Folder Correct
- 1.4.5. Remote Correct...
-
- 1.4.5.1. Retrieve Acoustids
- 1.4.5.2. Auto correct Metadata from MusicBrainz
- 1.4.5.3. Auto correct Metadata from Discogs
- 1.4.5.4. Submit MusicBrainz/AcoustId Pair
- 1.4.5.5. Submit MusicBrainz Genres
- 1.4.5.6. Submit Barcodes
- 1.4.5.7. Submit Ratings
- 1.4.5.8. Submit New Release
- 1.4.5.9. Add to your MusicBrainz Collection
- 1.4.5.10. Remove from your MusicBrainz Collection
- 1.4.5.11. Manual Correct Tags from MusicBrainz
- 1.4.5.12. Update Metadata from MusicBrainz
- 1.4.5.13. Update Metadata From Discogs
- 1.4.6. Delete Duplicates
- 1.4.7. Delete Files
- 1.4.8. Undelete Files
- 1.5. Filters
- 1.6. Advanced
- 1.7. Reports
- 1.8. Help
- 2. Preferences
- 3. Popup Menu
- 11. Keyboard Traversal
List of Tables
- 4.1. Colour Coding
- 9.1. Not Supported Fields
- 9.2. ID3v1 Fields
- 11.1. General Keyboard Actions
- 11.2. Main Menu Actions
- 11.3. Table Keyboard Actions
- 11.4. Shortcut keys for tasks
Table of Contents
![]()
![]()

Are you frustrated by missing information in your songs? Are you unable to play back your favourite tracks? Maybe you are a recording artist and need to improve the information in your distributed songs? Whether you need to regain control of your music collection or simply make some refinements Jaikoz offers an effective music management solution. The missing information in your files is known as Metadata and is stored in a Tag. The Jaikoz Tagger is a powerful yet simple to use tool that allows you to organize, edit and correct thousands of these tags with ease.
Jaikoz has powerful automation features designed to do the hard work for you. Jaikoz uses MusicBrainz, an online database of over ten million songs. MusicBrainz is a community based database with contributions by over 200,000 people and its system of moderation ensures the data is extremely accurate. Many of these songs also have associated Acoustids provided by Acoustid, allowing a song to be identified by the actual music, so it can do a match even if you have no metadata! This feature means that Jaikoz gives you the flexibility to lookup your songs by both the acoustic id and the Metadata making Jaikoz a very accurate tool. Jaikoz also uses other databases such as Discogs and Amazon to provide even better matching.
No identification system is 100% accurate so we have made it as quick and easy as possible to edit your data manually as well. Jaikoz uses a convenient spreadsheet view to allow you to edit information very quickly and provides many auto-formatting tasks. For example it compares your files to each other and using this information it can correct missing information and spelling mistakes. Jaikoz can export/import your metadata to/from a spreadsheet, and can rename filenames and folders from your metadata in your chosen format.
Jaikoz provides access to many more fields than just the popular ones like artist and album, in fact you can modify ninety fields such Official Artist Web Page or ISRC code and Play Counter. Jaikoz also provides a split screen view letting you view the original file(s) and the changes you have made at the same time. Jaikoz transparently supports tagging of Mp4, M4a, M4p, Flac, Ogg Vorbis files and Mp3 files with ID3v1,ID3v2,ID3v2.2,ID3v2.3 and ID3v2.4 tags, and allows easy conversion between them.
Jaikoz is a tag editor not a music player and it has been designed to be fully compatible with popular media players. If you are an iTunes user you can configure Jaikoz to update your iTunes library from within Jaikoz. Not all media players interpret metadata in the same way so there are options to enable maximum compatibility with Windows Media Player and Media Monkey as well.
Jaikoz is available with the same features for Mac OS X, Windows and Linux.
-
Acoustic matching using MusicBrainz and Acoustid to match tracks based on the actual music.
-
MetaData matching using MusicBrainz to match tracks from the metadata in your songs.
-
MetaData matching using Discogs to match tracks from the metadata in your songs.
-
Automatically download front cover album art from the Internet into your songs.
-
Automatically extract embedded artwork into cover.jpg files.
-
Automatically updates iTunes database from Jaikoz.
-
Powerful Find and Replace to quickly edit your data.
-
Identifies duplicate files based on the Acoustic Id or the MusicBrainz Id.
-
Rename your files and folders based on your tag Metadata.
-
Intelligent File Name to Tagger can extract information from the filename into the tag without having to know the format of the field.
-
Intelligent Auto Match compares different Songs and finds field matches and then allows all similar fields to be formatted the same.
-
Intelligent Auto Format provides automatic capitalization, conversion of special words and removal of invalid and punctuation characters.
-
Designed to allow tagging of large number of songs.
-
The innovative spreadsheet view allows easy editing of all fields.
-
Provides full support of all text fields and partial support of all other fields.
-
Automatically keeps v1 and v2 tags synchronised.
-
Split screen view allows you to view the data before and after modifications at same time,view are automatically synchronised with each other.
-
Full Unicode support allow any character from any language to be used.
-
Easy conversion of tags between version.
-
Displays what is actually contained in the tag allowing the user full control.
Jaikoz is available in two version , Standard and Pro. The Pro version provides some extra features for power users not available to in the standard edition.
-
No limit on how many Discogs queries can be made in 24 hours (Limited to 5000 queries per 24 hours in Standard).
-
Can setup a local MusicBrainz Search Server with no throttling to slow down how often queries can be sent (Limited to 1 query per second in Standard).
Table of Contents
This section explains platform requirements and installation procedures. It also provides instructions on how to obtain and apply a Jaikoz license, how to perform upgrades and uninstall Jaikoz if required.
The Minimum run-time requirements are a computer with 512MB of RAM and 10MB free disk space
-
Download the jaikoz-windows.zip file from the Website
-
Unzip the zip file and run setup.exe
-
Installer provides installation in English and some other common languages

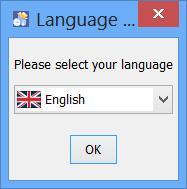
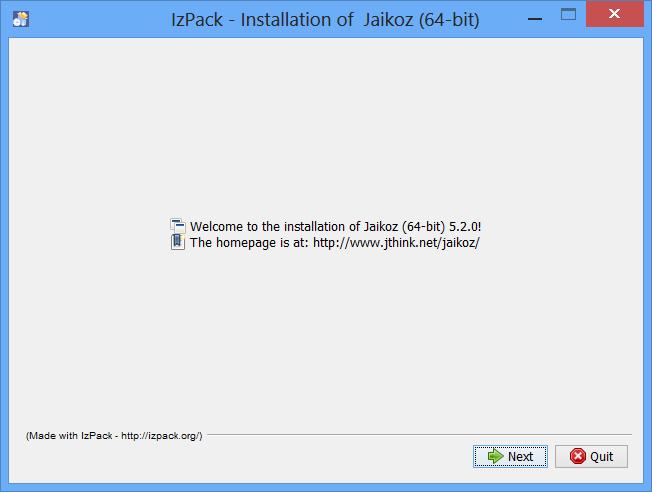
-
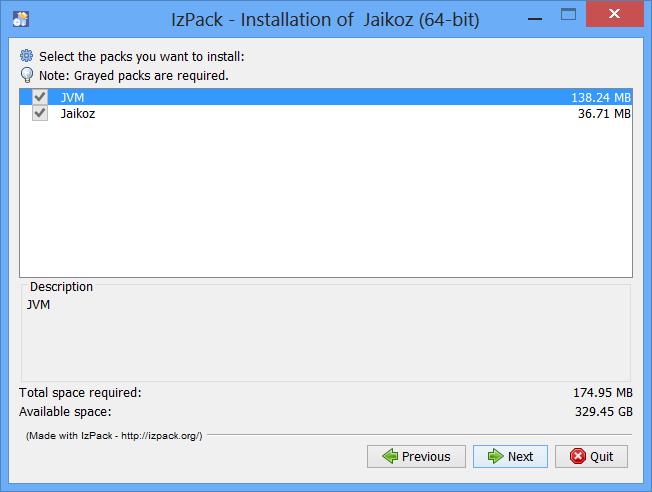
You will then see this information page
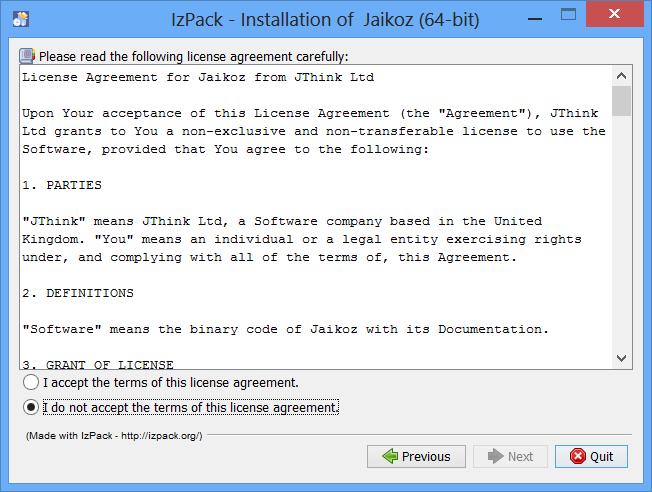
-
Please accept the license in order to continue installation
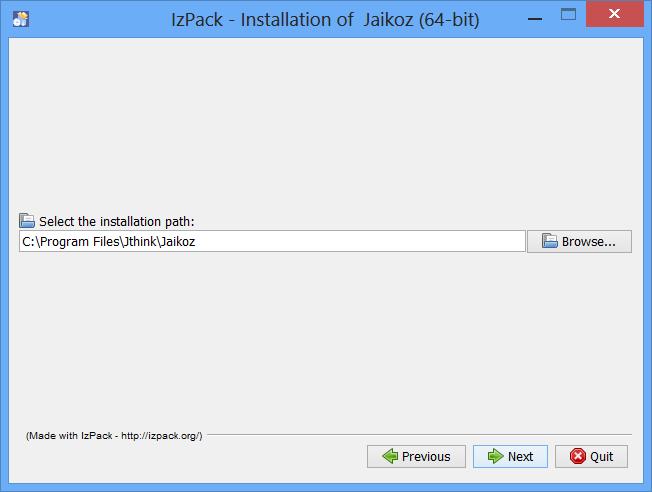
-
Select where you would like to install Jaikoz or accept the default.
-
Check the details and select to 'next' to start installation.
-
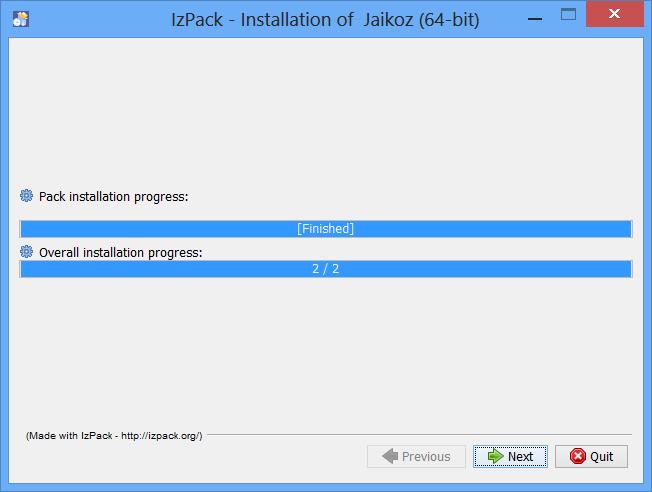
Files have now been installed
-
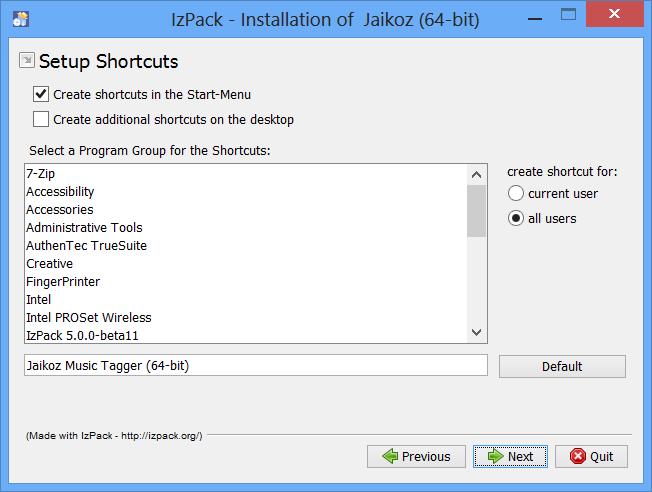
You can now elect to install shortcuts
-
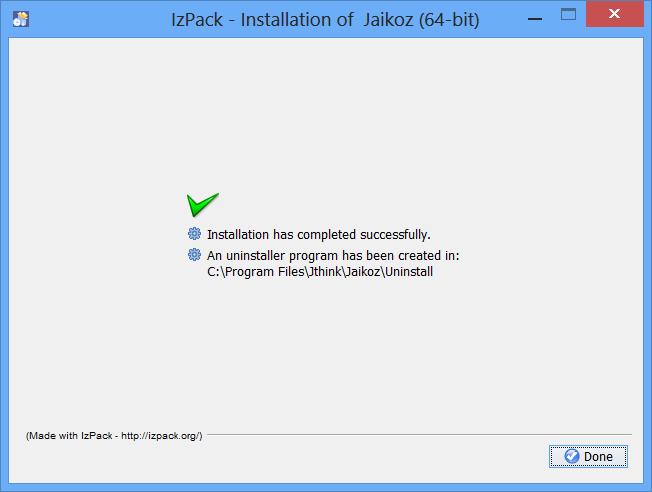
Installation has now completed, there is a delay of about 40 seconds whilst it builds an uninstaller.
You can start Jaikoz using the shortcut that should have been created in your Start Menu Jaikoz.exe. Alternatively you can start Jaikoz using the batch file jaikoz.bat
If everything is OK there will be a short delay whilst Jaikoz initialises and then it should start.
Select Path to Open a File Dialog and find the license file that you should have received by email (license.jai) and select Open. Then select OK to verify the license.
If the license is verified Jaikoz will start
Run Uninstall Jaikoz from your Start menu If you wish to completely remove the application folder and any work saved in it, you will have to delete this folder manually.
With Jaikoz 64bit it will use a maximum of 75% of your system memory, Jaikoz 32bit will use 800mb regardless of how much physical memory your machine has.
The setting for 64bit Java should be fine but you may want to increase the value set for Jaikoz 32bit. If you are attempting to load many songs (more than 10,000) you may get a warning that memory is low, also note that if you are using Jaikoz 32bit the maximum value you can set the memory to is about 2GB, there is no such limit if using Jaikoz 64bit.
In the same folder as Jaikoz64.exe is a Jaikoz64.ini file
Within Jaikoz64.ini edit the value of vm.heapsize.max.percent=75 to specify the maximum percentage heap size in megabytes.
In the same folder as Jaikoz.exe is a Jaikoz.ini file
Within Jaikoz.ini edit the value of vm.heapsize.preferred to specify the actual maximum heap size in megabytes.
You can confirm you have made the change correctly when you start Jaikoz. Click on the Console tab at the bottom and the first line should say how much memory Jaikoz has been allocated. If you cannot see the console you may have hidden the Detail Pane, make sure it is checked in View/Show View Pane.
Jaikoz uses two log files, jaikozuser0-0.log contains the same information as is written to the Console Panel, it contains general information about what you've done within Jaikoz. The jaikozdebug0-0.log file contains warnings and debugging information that helps diagnose problems when running Jaikoz. These files are held in the Jaikoz folder in your home directory, for example C:\Documents and Settings\paul\Jaikoz\Logs and are renamed when they get to a certain size, the latest file is always called jaikozuser0-0.log, the next most recent is called jaikozuser0-1.log. if you require support with Jaikoz it is important to send both types of log files, to help diagnose the problem. The amount of logging written to the jaikozdebug0-0.log file can be adjusted, if you have a problem that you can reproduce it would be helpful if you could increase the amount of information logged, recreate the problem, send the logs and then return the logging to the normal levels.
You can send your logs and other support files from within Jaikoz by selecting Advanced/Create Support Files and then emailing the zip file created.
The following parameters effect logging
-l2 -m2
The -l2 parameter specifies how much logging output should be generated by Jaikoz, the -m2 parameter specifies how much output should be generated when reading and writing files. The number 2 can be replaced by any value from 1 to 7, a value of 1 is the minimum and a value of 7 is the maximum. Setting a high value will noticeably slow the performance of Jaikoz, so changes should only be made temporarily to diagnose a problem.
Usually Jaikoz is run using Jaikoz.exe, but you can also run it using Jaikoz.bat. If you hide extensions within File Explorer both files will be listed as Jaikoz, but Jaikoz.exe will have a Insect icon and have type of Application and Jaikoz.bat will have a DOS icon and a type of MS-DOS Batch File. Logging is adjusted differently depending on which file you use.
In the same folder as Jaikoz.exe is a Jaikoz.ini file
Within Jaikoz.ini edit the value of arg.1 from -l1 to -l7, the default is -l2.
Within Jaikoz.ini edit the value of arg.2 from -m1 to -m7, the default is -l2.
Table of Contents
Select the File/Open Folder to select files to load in Jaikoz, by default sub folders will also be loaded, your songs will start to load into Jaikoz.
Select the Auto correct button , this runs a series of auto corrections and lookups to correct your songs metadata.
Once it has completed you can check the results and make any manual changes by editing the data directly
When you are happy with the result select the Save Changes Button to save your songs.
In the example above the tasks were performed on all songs, but you can also select rows in the row header, and using the pop-up menu run any task on only the selected rows
This section explains the Main Jaikoz Window, and the visible components of Jaikoz.
![]()
This section explains the terminology used within Jaikoz and the main components of Jaikoz
-
MP3 is a audio format, which compresses music files to a small size making them suitable for storing on a computer.
-
Ogg is an open source media container format for storing audio and video. Jaikoz currently only supports use of Ogg with Vorbis Audio.
-
OggVorbis is an open source audio format, similar to MP3 but newer and of a higher quality, it uses the ogg container format to store Vorbis Audio
-
Flac is an open source lossless audio format, that preserves the original recording exactly.
-
MP4 is a audio/video container format for storing audio and video. Jaikoz only supports use of Mp4 with Audio files
-
M4P is a protected version of MP4, Jaikoz can edit the Metadata within an M4p audio file without affecting the protection.
-
Metadata is the term for any information about a music file other then the music file itself.
-
ID3v1 is the original format which is very basic but supports many applications . It comes in two flavours ID3v1.0 and ID3v1.1.
-
ID3v2 is a newer more advanced format which allows over 100 different types of information to be stored. It comes in three versions ID3v2.2,ID3v2.3 and ID3v2.4. ID3v2 is not supported by all applications and some applications only support a particular version.
-
Vorbis Comment is the tag format for use with OggVorbis and Flac files.
-
Unicode is a way of specifying characters, it supports almost every language in the world.
-
Pop-up Window is a new window to the main application window
-
By default Jaikoz shows an Edit Panel and a Detail Panel but you can also show a View Panel by selecting the View/Show View Panel Menu Item. Then the screen is split horizontally between the View and Edit Panels, you can adjust the proportion of the screen taken up by each Panel by adjusting the divider up and down. The Panels contain tabs
-
You can view the contents of a tab using the vertical and horizontal scroll bars
-
Each tab consists of a table which holds audio information.
-
Fields store the data within a column and refers to particular information such as Artist or Album
-
Values are what are stored by a field such as the 'Artist' field may contain the value 'The MisVitals'. Some fields can have multiple values for example the Genre field may contain two values such as 'Rock' and 'Pop'
-
Attributes make up parts of the value. Most values have only one attribute, but some values have multiple attributes, for example an attached picture has the image itself, an image name and an image type
The Toolbar provides access to most useful and commonly used commands. The Toolbar can be displayed or hidden from the View Menu and most tasks can be added to the toolbar via the Preferences menu. Usually if you click on a task in the toolbar and you have some rows selected then the task will only be performed on those rows, but if you hold down the Alt/Option key when clicking it will be performed on all rows. Tasks that are field based such as Copy, Paste and Set Value are always performed on the fields selected in the Edit panel.
![]()

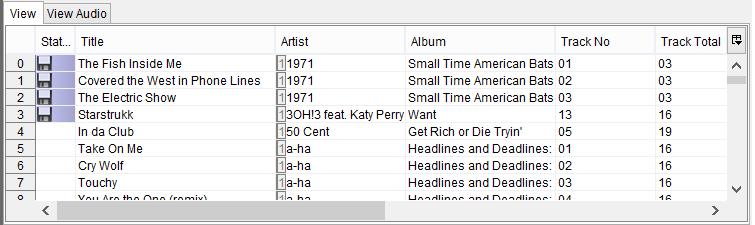
The Tag Browser makes it very easy to quickly filter your loaded songs to a more manageable size. The Genre list, groups together all the genres contained in your tracks, if you select a particular Genre only tracks containing that Genre will be displayed. The Artist and Album lists will be updated with only the Artist and Albums for tracks containing that genre, you can select an Artist or Album to further refine your choice, alternatively you can select all genres but limit by an Artist or Album. Note the lists are not case sensitive, and ignore therefore capitalization. The Tag Browser can be displayed or hidden from the View Menu. The Tag Browser makes it easy to work on subsets of your loaded songs at a time.
![]()

The View Panel can be displayed or hidden, it displays tagging information as it currently exists in the saved file
-
The View Audio Tab contains audio information about the music file, this information cannot be modified
-
The View Tab shows the Metadata for the loaded songs, it is independent of any specific audio format.
-
For MP3s the View ID3V1 Tab contains the contents of the ID3v1 tag
-
For MP3s the View ID3V2 Tab contains the contents of the ID3v2 tag, if a file contains more than one ID3v2 tag the latest one will be displayed
-
For MP3s the View Merged ID3 Tab merges the ID3v1 and ID3v2 tags. If a V2 field exists (and is not empty) it is displayed, if it is empty or does not exist and there is an equivalent v1 tag this value will be displayed. If it not contain either fields it will be shown as missing. This tab shows more fields than the View Tab, and maps fields directly to the underlying MP3 format.
![]()
The Edit Panel is always displayed, it contains the Edit Tab and the Edit ID3 Tab
The Edit Tab starts with the same information as the View Tab showing most of a files metadata in an audio format independent way, but it is here you can edit the tag information. The fields are designed so that they can be edited inline wherever possible in an easy to understand format, the fields are similar to those within iTunes, but with additional information from MusicBrainz displayed. For example there are separate fields for all the MusicBrainz fields whereas within ID3 many of these are stored within the User Defined Text field. Usually you can edit a field by click on the field and start typing, some fields provide a combo box with a list of options. If the field is a multi value field it is the first field that is displayed in the table, to edit additional values click on the small numbered button to provide access to the additional values. The Edit Panel can show up to eighty different fields but by default only the more commonly used ones are shown, you can show more columns for just the Edit Panel using the column control in the right hand-side corner of the Edit Panel. If you also want the same columns to be displayed in the View Panel you should use the 'Settings/Table Settings' Menu Item.
For MP3s the Edit ID3 Tab can also be used to modify fields, this tab maps more directly to how fields are actually stored in the file, it also gives access to additional fields that are not yet in the Edit Tab
![]()

-
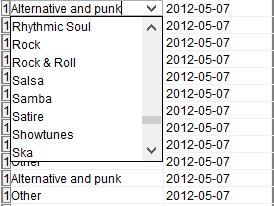
Selectable Combo is a drop down list where you can select a value
-
Editable Combo is a drop down list where you can select a value or enter a value not in the list
-
Multi Field Count Fields which support multi value fields have a row count specifying how may values a field contains, clicking on the multi-field count will show up a PopupWindow showing all the values held in a field.
![]()
The Detail Panel shows details of the currently selected file in a series of tabs (with the exception of the Console tab). As you select different files the detail tab gets updated automatically, (with the exception of the Read Only Summary Tab) you can edit values in the Detail tab and the changes will take effect immediately in the Edit Panel and vice versa. This provides a powerful alternative to the Edit Panel for making modifications and enables quick access to fields that may not be displayed in the Edit panel by default or without scrolling. The tabs are similar to the tabs from the Get Info option within iTunes, but with additional information from MusicBrainz displayed. You can use the Up and Down arrows to change the selected record, selection is based on the record selected in the Edit Panel, selections within the View Panel have no effect.
This displays a summary of the file including audio information such as the length of the track and the size of the file. If the file contains artwork you can view it full size by double clicking on the image itself.
![]()

This shows the most common editable fields such as Artist,Album and Genre, all these fields are likely to be understood and used by most music players and organisers. The Is Compilation option is not standard but is becoming a de facto standard and is likely to be better supported by other applications in the future.
![]()

This shows all the MusicBrainz Ids that can be used to lookup information from MusicBrainz, plus it shows other fields that have been populated by the MusicBrainz lookup, that do not fit into a standard ID3 field.
![]()

This shows the most common fields together with their corresponding sort field. Sort fields are useful because they can be used to sort songs in a more useful way than using the main field. For example sort fields can be used to sort individual artists by their surname, or can disregard 'The' in group names. Some of the Sort fields are only supported by iTunes and are unlikely to be recognised by other Music Players.
![]()

This shows relationships with websites such as Discogs and Wikipedia for the release or artist.
![]()


This shows the artwork associated with the file. You can add additional artwork and delete existing Artwork.
![]()

The Console tab summarizes tasks you have done, plus any problems encountered. Everything written to the Console Panel, also gets written to the User Log, and everything will always be written to the User Log even if the Console Panel is not displayed.
![]()

The user log is stored in your installation folder, the latest log is called jaikozuser-0-0.log, as it get larger it will be renamed jaikozuser0-1.log, and an empty jaikozuser0-0.log will be created. There is also a jaikozdebug-0-0.log that contains additional information useful to us if you have a support query with Jaikoz.
The Status Bar at the bottom of the screen shows how many songs are loaded, how many songs are actually visible due to filters and are any filters active.
The Delay field shows how much time is spent waiting between sending queries to MusicBrainz because of rate limiting applied by MusicBrainz. MusicBrainz is used by many websites to prevent the website being overloaded with requests but it does mean that results are slower than they would be if no rate limiting was imposed. . The delay can be eliminated completely by using a local MusicBrainz server and a Jaikoz Pro license, meaning matching will complete more quicly.
The last field shows memory usage. When Jaikoz is started the maximum memory it can ever use is specified, this is the second value and Jaikoz can never use more memory than this regardless of how much memory your computer actually has whereas the first value is how much of that memory Jaikoz is actually using. Note that Jaikoz uses a garbage collector to release memory that is no longer required and this is called periodically, if Jaikoz is nowhere near max memory usage it tries to recover memory less often than it could, and so the current memory usage may be higher than Jaikoz is actually using.
![]()

Jaikoz has been designed to allow you to do your editing as quickly and easily as possible. Is it particularly good if you have a large music collection, if you have ever used another tagger then you will find time spent using Jaikoz well spent.
-
Pop Windows have been limited. Pop-up Windows are slow and cumbersome,Jaikoz allows you to edit 99% of the time directly within the Edit panel, pop ups are only used for editing multiple values for a field.
-
Generous type checking. Jaikoz does not impose unnecessary restrictions on your editing
-
Intelligent Auto Fixing if you enter an invalid value Jaikoz tries to convert the value to an allowable value, if it cannot the value is left unchanged. This is much more user friendly then bringing up pop-up window errors
-
Keyboard and Mouse traversal are provided with many short cut keys available to perform common tasks.
When editing data within Jaikoz either using the autocorrecters or manually, all changes are made in memory. Nothing is saved until you elect to save your changes.
If you use iTunes and have Automatically update iTunes library enabled Jaikoz will update the tracks in your iTunes library
Save Changes will save the files that you have modified and delete any files that you have marked for deletion. You can run it from the Main Menu in which case it will apply the changes to all files visible in the Edit Tab. Or from the Pop-up Menu so that it only is done for selected files, or as a task within the Autocorrecter so that it is applied to all files processed by the Auto Correcter
Force Save will re-save files even if you have not modified any fields. This can be useful if you wish to re-save a file because you want to modify the way it is saved. For example you may wish to save a file with unsynchronization either enabled or disabled. You can run it from the Main Menu in which case it will apply the changes to all files visible in the Edit Tab, or from the Pop-up Menu so that it only is done for selected files.
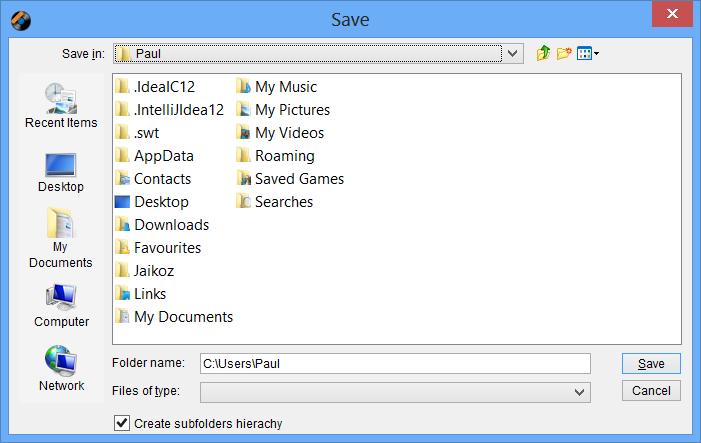
Save and Move saves any changes and then moves the files to the specified folder, this is an easy way to move a set of processed files to another folder. By default it will create the sub folder hierarchy underneath the selected folder using the values in the sub folder fields for the selected files, but you can move the files without creating the sub folder hierarchy by unchecking the Create sub folders hierarchy option.
![]()
Save and Copy saves any changes and then copies the files to the specified folder, this is an easy way to make a copy of processed files to another folder. By default it will create the sub folder hierarchy underneath the selected folder using the values in the sub folder fields for the selected files, but you can move the files without creating the sub folder hierarchy by unchecking the Create sub folders hierarchy option.
![]()
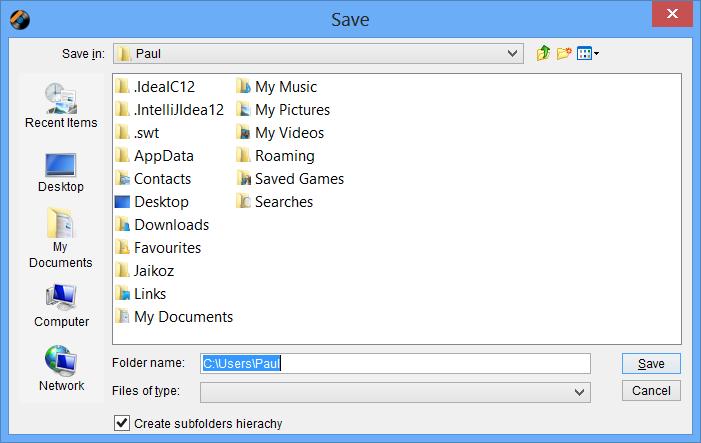
Table of Contents
- 1. Colour Coding
- 2. Table Columns
- 3. Synchronisation
- 4. Highlighting
- 5. Filtering
- 6. Find and Replace
- 7. Reports
- 8. View Artwork Full size
- 9. Links with other Applications
-
- 9.1. View this Song at MusicBrainz
- 9.2. View this Artist at MusicBrainz
- 9.3. View this Album at MusicBrainz
- 9.4. View this Album Group at MusicBrainz
- 9.5. View this Acoustid at Acoustid
- 9.6. View this Original Album at MusicBrainz
- 9.7. View this Song at Amazon
- 9.8. View this Album at Discogs
- 9.9. View this Album at Wikipedia
- 9.10. View this Artist at Discogs
- 9.11. View this Artist at Wikipedia
- 9.12. View this Song in AcousticBrainz
- 9.13. Play Song
- 9.14. Copy Paste with other Applications
This chapter explains some of the features of Jaikoz, to make it easier to manage your files
Colour coding is used extensively in Jaikoz to provide you with extra information without using up extra screen space.
Table 4.1. Colour Coding
| Name | Default Colour | Description |
|---|---|---|
| Edited | Purple | Whenever a field value is different to the value in the saved file |
| Missing | Green | When a field does not actually exist in the file |
| Whitespace | Pink | Shows whitespace at the start or end of a field value |
| Deleted | Delete | When a field has been deleted from the file |
| Highlight | Orange | When a field matches a Highlighter |
| Find | Yellow | The field has been matched by find |
If you click on a column you can sort it in ascending order, click on it again and it will be sorted in descending order. if you click on the Row Number column the songs will be sorted by row number this will be the same order as when they were originally loaded into Jaikoz
The size of a column can be set so that it fits exactly wide enough to display the title and all the data within the column by double-clicking on its header boundary with the next column header. It can also be increased or decreased by selecting the right hand side of the column header and dragging it inwards or outwards
The column order can be changed by selecting the middle of the column header and dragging it to the new location
Selecting the column control button in the top right corner of the table, allow you to quickly make changes to the table view.
![]()

Pack All Columns try’s to set the width of all the visible columns so that they are wide enough to display the data within them. If Horizontal Scroll is enabled then the columns can be as wide as required up to a limit of 500 pixels for any single column, if horizontal scroll is disabled then all the visible columns have to fit onscreen. The Pack Selected Column is available if you have selected a field before clicking the column control button, this will pack the selected column so it is just wide enough to display all the field values.
You can scroll down the list to make individual columns visible or invisible
The column control button only effects the table for which it is selected, changes are not synchronized to other tables
Jaikoz automatically synchronises the View Panel and the Edit Panel when both are displayed. For example if you scroll the Edit Panel to the right-hand-side, the currently displayed view tab will also be scrolled to the right-hand-side. This is a very powerful feature but you can disable it if you wish, it is also quite computationally intensive
-
Synchronise row sorting between rows When rows are sorted in one view they will be sorted in all other views
-
Synchronise column sorting and resizing between rows When the column order is changed in one view they will be changed in other V2 views
-
Synchronise horizontal scrolling between rows When scrolling through the columns in one view they will be scrolled in other V2 views
-
Synchronise vertical scrolling between rows When scrolling through the rows in one view they will be scrolled in other views
Highlighting uses Colour Coding as described earlier to make fields standout, there are currently two types of highlighter
If there is any whitespace at the start or the end of the value it will be coloured the Whitespace Colour (default pink). This is very useful for identifying white space at the end of a field,if you have ever wondered why two field that appear to have the same value are not listed together in an Audio Player it is probably because one contains white space or undisplayable characters.
You can temporarily highlight fields that match a particular rule, the matching fields are coloured the Highlight Colour (orange). Currently there are two highlight rules available
When enabled all MusicBrainz Recording Ids fields that are the same as in at least one other song are highlighted.
Filtering only shows rows that match a particular rule, any active filters are shown in the status bar. If you run an autocorrection task it will only be performed on the visible songs. There are currently filters available for the MB Recording Id and Acoustid, only one of each filter type can be enabled at the same time.
When enabled only songs containing a Recording Id field that is the same as at least one other song are displayed. This function is very useful for finding and possibly deleting duplicate versions of the same song. But please note this field was previously described in Jaikoz as the MB Unique Id because the id uniquely identified a track on a particular release, however since MusicBrainz NGS this id now only identifies a unique recording, the same exact recording can be found on multiple different albums, each song would have the same Recording Id but a different Release Id. In fact to accurately identify a particular track on a particular release, the Recording Id, Release Id, Disc no and track no are required.
When enabled only songs containing a Recording Id field are shown. This is useful for listing songs that have been matched to MusicBrainz.
When enabled only songs that do not contain a MusicBrainz Recording Id field are shown. This function is useful for finding tracks that have not been matched to MusicBrainz, that may need matching manually
When enabled only songs containing a Acoustid fingerprint that is the same as at least one other song are displayed, filter status is also shown in the status bar. This function is very useful for finding and possibly deleting duplicate versions of the same song.
When enabled only songs containing an Acoustid are shown. This is useful for listing tracks that have had an Acoustid fingerprint created.
When enabled only songs that do not contain a Acoustid field. This is useful for finding tracks that have not had an Acoustid fingerprint created.
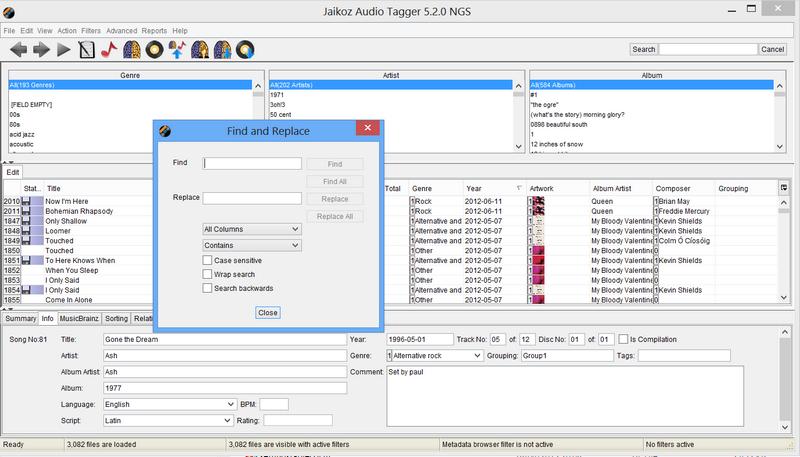
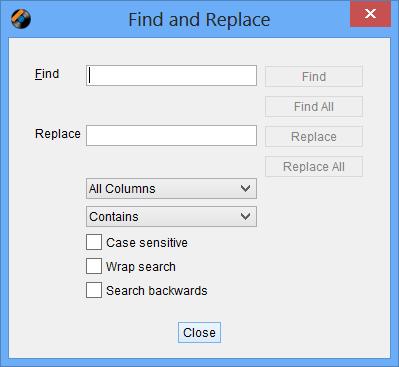
The Find dialog can be displayed for the current view by selecting it from the pop-up menu, or using the shortcut key. From the dialog you can search through the fields in the chosen table searching for fields containing the value you enter. The Search can be forwards/backwards , it can be case sensitive, and it can wrap round once and continue searching from the start of the table once it has got to the end. A match will be highlighted in yellow. You can highlight all matching fields using the Find All button
You can limit the search to only search a particular column by selecting it from the Column drop-down, Find All will now only match fields within that column
By default a field will match if it contains the find value. You can restrict the match to exact matches by changing the drop drown to Equals, or match the start or end of the field by selecting the Starts With or Ends With option.
If you started the Find Dialog for the edit view you it also offers you Replace and Replace All. If you have just done a find then replace will replace the matching value, otherwise replace will search for the next match and replace it with the replace value. Replace All will starting from the first record replace all matching fields
![]()
Reports let you analyse your tracks
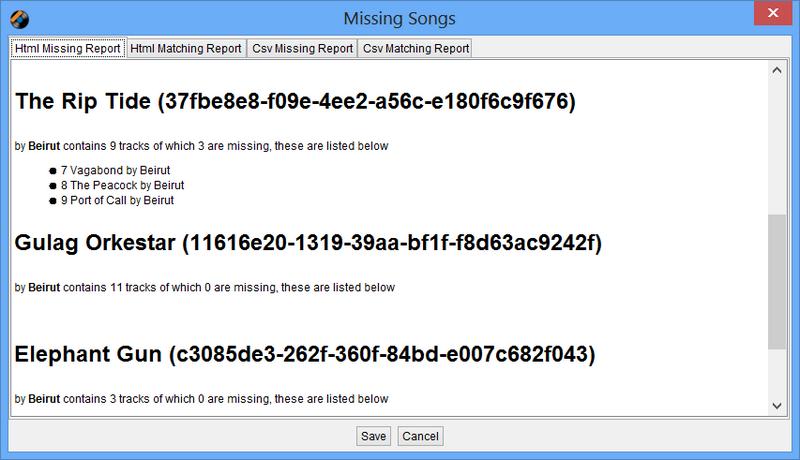
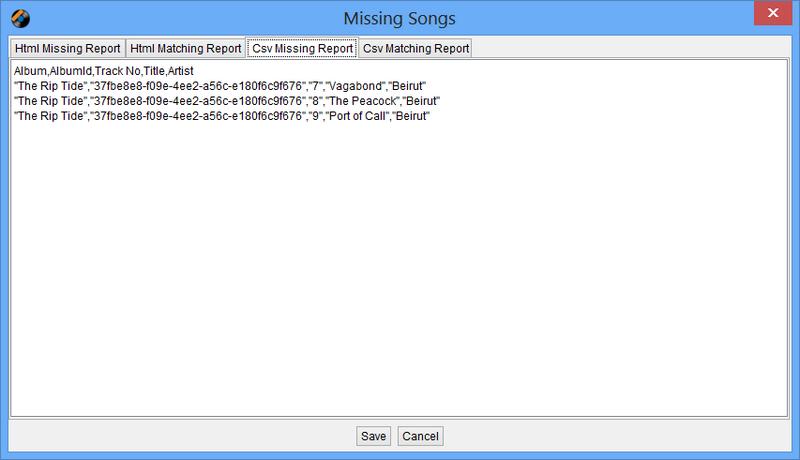
Find Missing tracks generate a list of all the albums in your selected files, and the tracks within each album. It then compares the list to all the tracks you have loaded in Jaikoz to find matching tracks. It then generates a list of all missing tracks and all matching tracks. Within the html report if the album is a Various Artists album then the individual artist name will be listed for every track, if not then it is not displayed because it is assumed the same Artist will be on every track in the album. These lists can be viewed and saved as a html file, or as a csv file, csv files can easily be loaded into spreadsheets.
The matching is done based upon the MusicBrainz Unique Id and the MusicBrainz Album Id because this is the only accurate way to identify albums, and allows us to distinguish between albums of the same name by different artists. This means you should not run this report unless your tracks have been matched by MusicBrainz. The information in the Matching Reports shows the information as stored on the MusicBrainz Server rather than in your files, so for example if you have a track with Unique id of e785f700-c1aa-4943-bcee-87dd316a2c30 and the value of Artist in your file is 'Farming Incident' but in the MusicBrainz Server it is 'The Farming Incident' then 'The Farming Incident' will be displayed, the report is done this way as it is intended to show what you do not have/have in relation to the details on MusicBrainz.
![]()
![]()

![]()
![]()

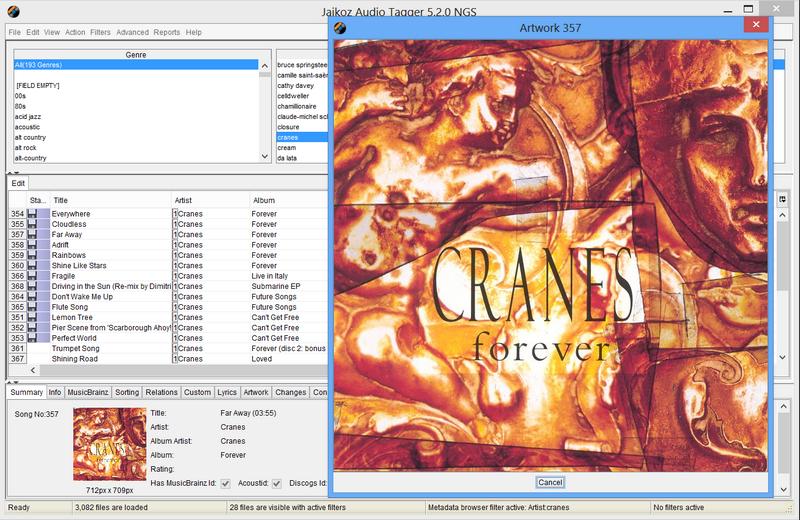
This opens a window with all the artwork of the selected files shown full size, it can be triggered by either selecting the View Artwork Full size from the Pop-up menu, or by double clicking the image shown in the Detail/Summary Tab, you can have multiple windows open at one time, if a song has multiple images each is displayed in a separate window.
![]()
The options allow you to open Web pages linked to your selected songs by one of the identifiers provided by MusicBrainz, Discogs, Amazon and AcoustId.
Open the MusicBrainz page in your web browser for all selected songs that have a MusicBrainz Recording Id
Open the MusicBrainz page in your web browser for all selected songs that have a MusicBrainz Artist Id
Open the MusicBrainz page in your web browser for all selected songs that have a MusicBrainz Release Id
Open the MusicBrainz page in your web browser for all selected songs that have a MusicBrainz Release Id
Open the AcoustId page in your web browser for all selected songs that have an AcoustId
Open the MusicBrainz page in your web browser for all selected songs that have an Original MusicBrainz Release Id
Open the Amazon page in your web browser for all selected songs that have an Amzon (ASIN) Id
Open the Discogs page in your web browser for all selected songs that have a Discogs Release Id
Open the Wikipedia page in your web browser for all selected songs that have a Wikipedia link
Open the Discogs page in your web browser for all selected songs that have a Discogs Artist link
Open the Wikipedia page in your web browser for all selected songs that have a Wikipedia Artist link
Open the AcousticBrainz page in your web browser for all selected songs that have a MusicBrainz Recording Id, not every song in MusicBrainz currewntly has a page in AcousticBrainz but you can use the tools provided by AcousticBrainz to update acoustic data for your own songs
Play Song, plays the song using your default Music Player , or configured Music Player
Table of Contents
Fields can be edited in the Edit Panel and the Detail Panel
Within the Edit and View Panels fields are displayed in a view akin to a spreadsheet. If a field does not exist its background will be coloured the Missing Colour (default green). If it does exist then it then the background will be white. If the field exists but is empty then the whole field will just be white.
Within the Edit Tab Panel you can edit a value by simply clicking on it and entering the new information. After leaving the field it will perform Auto Fixing if necessary, if the value is invalid it will revert back to original value. Once you edit a field its colour will change to Edit Colour (default purple), if you change it back to its original value it will no longer be Edited Colour. Most fields are simple text fields but some provide a Selectable Combo or an Editable Combo providing a list of valid values. Some fields allow multiple values in this case Multi Field Count will display showing the current number of songs, double clicking on this will open a Pop-up Window to allow you to add additional values. Some of these fields have multiple parts that can also be edited here. Deleting a field will change its colour to Deleted Colour (default red)
The first column is the status column, this is also colour coded to indicate that the record has been modified (Edit Colour), if you mark the record to be deleted, it will be set to Deleted Colour.
Displaying the View Panel is useful to allow you to compare modified values with the original values, no changes will actually be made to the file until you select 'Save Changes'
The Detail Panel allows you to edit the currently selected record, it groups together the fields logically in a series of tabs and can be easier to use than the Edit Panel. The Detail Panel does not use colour coding, changes made in the Detail Panel are immediately reflected in the Edit Panel and vice versa.
MP3 Files can also use the ID3 Edit Tab, this is similar to the Edit Tab, but provides access to more ID3 fields, and maps the fields directly to how they are stored within the file. Changes made in the Edit ID3 tab are immediately reflected in the Edit Tab and Detail Panel and vice versa.
Jaikoz supports the full Unicode character set, this means you can enter text in any language you wish. Whether you can do this directly from your keyboard depend on your keyboard settings and your operating system type and settings. If you cannot enter a character directly you can use the Unicode notation using the form /uXXXX,once you have finished editing the field it will display the value as a character. The full Unicode specification can be found here
![]()

After exiting the field Jaikoz will show its displayed value
![]()

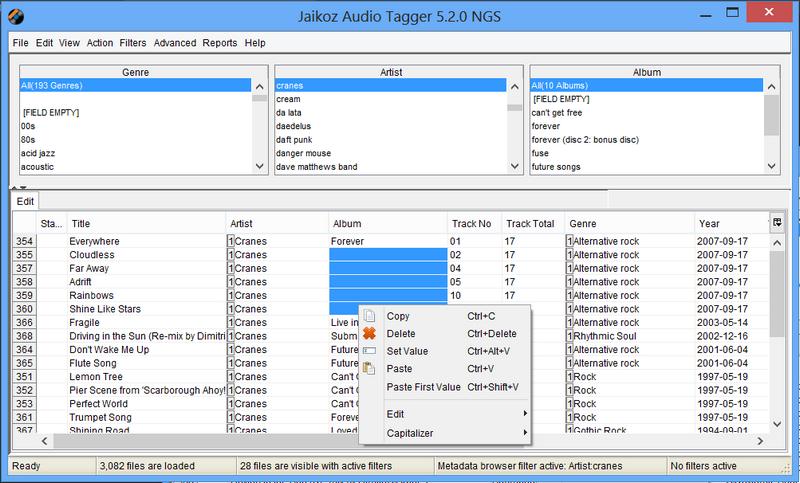
Fields from a single column can be copied from any of the tabs and pasted into one or more fields in the Edit Panel if all the fields to be pasted to accept the copied fields as valid
Select field(s) to copy
![]()

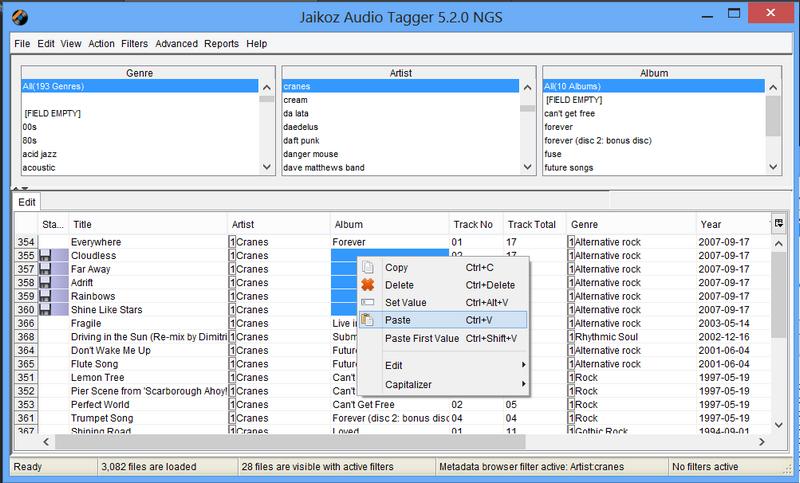
Select fields to paste into
![]()
That’s it!
![]()
You can only select a fields from a single column to be copied at any time, if you select fields from more than one column the copy will not take place.
Select some fields to paste into and select Paste provided all fields accept the copied value the paste will take place. If the field to be copied has multiple values only the first value will be pasted to the paste fields. If the paste area is larger than the copy area, the copied fields will be cycled through again to populate the required paste area. For example you can copy data from the Artist field to the Album field but not to an Attached Picture field because it wouldn't make any sense. In some cases the data is automatically formatted so it is valid for the pasted field, this is known as Auto Fixing. For example if you paste a value from an Artist field to the Filename field for an mp3 file it appends the (MP3) suffix to the filename and checks that you have not already loaded a file with the same filename.
If the field to be pasted contains multiple values selecting this value will paste all values into the selected fields.
Pastes the previously copied values to the start of the currently selected fields in the edit pane, (separated by a space character).
Pastes the previously copied values to the end of the currently selected fields in the edit pane, (separated by a space character).
Field values can be exchanged between fields in two column as follows
If you have selected some fields in two separate columns this swaps the fields in one column with the fields in another
If you have selected some fields in two separate columns, this option will copy the contents of the fields in the right column into the start of the fields in the left column (separated by a space character)
If you have selected some fields in two separate columns, this option will copy the contents of the fields in the left column into the start of the fields in the right column (separated by a space character)
If you have selected some fields in two separate columns, this option will copy the contents of the fields in the right column into the end of the fields in the left column.
If you have selected some fields in two separate columns, this option will copy the contents of the fields in the left column into the end of the fields in the right column.
If you have selected some fields in the track no column, this option renumber the fields starting from the value of the first field (based on the current sort order), or starting from one if the first field has no value. The renumbering is based on the current order of the files, the numbering takes into account your Track No Preferences
You can delete individual fields or the actual file, the deletions do not take place until you have saved changes.
You can delete a field, this is different to setting the field to empty, the field will no longer exist in the song after saving changes
You can delete the whole song. You are most likely to do this if you find you have duplicate files of the same recording.
Revert to Saved will reset the songs to their currently saved value. Any changes you have made but not saved will be lost.
Jaikoz checks any data you have entered to check it is valid, if it is not valid it will try to fix it, if it can not it will revert it back to its original value. This is known as Auto Fixing, at first it may seem confusing that the value displayed in the field after editing is different to the value you entered but it cuts down on annoying warning and error messages that you get with most applications
Table of Contents
- 1. Remote Correct
-
- 1.1. What is MusicBrainz ?
- 1.2. What is Discogs ?
- 1.3. What is Acoustid ?
- 1.4. What is the JThink Music Server ?
- 1.5. How Does Jaikoz Use MusicBrainz and Acoustic Fingerprinting ?
- 1.6. Retrieve Acoustic Ids
- 1.7. Auto correct Metadata from MusicBrainz
- 1.8. Auto correct Metadata from Discogs
- 1.9. Manual Correct Metadata from MusicBrainz
- 1.10. Update Metadata from MusicBrainz
- 1.11. Update Metadata from Discogs
- 1.12. Match Songs to one MusicBrainz Album
- 1.13. Match Songs to Specified MusicBrainz Album...
- 1.14. Match Songs to MusicBrainz Album by Barcode...
- 1.15. Match Songs to MusicBrainz Album by Catno...
- 1.16. Match Songs to one Discogs Album
- 1.17. Match Songs to Specified Discogs Album...
- 1.18. Match Songs to Discogs Album by Barcode...
- 1.19. Match Songs to Discogs Album by Catno...
- 1.20. MusicBrainz Server
-
- 1.20.1. MusicBrainzServerPreferences
- 1.20.2. Submit MusicBrainz/Acoustid Pair
- 1.20.3. Submit MusicBrainz Genres
- 1.20.4. Submit MusicBrainz Barcodes
- 1.20.5. Submit MusicBrainz Ratings
- 1.20.6. Submit New Release
- 1.20.7. Add to your MusicBrainz Collection
- 1.20.8. Remove from your MusicBrainz Collection
- 2. Local Correct
-
- 2.1. Correct Artwork
- 2.2. Delete Duplicates
- 2.3. Correct Track Nos
- 2.4. Cross Referencing Correct - Correct Artists/Albums/Titles/Genres/Recording Times/Composers
- 3. File and Folder Correct
- 4. Delete Duplicates
- 5. Auto Correcter
Auto Correction allows your song information to be corrected without you manually entering the information, this is a much quicker and more accurate way of sorting out your music. Jaikoz can perform Local Correct this does not require internet access, and is very quick but can only work with the metadata that you already have in your files. Much more powerful are Auto correct from MusicBrainz and Auto correct from Discogs, these use online databases to do comprehensive matches, this is much more accurate but takes longer. File and Folder Correct is another form of Local Correct that modifies your folder and file names, rather than just your metadata. The Autocorrecter allows you to batch up a number of these tasks into a single task. Usually you would use all these methods to clean up your Music Library
Remote correct groups tasks together that require Internet access in order to run
MusicBrainz is an online database of information on more than ten million songs. This is a community based database so anybody can view, add or edit information in the database, but it there is a system of moderation to ensure only correct information persists. The information is of an extremely high quality and of exceptional detail. MusicBrainz is the primary source of information Jaikoz uses to match your songs, matching against MusicBrainz means Jaikoz can fix the metadata in your songs but it also means your songs can then be used in many other MusicBrainz based applications. For example you can also upload your song collection from Jaikoz to MusicBrainz and share the details with other MusicBrainz users.
Discogs is another online database of information similar to MusicBrainz, Discogs also allows you to buy and sell records and CD's to other Discogs users. We use MusicBrainz and Discogs to get the best possible coverage of your song library.
Acoustid listens to a song, and create an audio fingerprint of the song based on the actual music. The idea is that different songs always have different fingerprints , but the same song encoded in different formats (such as mp4 or mp3) or in a slightly different way will have the same fingerprint. Acoustid then provides a database that matches acoustid to recordings in the MusicBrainz Database. We can use this database to match your songs and it is really useful if your songs have no metadata, because it allows Jaikoz to still find a match if the fingerprint is in the Acoustid database. Jaikoz uses Acoustid as its main database for audio fingerprinting.
The JThink Music Server is a dedicated server containing both the MusicBrainz and Discogs data in a single database optimized to give the best results, quickly. It is regularly updated witht he lates data from MusicBrainz and Discogs. Because the JThink Music Server is only used by Jaikoz and SongKong it is designed to return exactly the information required and no more making it about ten times faster than the standard MusicBrainz and Discogs servers.
Jaikoz allows to lookup your songs by both the acoustic id and the metadata making it very accurate. Jaikoz automatic matching is release based (it try’s to match groups of your songs to MusicBrainz Releases) and if you have good metadata acoustic fingerprinting may not be needed, but for songs that cannot be matched using release matching acoustic fingerprinting is very useful. Of course both metadata and acoustic matching of many songs can take some time so Jaikoz is designed to run without intervention, only when it has completed are you required to check the results and save changes if you are happy with them. Checking results is important because there are so many potential scenarios involved in music matching, and so many recorded songs that Jaikoz cannot guarantee 100% match, but most users report a success rate of 95%.
This generates a Acoustid fingerprint for your songs, this is all done locally without the need to contact Acoustid and can therefore be done quite quickly, the fingerprints are stored in the Acoustid Fingerprint field for later use in the matching phase, generating a fingerprint for a song only has to be done once and because the Acoustid for a particular file will never change, the Acoustic Id is automatically saved to file as it is created.
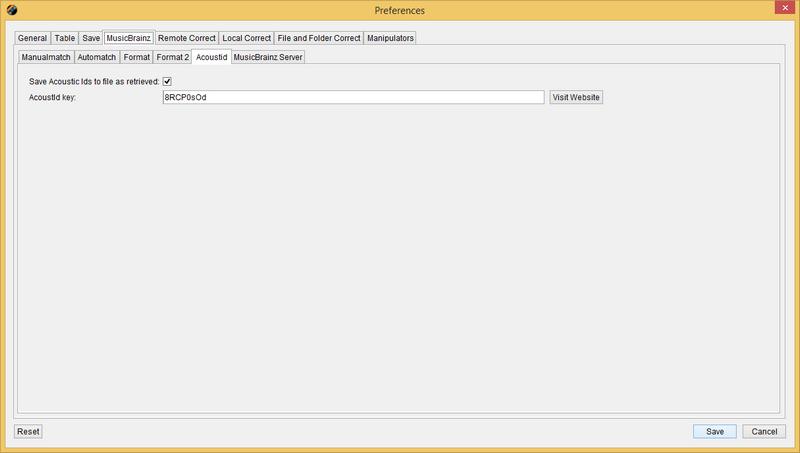
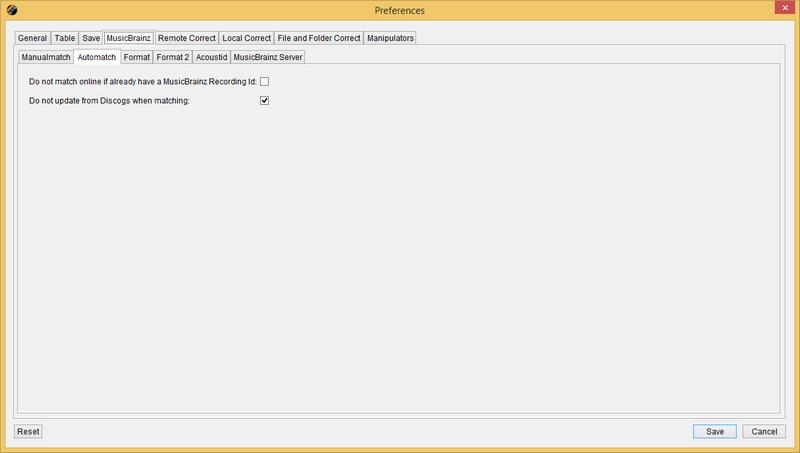
You can change the following options the Preferences/MusicBrainz/Acoustid window.
The Save Acoustic Ids to file as retrieved save the acoustic id to the file as it is retrieved. This protects you from losing your work against a system crash, because acoustic ids are always correct, no verification is required by the user
Once you have matched your songs to MusicBrainz you can submit your fingerprint/MusicBrainz Id pairings to Acoustid to help build the database. But to do this you need to get a (completely free) Acoustid key, enter that into the Acoustid keyfield
![]()
This attempts to find a match in the MusicBrainz Database, using metadata such as artist, album and title, track duration and track number and/or the Acoustic Id. Jaikoz groups your songs by album if they have album field specified and/or by folder and first of all try to find a matching release on MusicBrainz for all the songs in the grouping, a sophisticated algorithm analyses potential matches and selects the one that matches all songs the best and is most similar to your preferences including preferred country and media format. If no suitable match is found Jaikoz then does song by song matching based on the metadata, and then for remaining songs it matches based on acoustic ids. Jaikoz will complete as many fields as it can from MusicBrainz if they are enabled in your Auto Format options.
Because different customers use Jaikoz in different ways there are a number of preferences you can change
The Do not match online if already have a MusicBrainz Recording id option allows you to skip over songs that have already had a Recording id, this option is enabled by default.
If the matching MusicBrainz song has a match to a Discogs Release Jaikoz can use Discogs to retrieve additional information for the song, if you do not wish to do this then check Do not update from Discogs when matching
![]()
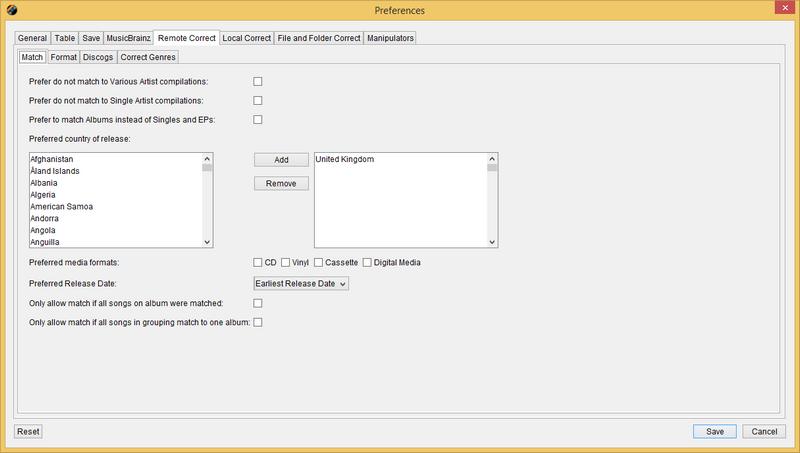
These preferences apply to both matching from MusicBrainz and matching from Discogs
The Prefer do not match to Various Artist Compilations and Prefer do not match to Single Artist Compilations options will give preference to matching a song on an original release such as original album or single, and will only match to a compilation album as a last resort.
The selected Preferred Country of release will give song linked to a releases in this country an improved score.
The selected Preferred Media Formats will give songs with releases of this type an improved score.
If Preferred Release Date is set to Earliest Release Date this will boost scores of releases with the earlier release dates, you can also specify Latest Release Date and No Preference
The Only match if all songs on album were matched option is useful if you have a collection that already had good metadata and you want to ensure that only really good matches based on your groupings are made but it does also mean if you have any partial albums they will not be matched to a MusicBrainz or Discogs release.If you have only this option enabled it means that any album that is matched must be completely matched but this doesn't have to be on a folder by folder basis, so for example if you have a folder containing 10 songs that failed to match any album but existing metadata in the songs creates two groupings of 5 each, then one of those grouping could be matched to a 5 track release that would be okay.If this option is enabled individual song by song matching to the best album does not take place.
You can get safer matching if Only allow match if all songs in grouping match to one album is enabled. If your songs are already organized one folder per album then songs in the folder will only be matched to a release if all songs in that folder can be matched to the same release. Usually Jaikoz is clever enough to recognise when you have a multi disc release and have created separate folders per disc as well, in this case it will only allow a match if songs in each subfolder are matched to a disc of the same release.Usually this option should be enabled because although it prevents album folders being broken up but allowances are made if Jaikoz identifies you have some have folders containing a random assortment of files, and it also identifies when you have duplicate file sin the same folder. If you disable this option then if Jaikoz fails to match the folder to an album it will then try and group the songs in the folder into smaller groupings based on their existing metadata, if this fails and matching to Discogs fails as well it then does individual song by song matching and will match each song to the best album it can find with the limited information available.
If both Only match if all songs on album were matched and Only allow match if all songs in grouping match to one album are enabled then all the songs in a grouping must match to same album and all songs on the album must be matched, so if there are 10 songs in a folder it can only match a 10 song album. If your music collection is already well organized and you have complete albums this ensures that only very high quality matches will be made to MusicBrainz and Discogs but it does also mean if you have any partial albums they will not be matched to a MusicBrainz or Discogs release.
If neither options are enabled then Jaikoz willl eventually match each song individually so if the song can be identified it will be matched. This works very well if you have a very messed up collection and just want to identify each song, it also works if you use your songs as a jukebox and are not interested in the album that the song belongs to.
![]()
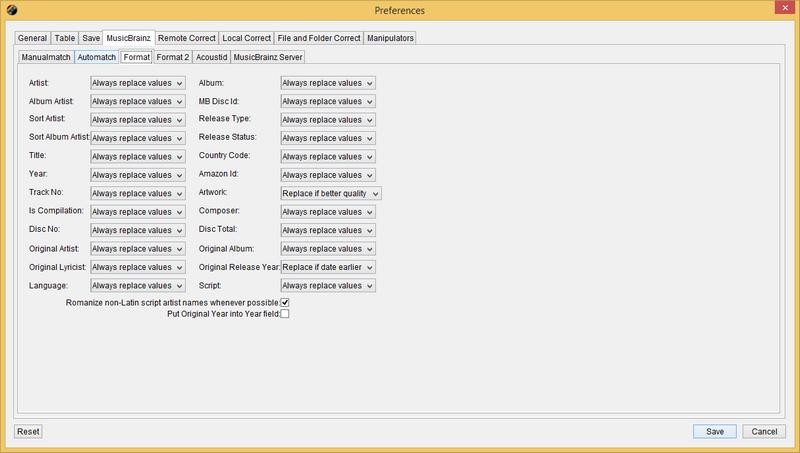
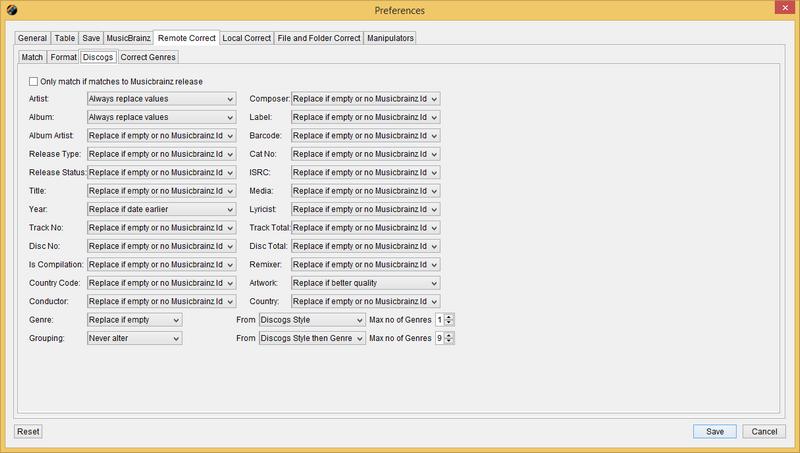
This lists most of the values that can possibly be updated by MusicBrainz upon a successful match, this includes text fields and Artwork. By default all fields are populated on a MusicBrainz match if MusicBrainz has a value, but you can select to only Replace if empty or Never Alter the field.
When matching cover art Jaikoz will attempt to finest the highest quality image it can from a variety of sources, the image is added to the audio file automatically but like all tasks the image will not be saved until you save changes.
The Romanize non-Latin script artist names whenever possible uses the Latin versions of non-latin names where possible. If the artist names is in a non-Latin script such as Chinese, Japanese or Cyrillic its Latin equivalent will be used if available. This is very useful for Western speakers who typically only can only pronounce Latin script but may have music from other cultures because then it allows them to pronounce the names of any of the artists in their collection. The Latin name is often stored as an additional alias within the original MusicBrainz database, it maybe a transliteration of the original name or an alternative Latin based name that the artists is known by in the Western world. The JThink Music Server additionally links Discogs artists to the corresponding MusicBrainz artist if it exists so that now you can often get Latin names even when your songs only match a Discogs release and not a MusicBrainz release.
This is the current list of fields that can be auto populated
- Artist
- Album Artist
- Sort Artist
- Sort Album Artist
- Title
- Year
- Track No
- Is Compilation
- Disc No
- Original Artist
- Original Lyricist
- Language
- Album
- MB Disc Id
- Release Type
- Release Status
- Release Country
- Amazon Id
- Artwork
- Composer
- Disc Total
- Original Album
- Original Release Year
- Script
The Put Original Year into Year field can be used when the original album is found so that the original year is stored in the year field. When creating play-lists in some players you may want to create date based play-lists i.e. Songs from the 60's and only some players provide access to the original release year.
![]()
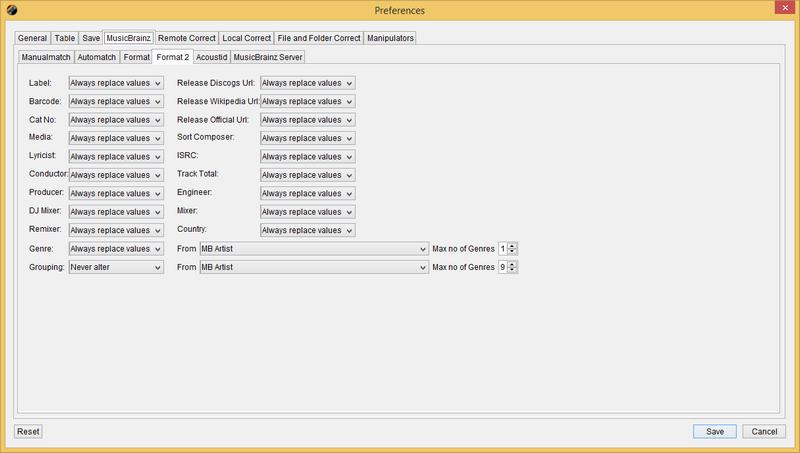
This lists additional values that can possibly be updated by MusicBrainz upon a successful match.
- Label
- Bar code
- Cat No
- Media
- Lyricist
- Conductor
- Producer
- DJ Mixer
- Remixer
- Genre
- Grouping
- Release Discogs Url
- Release Wikipedia Url
- Release Official Url
- Sort Composer
- ISRC
- Track Total
- Engineer
- Mixer
You can specify options for genres, because most players only understand the first genre linked to a song some customers put a list of genres in the grouping field as a single field to make it easier to create multiple genre based play-lists. So with Jaikoz you can also specify whether to write genres to the grouping field as well, independently of the values added to the genre field.
![]()
These preferences apply to both matching from MusicBrainz and matching from Discogs
Add EP and Single release types to release title is useful for distinguishing between a release and a single of the same name, it is common for a release to have the same name as a song on the album and if that song is released as a single there is nothing to differentiate between them.
Sometimes a recording artist may use a different name on some of their releases, this can me it harder to manage your collection. If you enable Use standard Artist name instead of name displayed on cover then the artist name will always be used in your songs metadata.
Sometimes a recording is given another name on a different release, to force a consistent name to be used enable Use standard song title instead of title displayed on cover
The Disc No field is very useful in multiple disc releases, for example to distinguish between the first track on disc 1 and the first track on disc 2. But not all applications provide access to this field so it can be useful to add to the release title by setting this option to Always Add Disc No Information to the release title. Multi-disc releases sometimes give an actual name to each disc and this can be added to the release title by setting the option to Add Disc No to the release title if disc has title.Or you can elect to do nothing special for multi-disc release by setting the option to Never add Disc No information to the release title.
This attempts to find a match in the Discogs Database, using metadata such as artist, album and title, track duration and track number. Jaikoz groups your songs by album if they have album field specified and/or by folder and first of all try to find a matching release on Discogs for all the songs in the grouping, a sophisticated algorithm analyses potential matches and selects the one that matches all songs the best and is most similar to your preferences including preferred country and media format. If no suitable match is found Jaikoz then does song by song matching based on the metadata. Jaikoz will complete as many fields as it can from Discogs if they are enabled in your Auto Format options, by default if the song has already been matched to a MusicBrainz release only empty fields will be modified by Discogs
You are limited to doing 5,000 Discogs queries within a 24 hour period by standard Jaikoz, Jaikoz does search queries to find possible matching releases and then lookups those releases so this limit doesn't necessarily match how many songs Jaikoz matches, but is usually similar. But if you have Jaikoz Pro there is no such limit.
If you are an editor of MusicBrainz you may find the Only match if matches to MusicBrainz release option useful. When this is enabled Auto correct from Discogs will only try to match to Discogs if the song has a MusicBrainz Id, and will only accept the match if the Discogs metadata is a good match with the existing MusicBrainz metadata. This is a very useful way of finding links between MusicBrainz and Discogs that you can then add to the MusicBrainz release as a Discogs Relationship Type.
The Match Settings also apply to Discogs
- Artist
- Album
- Album Artist
- Release Type
- Release Status
- Title
- Year
- Track No
- Disc No
- Is Compilation
- Release Country
- Conductor
- Composer
- Label
- Bar code
- Cat No
- ISRC
- Media
- Lyricist
- Track Total
- Disc Total
- Remixer
- Artwork
Discogs categorises releases by styles and sub categories called genres. With Jaikoz you can complete the genre field using styles and/or genres, and select how many genres you want to link to any one song. Because most players only understand the first genre linked to a song some customers put a list of genres in the grouping field as a single field to make it easier to create multiple genre based play-lists. So with Jaikoz you can also specify whether to write genres to the grouping field as well, independently of the values added to the genre field.
![]()
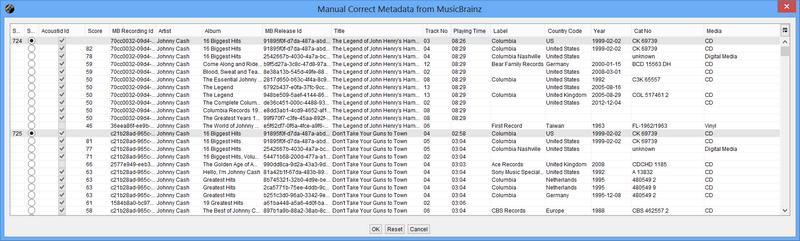
For each (selected) songs this finds up to ten potential matches in the MusicBrainz Database, a similar algorithm is used as for the Auto Correct from MusicBrainz but Manual Correct is song based instead of release based , and instead of automatically selecting the best match, up to ten matches are displayed and it is your decision to select a match or not. Matches by Acoustic Id are shown first, then matches by meta data - sorted by their rating. You can modify what fields are displayed and in what order and these changes are preserved.
If you select the pop-up menu for a song you have some further options:
This looks at the Release Id of the selected song, it then checks all the other potential matches for the other songs and selects any match that has the same Release Id. This is a nice easy way of matching a whole album of songs just by finding the best match for one song.
Displays the selected songs album details in MusicBrainz using your Web Browser
Displays the selected songs details in MusicBrainz using your Web Browser
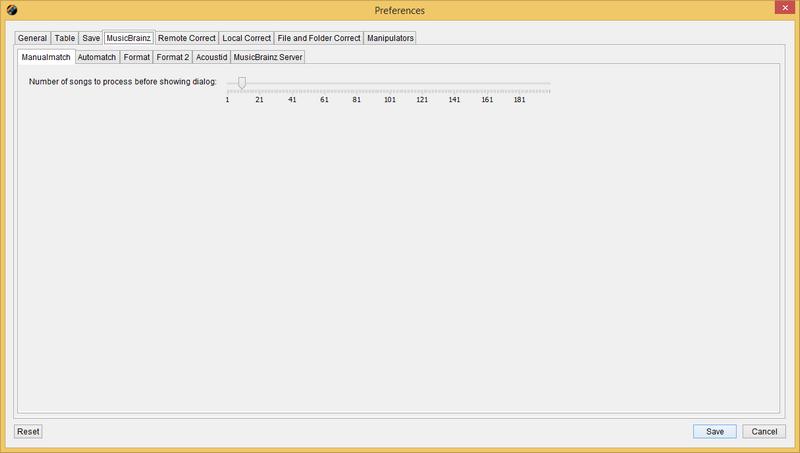
By default songs are processed in batches of ten, after the first ten songs are processed the matches are displayed in a dialog. Whilst you are reviewing the options the next batch of songs is processed in the background. If you select OK the songs are updated to your matches. This continues until there are no more songs to process, unless you select Cancel. You can select Reset to undo any changes you have made in the current batch that you are reviewing.
![]()
For each (selected) song this checks that they already have a MusicBrainz Recording Id, and if they do retrieve the latest information from MusicBrainz for this Id and updates the relevant fields in the songs if they are enabled in your Format options. Recording can be standalone but in most cases can be found on at least one album and if so Jaikoz will also have matched the recording to a MB Release Id, and Jaikoz uses this to update all the release information for the song. If the track does not have a MusicBrainz Recording Id but it does have a MusicBrainz Release Id then Jaikoz tries to find the correct track on the release by comparing the track-name, track number and track duration. If MusicBrainz contains a link to a Discogs Release Id the songs will also be updated with any more information available from Discogs.
This has a number of uses:
-
Ensuring that you have the latest information from MusicBrainz because MusicBrainz may have improved/corrected/increased the information held for this track since you originally matched it.
-
Jaikoz may not have been able to find a MusicBrainz Match itself, so you can find the correct track using the MusicBrainz Website yourself and then enter the id into the Unique Id field, then use this task to update all the fields based on this Id.
-
Even easier, just find the Release Id and then paste the MusicBrainz Release Id for every track into the Release Id field
For each (selected) song this checks that they already have a Release Discogs Url, and if they do then Jaikoz retrieves the latest information from Discogs for this Release Id and tries to find the correct track on the release by comparing the track-name, track number and track duration of the tracks with the Discogs release information. Jaikoz then updates the relevant fields in the record if they are enabled in your Format options. The Release Discogs Url can be added after a successful MusicBrainz lookup but if you're song does not have one you can search on Discogs for it yourself and add it manually.
Whether or not you have already tagged your track from MusicBrainz, Discogs may contain additional information that is not included in the MusicBrainz Database. You can also use this to help identify information that you can be added into MusicBrainz. Discogs Cover Art is generally higher quality than is available from MusicBrainz.
You are limited to doing 5,000 Discogs queries within a 24 hour period by standard Jaikoz, Jaikoz does search queries to find possible matching releases and then lookups those releases so this limit doesn't necessarily match how many songs Jaikoz matches, but is usually similar. But if you have Jaikoz Pro there is no such limit.
Tries to match all the selected songs to one MusicBrainz Release. This is very useful if your songs are listed as being from various albums but you know they all belong on a single album. Jaikoz will only allow the match if it has been possible to match all songs to another song on the release, and track lengths are approximately the same.
Tries to match all the selected songs to specified MusicBrainz Release. This is very useful if you have already found the MusicBrainz release you want the songs to be linked to. You can also search for a release here, selecting the Search button opens up Advanced Release Search. From here you can do advanced release search, this works the same way as doing an advanced release search on the MusicBrainz website, once you select a good match this is used for matching your songs. It is also useful to force a match to a release that is not allowed by Match Songs to one MusicBrainz Release because Jaikoz will warn you if there are anomalies but allow you to ignore warnings and match anyway.
Tries to match all the selected songs to specified MusicBrainz album matching on bar code, this is useful if you have been digitising an album and have the physical record available, saves you doing a MusicBrainz search. If there are multiple albums with the same barcode Jaikoz will score them and select the one with the best score.
Tries to match all the selected songs to specified MusicBrainz album matching on catalogue no, this is useful if you have been digitising an album and have the physical record available, saves you doing a MusicBrainz search. If there are multiple albums with the same catalogue no Jaikoz will score them and select the one with the best score.
Tries to match all the selected songs to one Discogs Release. This is very useful if your songs are listed as being from various albums but you know they all belong on a single album
Tries to match all the selected songs to specified Discogs Release. This is very useful if you have already found the Discogs release you want the songs to be linked to. If your songs are not close matches to the selected release in duration Jaikoz warns you and gives you the chance to match to the release anyway.
Tries to match all the selected songs to specified Discogs album matching on bar code, this is useful if you have been digitising an album and have the physical record available, saves you doing a Discogs search. If there are multiple albums with the same barcode Jaikoz will score them and select the one with the best score.
Tries to match all the selected songs to specified Discogs album matching on catalogue no, this is useful if you have been digitising an album and have the physical record available, saves you doing a Discogs search. If there are multiple albums with the same catalogue no Jaikoz will score them and select the one with the best score.
The MusicBrainz Server field specifies what MusicBrainz server to use for lookups, this is usually http://www,musicbrainz.org, but you may want to access the beta server or setup a local server you can configure Jaikoz to use it here.
In order to submit data to MusicBrainz you need to have a user account, these are completely free and can be created at the MusicBrainz Website. If you have a user account specify your username and password in this tab in the MusicBrainz Username and MusicBrainz password fields. By submitting data to MusicBrainz you are helping to improve this open source database and maintain the most accurate music resource in existence. By submitting information for songs that you own you create an archive of information that will never be lost even if your own files get damaged. Currently the majority of information that is contributed to MusicBrainz is via their website, but you can contribute some information automatically via Jaikoz. if you do this please ensure the information you submit is accurate and of a high quality.
![]()
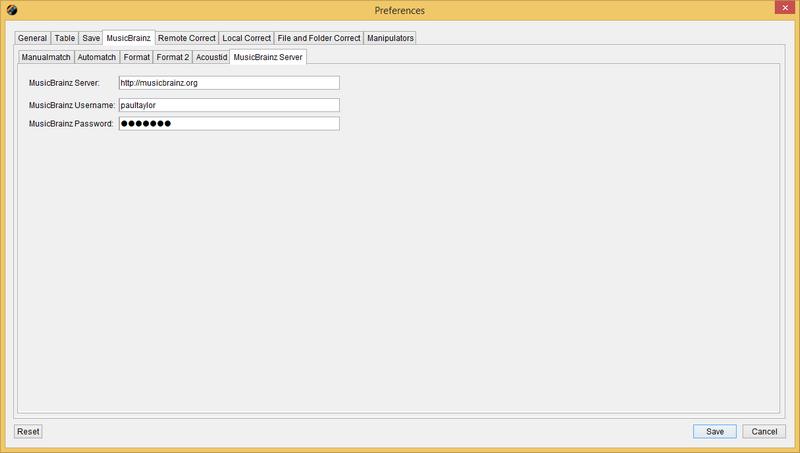
If you successfully create an Acoustid fingerprint for a track and you have independently found a match on MusicBrainz you can submit the pairing to the Acoustid database, so should use this task AFTER matching your songs. This helps build the Acoustid Database and means that subsequent users will be able to match to the correct MusicBrainz Id if their song has the same fingerprint even if they have no metadata. All displayed/selected pairing will be submitted.
MusicBrainz has a Folksonomy cloud that can be used to tag artists, releases and tracks with anything you like. Jaikoz uses this to add genres at releases and track level. Because genres are subjective this feature is going to become more useful as more people submit their genres, so please give it a go. Jaikoz also uses the folksonomy cloud to fix the genre field when correcting songs from MusicBrainz.
If you successfully matched a track to MusicBrainz and you have independently found the bar code for the release you can submit the pairing to the MusicBrainz database, this helps build the MusicBrainz Database. For example you may have matched a release to MusicBrainz but MusicBrainz does not contain the Bar code, however if you have the original release you can read it from the cover add it to the Bar code fields for the songs and then submit to MusicBrainz with this task.
You can rate your songs in MusicBrainz and then submit the ratings to MusicBrainz, this helps others identify the best songs for an artist they may not know so well.
You can submit a new release to MusicBrainz, either ensure a single album is listed or use the context menu to submit a new release to MusicBrainz. Your release details will be opened in your browser with most of the information completed making it much quicker than adding the release manually.
MusicBrainz can store a list of the release you own and inform you of new releases by your favourite artists. Submitting releases can be done via the website but Submit MusicBrainz Collection provides an easier way to submit all the releases loaded in Jaikoz in one go. You can have multiple MusicBrainz collections and Jaikoz allows you to submit your songs to your chosen collection.
Local correct groups together some powerful tasks that can be performed without an Internet connection, each task attempts to improve the data in one column. Most of the local correct tasks work in a similar fashion, this is explained fully in the Cross Referencing Correct section, the other local correct tasks are discussed next
Often artwork is not embedded into the metadata but held as a separate file, sometimes it is not available at the same time and has to be retrieved later. But cover art is much more useful if it is embedded into the metadata because only then will it be displayed in Music players such as iTunes and iPods. Correct Artwork checks the folders of the songs you are correcting and adds any image files it finds to the audio file unless they have already been added. The following formats are supported JPEG,PNG and GIF
There are options you can make that apply to Correct Artwork and when getting artwork from a MusicBrainz or Discogs match
Many applications only show the first image, so you may decide to only add the first image by setting the value of Maximum artwork images that can be added to song.
You can resize large images using Resize Artwork if dimensions larger than (pixels), very large images will make your songs correspondingly large.
You can ignore artwork smaller than a certain size using Ignore artwork smaller than this (pixels)
By default Local Artwork Correct ignores folders containing more than fifty songs because it is unlikely that the folder contains only a single album, but sometimes this is the case and you can remove this restriction by checking Preferences/Local Correct/Artwork Correct/Allow Artwork to be loaded from folders containing more than 50 songs
![]()
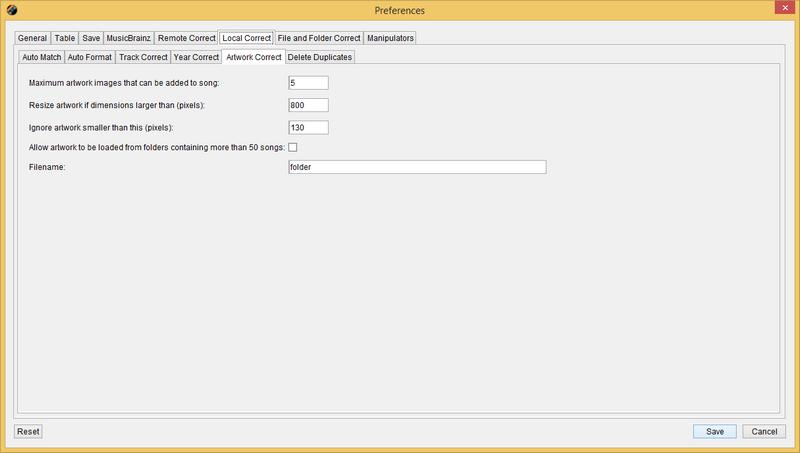
Song is a duplicate if allows you to decide how Jaikoz find duplicates. You can detect duplicates based on MB Id, Acoustid, Release Id or combinations of. It is important to understand the options available when you use Jaikoz to delete duplicates.
The song is a duplicate if it has the same MB Recording Id, be careful using this option because if you categorise your music by albums this could delete a song from one album if you have the same song on multiple albums.
Songs are only deleted if you have the same recording matched to the same album in duplicate, and they are acoustically the same because they have the same Acoustid. Beware that this option does not protect against the rare case when an album is released with the same identical recording on it more than once. Nor will it find duplicates for songs that do not have an Acoustid.
This option ignore release groupings and find matches purely sonically based on the same Acoustid id.
This is the default, songs are only deleted if you have the same recording matched to the same album in duplicate. Beware that this option does not protect against the rare case when an album is released with the same identical recording on it more than once.
The song is a duplicate if it has the same MB Recording Id and matching Acoustid. Matching on both criteria makes it very sure to be the same. Be careful using this option because if you categorise your music by albums this could delete a song from one album if you have the same song on multiple albums.
The When you have duplicate songs option defines what to do once duplicates have been found. They can either be deleted , moved to a special Duplicates folder or linked to the duplicate file that is not being deleted. If you want them to be moved you must specify a Duplicates Folder. If you want to link them use the Alias should be named so that option to specify if they should keep their name, be renamed to match the file they link to, or have a combination of both names.
Delete from iTunes if moving duplicates searches for these songs in iTunes and removes them from the iTunes library as well.
![]()
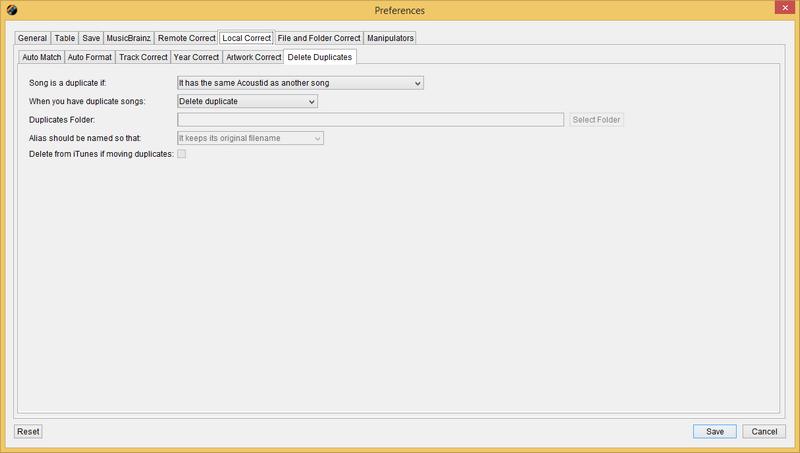
![]()
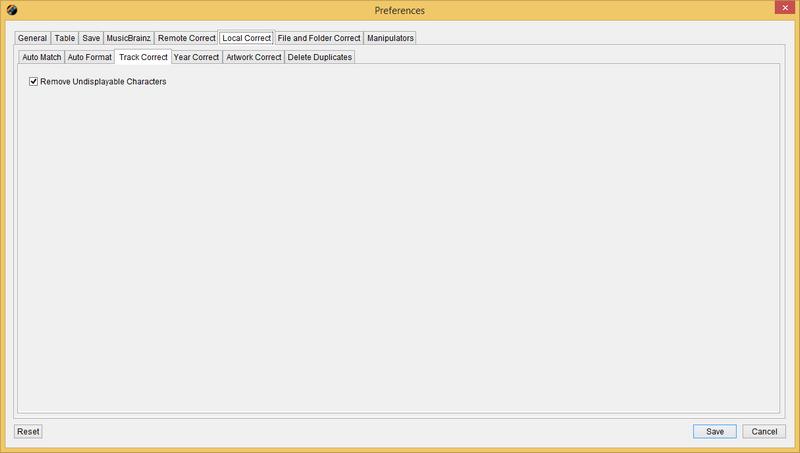
If Remove Undisplayable Characters is selected control characters can be removed.
If you have a number of songs that you wish to adjust the data for the chances are at least some of them are by the same Artist and from the same Album. However if the source for these files are different the Metadata may be subtlety different,this means that when you try and play all tracks by a particular group or artist they do not all appear. For example the following artists are all different,but only slightly
-
Flatuella Blurb - All words start with a capital letter
-
Flatuella blurb- First words start with a capital letter
-
The Flatuella Blurb - Additional definite article
-
Blurb Flatuella - Words in different order
-
Flatuella Blorb - Misspelling of second word
-
Flatuella Blurb - Extra white space character at end of word
-
Flatuella_Blurb - Words separated by underscore character
-
Flatuella Blurbs - Extra punctuation
Which is the correct answer?
Item five is a misspelling so it is not this,item four is not that easy to read but is the accepted format for some audio encoders, any of the others could conceivably be OK. The correct answer really depends upon your personal preference. Auto Format allows you to automatically modify values to your personal taste. Are all these artists the same band, as a human reading this document it should be obvious that they are but to a computer it is not. But Auto Match can detect these similar values, again the similarity is defined by you.
Cross Referencing Correct try’s to work out which is the correct value to use by a combination of comparing similar values, and user options. Local Correct is available for the following fields
-
Artist
-
Album
-
List item
-
Genre
-
Recording Time
-
Comments
-
Composer
Cross Referencing Correct works on a column by column basis,it identifies similar values and converts all similar values to the most common value. The procedure is as follows
-
Create an empty new list
-
For each record retrieve the Field Value relating to that column
-
Using the options defined in Auto Match Preferences calculate a Match Value
-
Using the options defined in Auto Format Preferences calculate a Format Value
-
Has this field been found before, if not add it to the list with Count of zero
-
If it has just increment the Count of this field in the list
-
Sort the list by their Match Value and then Count,highest count first.
-
If a record has the same Match Value as its preceding record set its Format Value to the same as the previous songs Format Value.
-
Go through each song and find the song in the list with the same Field Value and set the name in the song to the Format Value.
Local correct tasks like Local Artist Correct only modify songs that do not have a MusicBrainz Id. The reason for this is that Local Correcters are primarily provided to improve the quality of your metadata in preparation for MusicBrainz matching, so having run Autocorrecter on a group of songs you may run it again after making some manual edits to match the remaining unmatched songs, and would not expect songs that have been successfully matched to MusicBrainz to be modified further. You can make it run against all songs by checking Preferences/Local Correct/Auto Match/Do local correct on songs that already have a MusicBrainz Id
You can decide on what the Correcter deems is similar when matching by selecting options from the Auto Match Preferences . The more options you enable the more matches the correcter will make but more false positives will also occur.
Jaikoz can look for values that sound the same when spoken (based on English) but are spelt differently. For example Audio Bullies and Audio Bullys
If a field contains multiple words this option will ignore the order. This is particularly useful for Solo Artists because some Audio Encoders specify surname then first-name. For example 'Kate Bush' and 'Bush Kate' would match.
Ignore case when matching values. For example 'Flaming Lips' and 'Flaming lips' would match.
Certain common words in a Language are often used without much thought especially in group names. In English the biggest culprit is 'The'. This option allows to specify a Word Remover to use. For example 'Flaming Lips' and 'The Flaming Lips' would match.
Earlier we looked at word order, but what defines a word. The Space character separates words but other characters such as '.' and ',' also separate words. Here you can specify a Word Separator which define show to break up words
Auto Format formats fields to save you from tedious typing , there are a number of options
This removes whitespace at the start or end of field values, this extra whitespace is marked pink in the field values
Widespace is when there is more than one space between words, this option removes the additional spaces so that there is only one space between words
This option removes any characters found that do not relate to a character set, this works for all languages as defined in the Unicode standard, it is very useful for removing control characters
This option changes the case of the field, the options are as follows
-
No capitalization
-
Capitalize all words
-
Capitalize first word
-
Capitalize all letters
-
Lowercase all letters
If you select to Capitalize all words or Capitalize first words there a few improvements Jaikoz makes to simple capitalizing. The rules listed below are processed before the simple capitalization method of making the first letter upper case and the remaining letters of a word lowercase
-
O'Reilly rule
-
Mc rule
-
Acronym rule,words between 3 and 5 characters that contain only uppercase letters and numbers are not modified
Some words have acronyms or shorthands that can be used instead, this option allows you specify a Word Replacer to always use the one you want. For example 'ft' and 'Feat' are common shorthands for 'Featuring'. And '-' and '_' are often used instead of spaces.
Specify a Punctuation Remover which will remove the list of characters you have specified from the resulting output.
This shifts the last folder in the base folder over to become the first folder in the Sub Folder field, this is normally used in conjunction with the Correct Sub Folder from Metadata action.
This shifts the first folder in the sub folder field over to become the last folder in the Base Folder field, this is normally used in conjunction with the Correct Sub Folder from Metadata action.
Usually fields provides more accurate information than the filename of the song. But sometimes the field information is less accurate or missing information that can be found in the filename. However although there are some informal conventions for naming songs, files can be a named in any way the user wishes, for example
-
Artist-Album-Title.mp3
-
Artist_Album_TrackNo_Title.mp3
-
Title Album.mp3
-
Title-Artist.mp3
With other applications when you extract information from a filename into fields you have to specify the format of the filename and how parts combine. But as can be seen from above different filenames are often formatted in different ways so it is impossible to process a number of songs in one go.
But Jaikoz uses a special algorithm based on the general AutoCorrecter method to work out the parts by comparing the filename not only with its corresponding fields but also the fields of all the other loaded songs.
Jaikoz assumes that filenames are made up only of
-
Artist
-
Album
-
List item
-
Track No
-
Characters to separate the fields
-
File Type (e.g.mp3)
The correction will take the following steps
-
Generate a list of songs where it may be useful to extract information from the filename. Tags which already contain an Artist,List item and Album value are not included.
-
Run the AutoCorrecter algorithm on the filename using filename preferences this will generate a Filename List of distinct filenames together with a Word Count, words are calculated based on the Split Filename option specified in your Tags from Filename Settings. Note because The list item is commonly separated only with the space character the space character should not be defined as a suitable word separator character for separating parts of the filename(i.e. Artist from Album)
-
For each record in the File Name List.
-
Compare every word with all the Artists in the Artist Column, similarity is based on the Split Words option specified in your Tags from Filename Preferences. If it finds a match mark the word as being an Artist.
-
Compare every word except for marked words with all the Album in the Album Column,similarity is based on the Split Words Word Separator. If it finds a match mark the word as being an Album
-
Check all words except marked words to see if they are a number, if they are mark the word as being a track number.
-
-
For each record in Filename
-
Compare the number of words with the number of marked words, if no matches have yet been made
-
If number of words=3 assume filename format is Artist Album List item
-
Mark first word as artist
-
Mark next word as album
-
Mark next word as list item.
-
-
If number of words=2 assume filename format is Artist List item
-
Mark first word as artist
-
mark next word as list item.
-
-
If number of words=1 assume filename format is List item
-
Mark first word as list item
-
-
-
-
For every file
-
If number of unmarked words is 1
-
If list item not set to List item
-
else if artist not set to Artist
-
else if album not set to Album
-
else do nothing
-
-
If number of unmarked words is 2
-
If list item not set to List item
-
else if artist not set to Artist
-
else if album not set to Album
-
-
If number of unmarked words is 3
-
If list item not set to List item
-
else if artist not set to Artist
-
else if album not set to Album
-
-
-
For every Audio File
-
If we decided to process this Audio File find match in Filename List
-
If matched Artist set TagArtist to filename Artist
-
If matched Album set TagAlbum to filename Album
-
If matched List item set TagListitem to filenameListitem
-
If matched Track set TagTrack to filename Track
-
This modifies the Filename to reflect the values of the fields within the song. There is one mask for songs on compilation albums, and one for all other songs, this is useful because for compilation albums you might want to treat the artist name differently. Any Javascript expression is supported, this gives great flexibility allowing the use of regular expressions and character functions.
![]()
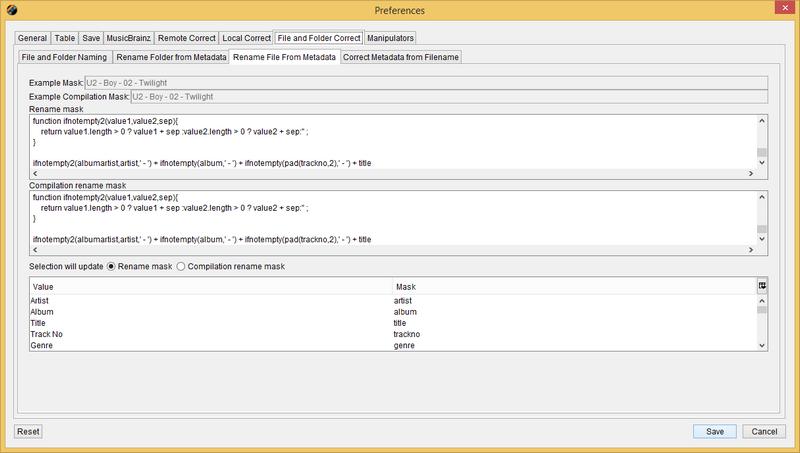
It is usually useful to stores songs on your computer in multiple sub folders for example by having a different sub folder for every artist. The AutoCorrecter applies the formatting mask specified and generates a sub folder. This modifies the Filename to reflect the values of the fields within the song. There is one mask for songs on compilation albums, and one for all other songs, this is useful because for compilation albums you might want to treat the artist name differently. Any Javascript expression is supported, this gives great flexibility allowing the use of regular expressions and character functions.
![]()
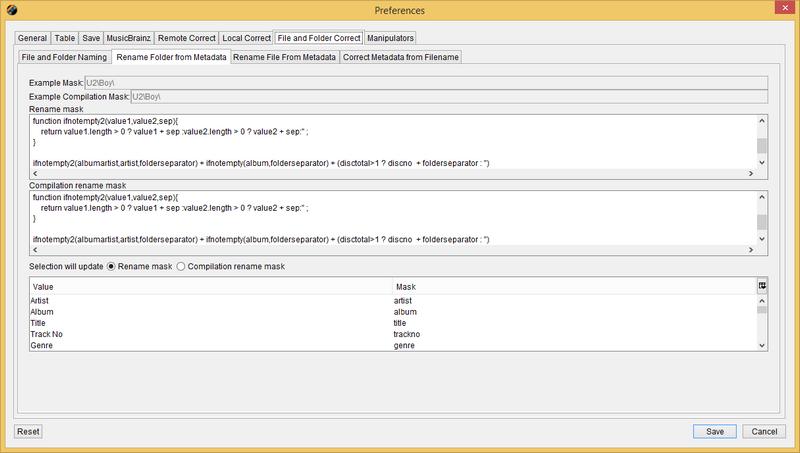
Delete duplicates find songs that appear to be the same song and marks for deletions all the duplicates, no songs are actually deleted until changes are saved. By default Jaikoz identifies duplicates by looking for files with duplicate MusicBrainz Recording Ids and MusicBrainz Release Id, but in the preferences you can change this to find duplicates based on various combinations of Recording Id, Release Id and AcoustId. Jaikoz compares the duplicate files by their Audio Format, Bitrate, File size and Track Duration and deletes the files with the lowest quality. More information at Deleting Duplicates
The AutoCorrecter allows you batch up the various Local Correct/File and Folder Correct and MusicBrainz Correct tasks, it can also save changes to your files automatically
The full list of tasks available is as follows
- Local Correct Artist
- Local Correct Album
- Local Correct List item
- Local Correct Track
- Local Correct Genre
- Local Correct Year
- Local Correct Comment
- Correct Tags from Filename
- Correct SubFolder from Metadata
- Correct Filename from Metadata
- Correct Tags From MusicBrainz
- Local Correct Composer
- Correct Local Artwork
- Retrieve Acoustic Ids
- Save Changes
- Updates tags from Existing MusicBrainz Ids
- Updates tags from Existing Discogs Ids
- Delete Duplicates
By default the AutoCorrecter does not run the actions that modify filenames and folders or save changes. However all can easily be configured in the AutoCorrecter if required. For example you could set up the Autocorrecter to simply Retrieve Acoustic Ids and then save changes to the files, this allows you to complete this task unattended. Because Acoustic Ids are correct there is no need to review them before saving the changes.
![]()
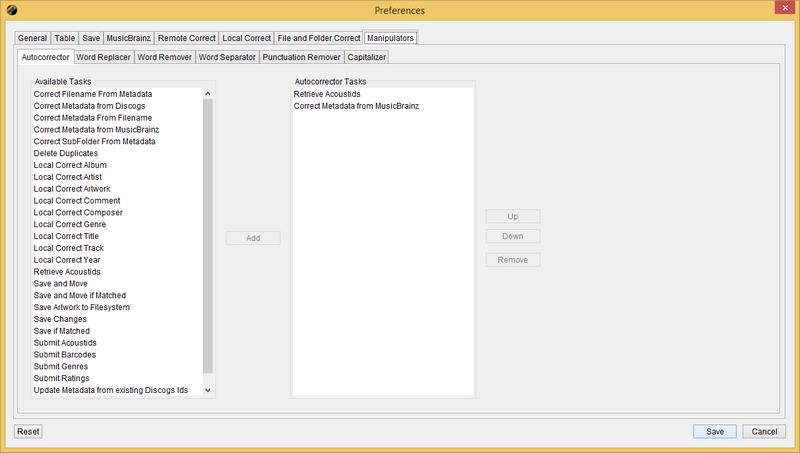
You can configure Jaikoz to update your iTunes database when you save changes to files, this is not enabled by default
If you do update iTunes from Jaikoz it is recommended that within iTunes own Preferences you disable the Advanced\Keep iTunes Music Folders organized option because otherwise iTunes may move files that you are still working on within Jaikoz, it will do this if you are working on files that are within the iTunes music folder location.
![]()
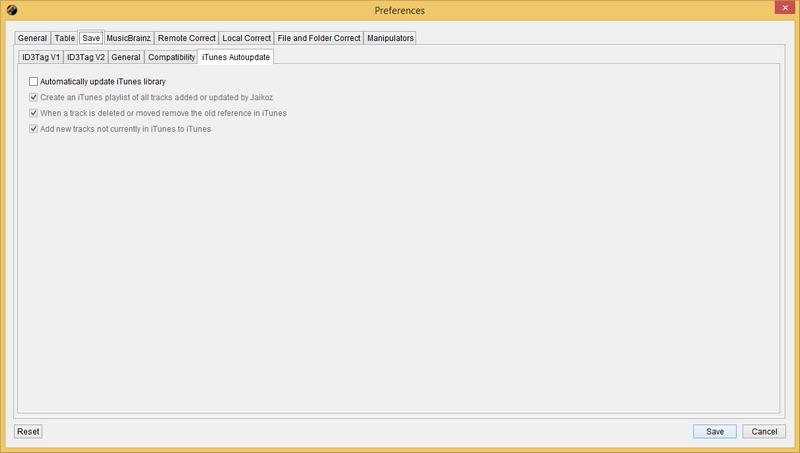
You must check Automatically update iTunes library to have iTunes integration.
If Create an iTunes playlist of all tracks added or updated by Jaikoz is checked then an iTunes playlist is created each time you save some changes listing all the files edited or added in Jaikoz where the corresponding file could be found in the iTunes library. If you move a file in Jaikoz it will show as a new file in iTunes.
If When a track is deleted or moved remove the old reference in iTunes is checked Jaikoz will try to remove references to non-existent files.
If Add new tracks not currently in iTunes to iTunes is checked any files saved in Jaikoz will be added to iTunes, if it is not checked Jaikoz will only add files if they already existed in the iTunes database. Usually you would want this option checked, unless you do not use iTunes for all your music tracks.
The Export action is simple and effective. It will allows you to export the details of your loaded songs in either an XLS (Excel) or CSV (comma separated values) file (both of the file types can be opened by Apples Numbers spreadsheet). You can then use this file as an archive of your metadata AND you can also open and edit values within a proper spreadsheet application and then import the changes back into Jaikoz.
You can use the export feature on all visible songs or just selected songs using the context menu. You can add to an existing file from a previous export , and if you reexport songs the spreadsheet will store the latest values for the reexported songs. The export file should be easy to view in any spreadsheet application, the information is stored in UTF8 format (to enable any unicode character to be stored) so specify UTF8 as the charset - if requested by your spreadsheet application.
The only restrictions are
- Export does not export coverart, a separate action will be added to Jaikoz for this in a later release
- Export does not export multiple values from multivalues like genre - only the first value is exported.
- Export only export fields available from the Metadata view, it does not export fields that are only visible in the ID3 view or fields that are not visible with Jaikoz at all.
You can use a spreadsheet to edit the details within an export file created with the Export action. Typically there are two types of edit you might like to make
- Field data such as album or artist, then this songs info will be corrected when import this file into Jaikoz
- Filename field, by modifying this field you can import song data from one file into another file. This is especially useful if you have a particular song in two formats (e.g. mp3 and mp4) and only have the correct metadata for one song.
Before using Import make sure you have already loaded your songs into Jaikoz before you use Import because Import does not load songs into Jaikoz it matches against the filename of songs in Jaikoz and updates the metadata when it finds any matches. Import is none destructive, for example although it will only import the first genre if your song has additional genres these will be left untouched.
Table of Contents
- 1. Metadata Fields
-
- 1.1. Jaikoz Fields
- 1.2. File Location Fields
- 1.3. Metadata Fields
-
- 1.3.1. Artist
- 1.3.2. Album
- 1.3.3. Track No
- 1.3.4. Title
- 1.3.5. Genre
- 1.3.6. Year
- 1.3.7. Comment
- 1.3.8. Album Artist
- 1.3.9. Composer
- 1.3.10. Artwork
- 1.3.11. Grouping
- 1.3.12. Disc No
- 1.3.13. BPM (beats per minute)
- 1.3.14. MusicBrainz Artist Id
- 1.3.15. MusicBrainz Release Id
- 1.3.16. MusicBrainz Release Artist Id
- 1.3.17. MusicBrainz Recording Id
- 1.3.18. MusicBrainz Disc Id
- 1.3.19. Puid
- 1.3.20. Amazon Id
- 1.3.21. Release Status
- 1.3.22. Release Type
- 1.3.23. Release Country
- 1.3.24. Lyrics
- 1.3.25. Is Compilation
- 1.3.26. Sort Artist
- 1.3.27. Sort Album Artist
- 1.3.28. Sort Album
- 1.3.29. Sort Title
- 1.3.30. Sort Composer
- 1.3.31. Encoder
- 1.3.32. ISRC
- 1.3.33. Bar code of the release
- 1.3.34. Catalog No
- 1.3.35. Label
- 1.3.36. Lyricist
- 1.3.37. Conductor of the music.
- 1.3.38. Remixer
- 1.3.39. Mood
- 1.3.40. Media
- 1.3.41. Release Official Url
- 1.3.42. Release Discogs Url
- 1.3.43. Release Wikipedia Url
- 1.3.44. Artist Official Url
- 1.3.45. Artist Discogs Url
- 1.3.46. Artist Wikipedia Url
- 1.3.47. Lyrics Url
- 1.3.48. Disc Total
- 1.3.49. Track Total
- 1.3.50. Custom1
- 1.3.51. Custom2
- 1.3.52. Custom3
- 1.3.53. Custom4
- 1.3.54. Custom5
- 1.3.55. Floating Bpm
- 1.3.56. MB Release Group Id
- 1.3.57. MB Work Id
- 1.3.58. Occasion
- 1.3.59. Original Album
- 1.3.60. Original Artist
- 1.3.61. Original Lyricist
- 1.3.62. Original Release Year
- 1.3.63. Quality
- 1.3.64. Script
- 1.3.65. Tags
- 1.3.66. Tempo
- 1.3.67. Rating
- 1.3.68. Producer
- 1.3.69. Mixer
- 1.3.70. DJ Mixer
- 1.3.71. Arranger
- 1.3.72. Engineer
- 1.3.73. Language
- 1.3.74. Acoustid Fingerprint
- 1.4. Audio Fields
- 2. ID3 Fields
-
- 2.1. ID3 Fields
-
- 2.1.1. Unique File Identifier
- 2.1.2. Artist
- 2.1.3. Album
- 2.1.4. Title
- 2.1.5. Track No
- 2.1.6. Cover Art
- 2.1.7. Genre
- 2.1.8. Year
- 2.1.9. Comment
- 2.1.10. User Defined URL
- 2.1.11. User Defined Text Information
- 2.1.12. Composer
- 2.1.13. Copyright Info
- 2.1.14. Encode By
- 2.1.15. Original Artist
- 2.1.16. BPM (beats per minute)
- 2.1.17. Encoding Time
- 2.1.18. Playlist Delay
- 2.1.19. Original Release Time
- 2.1.20. Release time
- 2.1.21. Tagging Time
- 2.1.22. Lyricist
- 2.1.23. File Type
- 2.1.24. Involved People List
- 2.1.25. Grouping
- 2.1.26. Title/Songname/Content Description
- 2.1.27. Initial Key
- 2.1.28. Language(s)
- 2.1.29. Length
- 2.1.30. Musician Credits List
- 2.1.31. Media Type
- 2.1.32. Mood
- 2.1.33. Original Album
- 2.1.34. Original Filename
- 2.1.35. Original Lyricist(s)
- 2.1.36. File Owner/Licensee
- 2.1.37. Album Artist (Accompaniment)
- 2.1.38. Conductor/Performer refinement
- 2.1.39. Remixed
- 2.1.40. Disc No (Part of a Set)
- 2.1.41. Produced Notice
- 2.1.42. Publisher
- 2.1.43. Internet Radio Station Name
- 2.1.44. Internet Radio Station Owner
- 2.1.45. Sort Album
- 2.1.46. Sort Artist
- 2.1.47. Sort Title
- 2.1.48. ISRC
- 2.1.49. Encoding Preferences
- 2.1.50. Set Subtitle
- 2.1.51. URL: Commercial Information
- 2.1.52. URL: Copyright/Legal Information
- 2.1.53. URL: Official Song Web Page
- 2.1.54. URL: Official Artist Web Page
- 2.1.55. URL: Official Audio Source Web Page
- 2.1.56. URL: Official Internet Radio Web Page
- 2.1.57. URL: Payment
- 2.1.58. URL: Publishers Official Web Page
- 2.1.59. Play Counter
- 2.2. ID3 Extended Fields
- 2.3. Tag Field Groups
- 2.4. Data Formats common to multiple Fields
- 2.5. ID3 Tag Compatibility
- 3. Ogg Vorbis Fields
- 4. Mp4 Fields
- 5. Flac Fields
These represent the Audio Information
These fields are not part of the tags themselves but provide important information about the Tags
Each record is allocated a row number numbered in the order the songs were loaded,this cannot be modified by you. The Row Menu Pop-up can be started by clicking on the row number. If you mark songs for deletion and then save changes the successfully deleted songs will disappear from Jaikoz and the songs will be renumbered
This represents the tag status, you cannot edit this field yourself.
-
C Tag has been changed
-
D Tag has been marked for deletion
-
Tag is unchanged
Describes the tag versions in the file.
When you first load new files into Jaikoz it will check your Save Options. If your save options mean you want to save different tags then currently exist in the file, the version field and record status will be set to Changed. When editing this is a Selectable Combo .When saving the file it will create tag(s) of these version(s)
Warning if you edit fields which are not supported by the underlying version they will not be saved. For example if you add an Attached Picture and then select to only save a V1 Tag it will not be saved because ID3v1 does not support attached pictures.
Be careful when modifying these files, if your files are already in a Music Library such as iTunes, because it may prevent iTunes from finding them. It is recommended that you run Jaikoz on your files before you add them to iTunes.
In the Read Panel this is the root of where you loaded the files from. When you first start Save Folder Preferences/Read Folder is used as the default location to read songs from, you can shift folders from the Base Folder to the Sub Folder with the Shift Base Folder to Sub Folder action. In the Edit Panel this is the root of where you will save your files to, upon loading the file it will always start the same as for the read panel but you can modify it to an existing folder location here AutoFix will check the folder exists
In the Read Panel this will indicate the sub folder the file is within if when loading you specified includesubdirs.
In the Edit Panel this will indicate the sub folder to write the file to, upon loading the file it will always start the same as for the read panel but you can manually enter any valid sub folder name for your operating system here. AutoFix will check the sub folder is a valid name for the operating system.
This is automatically populated by the Correct Sub Folder from Metadata action, this uses output mask specified in Rename Sub Folder Preferences, you can shift folders from the Sub Folder to the Base Folder with the Shift Sub Folder to Base Folder action
In the Read Panel this is the name of the Audio File
In the Edit Panel this is the new name of the Audio File, upon loading the file it will always start the same as for the read panel, but you can manually enter any valid filename name for the operating system here. AutoFix will check the name is a valid name for the operating system, has a valid extension and does not have the same name as another loaded file.
This is automatically modified by the Correct Filenames from Metadata action, you can specify an output mask for the filename in Rename File Preferences
These are the fields that can be directly view and edited within the View and Edit Panels, and the Detail Panel. These fields should be supported by most Audio Formats.
The album that this recording belongs. More accurately refers to the release that the tracks belongs, for example it may be a single or an E.P rather than an album
This the track number of the recording on the album.
In the Edit Panel you can enter the track number, there are four accepted formats
-
Zeroed Track Number -
Are of the form 01,02,03-11,12.. this has the advantage the track number will be sorted correctly. If the Track Number is used to generate the filename this will also be sorted correctly
-
Non-zeroed Track Number
Are of the form 1,2,3,..11,12 these may not be sorted properly for example 12 would come before 2
-
Zeroed Track Number/Total
Are of the form 01/10,02/10.... where the Total is the total number of tracks on the recording that this is part of.
-
Non-zeroed Track Number/Total
Are of the form 1/10,2/10.... where the Total is the total number of tracks on the recording that this is part of
This is automatically populated by the Correct Track Nos Action, using options specified in Track No Preferences
Displays the first genre this Audio File belongs to
In the Edit Panel editing the field will bring up an Editable Combo you can select one from the predefined list or enter your own. Genre support multiple values opening the Pop-up Window allow you to enter additional genres.
![]()
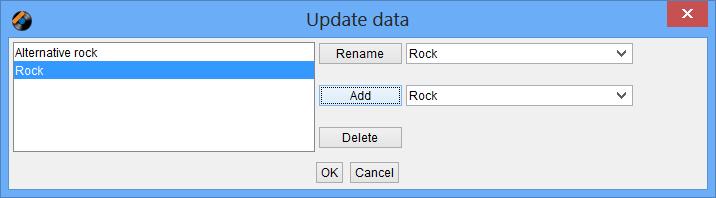
This is automatically populated by the Correct Genres Action using options specified in Genre Preferences.
Displays the Year, actually this displays the Recording Time that can be a full date and time, but most players expect it to be just a year. The Valid formats are here
You can Auto Correct the Recording Time with the Correct Recording Times using options specified in Recording Time Preferences.
Displays a comment description. Comment is a multi value field with multiple attributes but Description is the one you are most interested.
In the Edit Panel you can edit the comment description of the first comment . A comment comprises the language it is written in,a short description of the comment, and the comment itself. Selecting Multi Field Count allows you to edit these other attribute or add extra comments
![]()
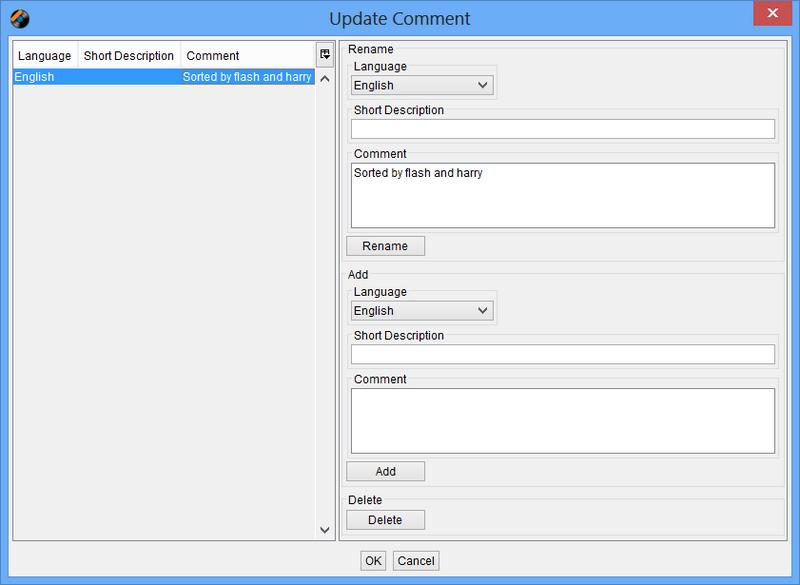
The Artist for the album, this is most useful in Various Artist compilations. This field was originally defined by ID3 as the Accompaniment but is rarely used for this purpose.
Images can be attached to a recording such as album art. This is a multi value field with multiple attributes, a thumbnail of the first image is displayed in the View Panel
From the Edit Panel you can select Multi Field Count to add new images
![]()

An image consists of
-
The Image itself, you can add an image with the Select File button. You should take care to add images of a suitable type and size, only images in JPG format should be added for maximum portability and you should scale the image so that its file size is not too large
-
A name, this is a text field where you can give the image a name
-
A type, this is a Selectable Combo where you select a type from a predefined list
The list on the lefthandside shows all images attached to this audio file. It shows additional attributes than cannot be modified.
-
The dimensions of the image in pixels
-
The size of the picture in bytes
Sometimes you may load an Audio File which contains an Image field but no actual picture because the tagging information was incorrectly created with another application. You can still edit this field with Jaikoz but will not see a preview until you add a new valid image.
If may contain an image field with a picture in a format not supported by Jaikoz, in this case no preview will be displayed but you can still edit the other attributes of the image.
The supported Image Types are:
-
JPEG
-
GIF
-
PNG
Identifies that this field is a part of a set grouped with other fields with the same set number. usually applies to a disc number within a multi disc release so is more commonly known as Disc No.
The MusicBrainz Artist Id allows you to access MusicBrainz Information on the Web for the associated artist.
The MusicBrainz Release Id allows you to access MusicBrainz Information on the Web for the associated release/album.
The MusicBrainz Release Artist Id allows you to access MusicBrainz Information on the Web for the associated album artist.
In Jaikoz upon a successful MusicBrainz match the MusicBrainz Recording Id is added to this field allowing you to access MusicBrainz Information for this recording. Since MusicBrainz NGS the MB Recording Id no longer uniquely identifies a track on a release, instead it identifies a unique recording of a song, this recording may then appear on multiple albums. To uniquely identify a track on a release you need the MB Recording Id, MB Release Id, Disc no and Track No.
The MusicBrainz Disc Id relates the track to the physical recording that it was taken from such as a CD pressing
The Puid is a unique acoustic identifier for the file, as calculated by MusicIP, this service is now defunct and no longer useful it has been replaced by the better Acoustid.
Release status is a MusicBrainz category used to categorize releases statuses, the allowable values are.
| Official |
| Promotion |
| Bootleg |
| Pseudo-Release |
Release type is a MusicBrainz category used to categorize releases types, the allowable values are
| Album |
| Single |
| EP |
| Compilation |
| Soundtrack |
| Spoken word |
| Interview |
| Audiobook |
| Live |
| Remix |
| Other |
Defines that this track is part of a compilation, originally used by iTunes but now in widespread use
This defines a value which should be used instead of the artist for sorting purposes.
Defines the sort name for the album artist, this is currently only used by iTunes
This defines a value which should be used instead of the album name for sorting purposes. e.g.. an album named "A Soundtrack" might preferably be sorted as "Soundtrack".
This defines a value which should be used instead of the title for sorting purposes.
The encoder that encoded the track. For some audio formats (Ogg,Flac,Mp4) modifying this field will affect the field in the Audio tab when reloaded, because they are both displaying the same field. MP3 files do not allow modification of the field in the Audio tab, so setting this field in the ID3 tag, will not affect the field in the audio tab.
International Standard Recording Code (ISRC) for the release, defined by ISO 3901, it is an international standard code for uniquely identifying sound recordings and music video recordings. IFPI has been appointed by ISO as registration authority for this standard. The ISO technical committee 46, subcommittee 9 (TC 46/SC 9) is responsible for the standard.
Url of an official web page that describes the release. This may contain additional information that isn’t currently held in MusicBrainz.
Url of a Discogs page that describes the release. Discogs may contain additional information that isn’t currently held in MusicBrainz.
Url of a Wikipedia page that describes the release. Discogs may contain additional information that isn’t currently held in MusicBrainz.
Url of an official web page that describes the artist. This may contain additional information that isn’t currently held in MusicBrainz.
Url of a Discogs page that describes the artist. Discogs may contain additional information that isn’t currently held in MusicBrainz.
Url of a Wikipedia page that describes the artist. Wikipedia may contain additional information that isn’t currently held in MusicBrainz.
MusicBrainz Release Group Id, within MusicBrainz different versions of a release all belong to the same release group.
MusicBrainz Work Id, within MusicBrainz a piece of music is called a work, this concept is particularly important for classical music.
The album that this song originally was released on. Very useful for storing the original studio album of a track that you have on a compilation.
These are the fields displayed in the View Audio Tab, this is for your information only you cannot modify these values.
This shows the audio format. For example for MP3s this combines the MPEG Version and Layer. The version is related to the sampling rate the original file was sampled at. Most music and audio book tracks use Version 1 which can sample information at CD quality (44Mhz), whereas Version 2 and Version 2.5 can be used to sample at lower rates, typically they are used in niche applications such as sampling sound effects. For MP3 the layer will always be three, MP2 would have a value of two, and MP1 files would have a value of one.
This displays the sampling rate used to create this file,usually the higher the bit rate the better quality the encoding. If variable bit rate is used it will be shown in brackets after the average bit rate e.g. 192kbps (VBR)
The encoder that encoded the track. For some audio formats (Ogg,Flac,Mp4) this fields can be modified by editing the Encoder field in the edit tab. MP3 files do not allow modification of this field, but you can set a corresponding field in the ID3 tag.
This section explains the ID3 tabs and fields, as used by MP3 files and differences between the versions of ID3. Because of the complexity of ID3, MP3 files can be edited either using the generic Edit Panel or using the ID3 Edit Panel. Usually the generic view is the easiest option, but the ID3 view provides access to fields in a way that maps directly to how they are stored and some fields that are currently not displayed in the Metadata view
These are fields that directly correspond to a field in the ID3v24 Specification, each of these fields can be seen as a column with the View and Edit Panels
The unique file identifier is used by some online music databases to identify a track. In Jaikoz upon a successful MusicBrainz match the MusicBrainz Unique Id is added to this field allowing you to access MusicBrainz Information on the Web.
The album that this recording belongs. More accurately refers to the release that the tracks belongs, for example it may be a single or an E.P rather than an album
This the track number of the recording on the album.
In the Edit Panel you can enter the track number, there are four accepted formats
-
Zeroed Track Number -
Are of the form 01,02,03-11,12.. this has the advantage the track number will be sorted correctly. If the Track Number is used to generate the filename this will also be sorted correctly
-
Non-zeroed Track Number
Are of the form 1,2,3,..11,12 these may not be sorted properly for example 12 would come before 2
-
Zeroed Track Number/Total
Are of the form 01/10,02/10.... where the Total is the total number of tracks on the recording that this is part of.
-
Non-zeroed Track Number/Total
Are of the form 1/10,2/10.... where the Total is the total number of tracks on the recording that this is part of
This is automatically populated by the Correct Track Nos Action, using options specified in Track No Preferences
Images can be attached to a recording such as album art. This is a multi value field with multiple attributes, a thumbnail of the first image is displayed in the View Panel
From the Edit Panel you can select Multi Field Count to add new images
![]()
An image consists of
-
The Image itself, you can add an image with the Select File button. You should take care to add images of a suitable type and size, only images in JPG format should be added for maximum portability and you should scale the image so that its file size is not too large
-
A name, this is a text field where you can give the image a name
-
A type, this is a Selectable Combo where you select a type from a predefined list
The list on the lefthandside shows all images attached to this audio file. It shows additional attributes than cannot be modified.
-
The dimensions of the image in pixels
-
The size of the picture in bytes
Sometimes you may load an Audio File which contains an Image field but no actual picture because the tagging information was incorrectly created with another application. You can still edit this field with Jaikoz but will not see a preview until you add a new valid image.
If may contain an image field with a picture in a format not supported by Jaikoz, in this case no preview will be displayed but you can still edit the other attributes of the image.
The supported Image Types are:
-
JPEG
-
GIF
-
PNG
Displays the first genre this Audio File belongs to
In the Edit Panel editing the field will bring up an Editable Combo you can select one from the predefined list or enter your own. Genre support multiple values opening the Pop-up Window allow you to enter additional genres.
![]()
This is automatically populated by the Correct Genres Action using options specified in Genre Preferences.
Displays the Year, actually this displays the Recording Time that can be a full date and time, but most players expect it to be just a year. The Valid formats are here
You can Auto Correct the Recording Time with the Correct Recording Times using options specified in Recording Time Preferences.
Displays a comment description. Comment is a multi value field with multiple attributes but Description is the one you are most interested.
In the Edit Panel you can edit the comment description of the first comment . A comment comprises the language it is written in,a short description of the comment, and the comment itself. Selecting Multi Field Count allows you to edit these other attribute or add extra comments
![]()
Displays a User Defined URL, this should be used to specify a URL which does not fit into any of the other fields. This is a multi value field with multiple attributes
In the Edit Panel you can edit the URL of the first URL. A User Defined URL comprises a short description of the it, and the User Defined URL value itself. Selecting Multi Field Count allows you to edit these other attribute or add urls.
![]()

Any other text information not covered by any of the other fields. This is a multi value field with multiple attributes
In the Edit Panel you can edit the text of the User Defined Text Information. User Defined Text Information comprises a description of which categorises the text, and the text itself. Selecting Multi Field Count allows you to edit these other attribute or add extra information. MusicBrainz stores values in this field when there is not a suitable alternative.
![]()
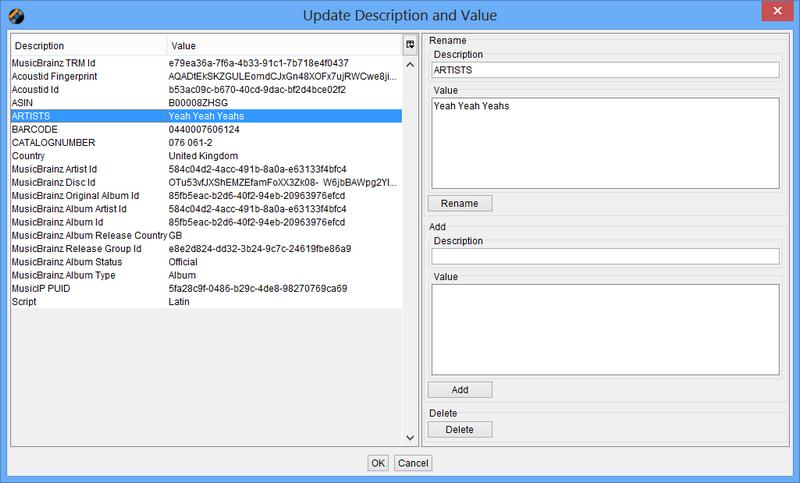
The name of the application used to encode the track into an MP3. This field can be modified but it will not affect the value held in the Audio tab.
The Date/Time when the original music file was encoded to MP3. The Valid formats are here
The Date/Time when the recording was originally released if this recording is a re-release. The Valid formats are here
The Date/Time when the original music file was released. The Valid formats are here
The Date/Time when the Audio File was tagged The Valid formats are here
The format of the encoded recording, should always be MP3
The Edit Panel provides a combo box specifying a list of encoded recording file types.
The Length of the recording. This is not normally used because normally the length can be accurately determined from the audio header
The format of the original recording that the Audio File was encoded from such as LP or CD
In the Edit Panel provides a combo box specifying a list of media types.
If the recording was part of a film soundtrack, the film should be specified here.
The Artist for the album, this is most useful in Various Artist compilations. This field was originally defined by ID3 as the Accompaniment but is rarely used for this purpose.
Identifies that this field is a part of a set grouped with other fields with the same set number. usually applies to a disc number within a multi disc release so is more commonly known as Disc No.
This contains the name of the internet radio station from which the audio is streamed.
This contains the name of the owner of the internet radio station from which the audio is streamed.
This defines a value which should be used instead of the album name for sorting purposes. e.g.. an album named "A Soundtrack" might preferably be sorted as "Soundtrack".
This defines a value which should be used instead of the artist for sorting purposes.
This defines a value which should be used instead of the title for sorting purposes.
This is a URL pointing at a web page with information such as where the album can be bought.
This is a URL pointing at a web page where the terms of use and ownership of the recording is described.
This a URL pointing at the official web page for the source of the audio file, e.g.. a movie.
This is a URL pointing at the homepage of the internet radio station.
This a URL pointing at a web page that will handle the process of paying for this file.
This a URL pointing at the official web page for the publisher.
Jaikoz recognises a small number of additional fields that are not part of the ID3 standard, but are in widespread use.
Defines that this track is part of a compilation, originally used by iTunes but now in widespread use
Defines the sort name for the album artist, this is currently only used by iTunes
These are groupings of ID3 fields that are not fully supported by Jaikoz
This lists all fields that are found within a tag which are recognised by Jaikoz but are not fully supported, Jaikoz recognises all fields specified in the ID3 Specification. Jaikoz supports all fields that are easy for uses to edit but some fields are very specialized and of limited use. These are the fields recognised but editing is not supported. Jaikoz displays the identifier and try’s to display the field value
Table 9.1. Not Supported Fields
| ID3 Identifier | Name |
|---|---|
| AENC | Audio encryption |
| ASPI | Audio seek point index |
| COMR | Commercial frame |
| ENCR | Encryption method registration |
| EQUA2 | Equalisation (2) |
| ETCO | Event timing codes |
| GEOB | General encapsulated object |
| GRID | Group identification registration |
| LINK | Linked information |
| MCDI | Music CD identifier |
| MLLT | MPEG location lookup table |
| OWNE | Ownership |
| PRIV | Private frame |
| POPM | Popularimeter |
| POSS | Position synchronisation |
| RBUF | Recommended buffer size |
| RVA2 | Relative volume adjustment (2) |
| RVRB | Reverb |
| SEEK | Seek frame |
| SIGN | Signature frame |
| SYLT | Synchronised lyric/text |
| SYLC | Synchronised tempo codes |
| USER | Terms of use |
From the Edit Panel although you cannot edit these fields you are able to remove them. If you select the Pop-up Menu and select Delete all unsupported fields are marked for removal. If you select the Multi Field Count you can elect to delete individual fields. Deleting fields will not effect the encoded recording but they may be required by an application you use to play songs.
![]()
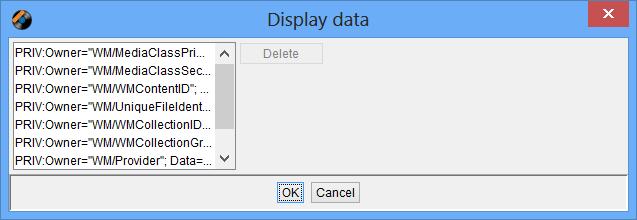
ID3 allows users and application to define their own fields, this lists all fields that are not standard and hence not recognised by Jaikoz
From the Edit Panel although you cannot edit these fields you are able to remove them. If you select the Pop-up Menu and select Delete all unsupported fields are marked for removal. If you select the Multi Field Count you can elect to delete individual fields. Deleting fields will not effect the encoded recording but they may be required by an application you use to play songs.
Date Time fields formats are as follows, you can enter dates in any of these formats
| YYYY |
| YYYY-MM |
| YYYY-MM-dd |
| YYYY-MM-dd:HH |
| YYYY-MM-dd:HH:MM |
| YYYY-MM-dd:HH:MM:SS |
where
| YYYY is a 4 digit year |
| MM is a 2 digit month |
| dd is a 2 digit day of month |
| HH is a 2 digit hour |
| MM is a 2 digit minute |
| SS is a 2 digit second |
The Id3 View Merged Tab and ID3 Edit Panel show a view of the tag data as it would be stored in ID3v24. When changes to tags are saved to some other version some conversion has to occur.
ID3v1 supports the following fields only, and the fields have maximum fields lengths.
Table 9.2. ID3v1 Fields
| Name | Maximum Length |
|---|---|
| Artist | 30 |
| Album | 30 |
| Title | 30 |
| Genre | 1 |
| Recording Time | 4 |
| Comment | 28 |
| Track Number | 1 |
When saving changes the values in the Edit Panel only predefined Genres will be saved. Only one Comment is allowed. Recording Time will only save the Year part of the recording time. Characters that are not part of the Standard European Character set will not be stored
ID3v2.2 does not support sort fields, but iTunes does provide extended ID3 Tag fields. So when Sort Fields are saved to a ID3v2.2 the iTunes fields are used.
ID3v2.2 does not support the following fields, they will not be saved.
-
Mood
-
Produced Notice
-
Musicians Credits
ID3v2.3 does not support sort fields, but iTunes does provide extended ID3 Tag fields. So when Sort Fields are saved to a ID3v2.3 the iTunes fields are used. Jaikoz also recognizes the alternative fields used by MusicBrainz (XSOP and XSOT).
ID3v2.3 does not support the following fields, they will not be saved.
-
Mood
-
Produced Notice
-
Musicians Credits
This section explains some details of the Ogg Vorbis implementation
Jaikoz supports Ogg Vorbis Comments of any size. However many Music Players will only read up to 64kb of Metadata for this reason you might want to be careful when adding Metadata to not exceed that limit
Ogg Vorbis does not allow empty values so if you save a value with an empty value it will actually be deleted from the file.
This section explains some details of the Mp4 implementation
Jaikoz supports M4a Files, Mp4 Audio Files and M4p Audio Files. Jaikoz will not open mp4 files that contain video, only audio tracks. Jaikoz can open and edit Protected Audio Files, this does not effect the protection mechanism
Jaikoz can safety edit protected files, the only functionality that is not available is the generation of Acoustic Ids for these files because the audio cannot be decoded.
Jaikoz supports writing values to Mp4 fields all the fields within the Metadata View. Other fields within Mp4 are not currently shown within Jaikoz but will be preserved. Note Mp4 does not allow multiple values to be entered for any fields, except for artwork. So if you add multiple values for any field (other than artwork) only the first field will be saved.
This section explains some details of the Flac implementation
Jaikoz supports Flac of any size. However many Music Players will only read up to 64kb of Metadata for this reason you might want to be careful when adding Metadata to not exceed that limit
Flac does not allow empty values so if you save a value with an empty value it will actually be deleted from the file.
Table of Contents
- 1. Main Menu
-
- 1.1. File
-
- 1.1.1. Open Folder...
- 1.1.2. Add Folder...
- 1.1.3. Open Files...
- 1.1.4. Add Files...
- 1.1.5. Open Playlist...
- 1.1.6. Add Playlist...
- 1.1.7. Open Recent
- 1.1.8. Close Files
- 1.1.9. Play Song
- 1.1.10. Update License
- 1.1.11. Preferences
- 1.1.12. Save Preferences
- 1.1.13. Save Changes
- 1.1.14. Save And Move...
- 1.1.15. Save And Copy...
- 1.1.16. Force Save
- 1.1.17. Revert Changes
- 1.1.18. Save Artwork to File system
- 1.1.19. Exit
- 1.2. Edit
-
- 1.2.1. Undo
- 1.2.2. Redo
- 1.2.3. Copy from View Pane
- 1.2.4. Copy from Edit Pane
- 1.2.5. Paste
- 1.2.6. Paste First Value
- 1.2.7. Paste to Start
- 1.2.8. Paste to End
- 1.2.9. Remove Whitespace
- 1.2.10. Remove Widespace
- 1.2.11. Delete
- 1.2.12. Set Value...
- 1.2.13. Find and Replace...
- 1.2.14. Capitalizer...
- 1.2.15. Swap Columns...
-
- 1.2.15.1. Swap Artist with Album
- 1.2.15.2. Swap Artist with Title
- 1.2.15.3. Swap Artist with Track No
- 1.2.15.4. Swap Artist with Comment
- 1.2.15.5. Swap Album with Title
- 1.2.15.6. Swap Album with Track No
- 1.2.15.7. Swap Album with Comment
- 1.2.15.8. Swap Title with Track No
- 1.2.15.9. Swap Track No with Comment
- 1.2.15.10. Swap Title with Comment
- 1.2.16. Empty Columns...
- 1.2.17. Swap
- 1.2.18. Prepend to Left
- 1.2.19. Prepend to Right
- 1.2.20. Renumber Track Nos
- 1.3. View
-
- 1.3.1. Show View Pane
- 1.3.2. Show Tag Browser
- 1.3.3. Show Detail Pane
- 1.3.4. Show Tool Bar
- 1.3.5. Show ID3 Tabs
- 1.3.6. View Artwork Full-size
- 1.3.7. View this Song at MusicBrainz
- 1.3.8. View this Artist at MusicBrainz
- 1.3.9. View this Album at MusicBrainz
- 1.3.10. View this Acoustic Id at MusicBrainz
- 1.3.11. View this Song at Amazon
- 1.3.12. View this Album at Discogs
- 1.3.13. View this Album at Wikipedia
- 1.3.14. View this Artist at Discogs
- 1.3.15. View this Artist at Wikipedia
- 1.4. Action
-
- 1.4.1. Auto Correct
- 1.4.2. Match To Album
-
- 1.4.2.1. Match Songs to one MusicBrainz Album
- 1.4.2.2. Match Songs to Specified MusicBrainz Album...
- 1.4.2.3. Match Songs to MusicBrainz Album by Barcode...
- 1.4.2.4. Match Songs to MusicBrainz Album by Catno...
- 1.4.2.5. Match Songs to one Discogs Album
- 1.4.2.6. Match Songs to Specified Discogs Album...
- 1.4.2.7. Match Songs to Discogs Album by Barcode...
- 1.4.2.8. Match Songs to Discogs Album by Catno...
- 1.4.3. Local Correct
- 1.4.4. File And Folder Correct
- 1.4.5. Remote Correct...
-
- 1.4.5.1. Retrieve Acoustids
- 1.4.5.2. Auto correct Metadata from MusicBrainz
- 1.4.5.3. Auto correct Metadata from Discogs
- 1.4.5.4. Submit MusicBrainz/AcoustId Pair
- 1.4.5.5. Submit MusicBrainz Genres
- 1.4.5.6. Submit Barcodes
- 1.4.5.7. Submit Ratings
- 1.4.5.8. Submit New Release
- 1.4.5.9. Add to your MusicBrainz Collection
- 1.4.5.10. Remove from your MusicBrainz Collection
- 1.4.5.11. Manual Correct Tags from MusicBrainz
- 1.4.5.12. Update Metadata from MusicBrainz
- 1.4.5.13. Update Metadata From Discogs
- 1.4.6. Delete Duplicates
- 1.4.7. Delete Files
- 1.4.8. Undelete Files
- 1.5. Filters
- 1.6. Advanced
- 1.7. Reports
- 1.8. Help
- 2. Preferences
- 3. Popup Menu
The main menu items work as follows, items in the Edit menu that works on individual fields such as Copy, Paste, Swap and Capitalizer are only applied to the currently selected fields in the Edit Panel. All other tasks are applied to those songs currently selected in the row header (the record no column on the left hand side of the Edit Panel) if any are selected, if none are selected then the task is applied to all visible songs.
Use this to load your songs into Jaikoz, selecting the option will start a file browser that you can use to select the folder you want to load songs from. By default files within the subfolders will also be loaded but you can disable this by deselecting Preferences:General:Base Folder:Include Sub Folders when searching for Songs.
The Guess where to split folder into Base Folder option means that Jaikoz decides how to split the folder path. This becomes more important if you want to use the Correct Sub Folders from Metadata option because you will want the folders you want to modify to be in the Sub Folder field. Jaikoz first looks to see the folder path contains an already registered Base Folder in Preferences:General:BaseFolder list , if not it try’s to split folders that match Metadata such as Artist are placed in the Sub Folder field, and those that are general names such as Music or My Files are placed in the base Folder field.
Alternatively you can set the split between the Base Folder and the SubFolderyourself using Specify the number of folders above this selection to set the Base Folder to option. When set to zero the path selected will be set as the Base Folder (any other folders below will be set as the Sub Folder), as the value is increased more of the path will be put into the Sub Folder field and less put into the Base Folder field.
![]()
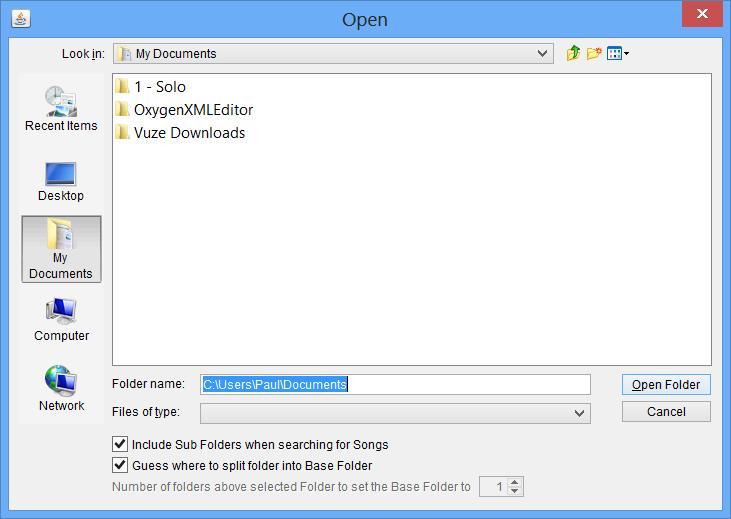
If you are attempting to load a large number of files a Progress Monitor will display showing the file loading progress, if you want to stop loading click on Cancel and no further files will be loaded. You cannot start editing until the load has completed.
![]()
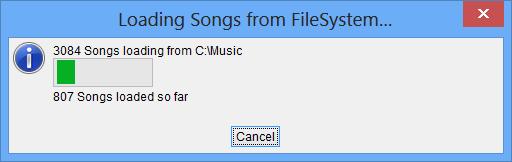
Use this to load further songs into Jaikoz, without replacing currently loaded files.
Use this to load songs into Jaikoz, you can use this option to select one or more individual files from a directory without having to load all the files in the directory, any currently loaded files will be discarded.
Use this to load additional songs into Jaikoz, without replacing currently loaded files.
Use this to open all the files specified in a playlist. Currently the popular M3U format is the only playlist format supported.
Use this to open all the files specified in a playlist, without replacing currently loaded files. Currently the popular M3U format is the only playlist format supported.
Use this to reopen files/folders or play-lists that have been recently opened, maintains a history of the last ten items opened.
Use this to close songs currently opened within Jaikoz. If you have modified any of the files you will be given the chance to save your changes.
Play the selected song(s) using your default player or an alternative specified in the preferences.
This can be used to install a full license before your trial license has expired, once a full license has been installed this option is permanently disabled.
This will save any changes you have made to your preferences to file so they will be preserved the next time you start Jaikoz. By default preferences are automatically saved when you exit Jaikoz anyway unless yo have disabled this option.
This will save changes you have made to your songs, including files that are marked for deletion.
Once the save has completed, for all songs successfully saved the View Panel will be updated to show the metadata information as is currently held in the record, the Edit Panel will show the same as the Read Panel. Any songs not successfully saved will still have a status of Changed or Deleted and the songs saved metadata will be the same as before the editing was done. For more details about how save works see Saving Changes
This will save changes you songs and move them to a different folder that you select. For more details about how save works see Saving Changes
After save the moved files will no longer be open in Jaikoz
This will save changes you have made to your songs and copy them to a different folder that you select. For more details about how save works see Saving Changes
This will re-save songs, regardless of whether you have made any changes, including marking files for deletion. This can be useful if you wish to re-save a file because you want to modify the way it is saved. For example you may wish to save a file with unsynchronization either enabled or disabled.
Once the save has completed for all songs successfully saved the View Panel will be updated to show the tag information as is currently held in the record, the Edit Panel will show the same as the Read Panel. Any songs not successfully saved will still have a status of Changed or Deleted and the songs data will be the same as before the editing was done. For more details about how save works see Saving Changes
Undo any changes to fields in the song, so it is the same as when originally loaded.
If any songs contain embedded artwork the first artwork for each song will be saved as folder.jpg in the songs folder overwriting any existing folder.jpg. This is useful for some players that look for artwork on the file system instead of within the artwork itself.
Exit Jaikoz. First of all it will check if you have made modifications to your preferences but not saved them. If you have you will see
![]()
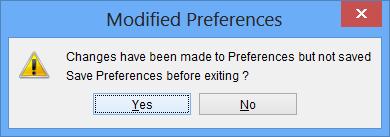
click Yes to save preferences or No to not.
It will then check if you have modified any songs. if you have you will see
![]()
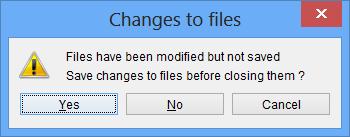
click Yes to save changes or No not to.
After saving if necessary Jaikoz will then exit
This Menu provides access to basic editing functions.
Copies the selected items from the View Pane, multiple fields within a single column can be copied. This data can be pasted into another applications outside of Jaikoz if you wish.
Pastes the previously copied values (including multiple values if they have them) to the currently selected fields in the edit pane. If the copy area was larger than the selected paste area, then only the required number of fields are pasted, if the copy area was smaller than the selected paste area, we reuse the copied fields in order to populate the paste area.
Pastes the previously copied values (only pasting first value if field has multiple values) to the currently selected fields in the edit pane
Pastes the previously copied values to the start of the currently selected fields in the edit pane, (separated by a space character).
Pastes the previously copied values to the end of the currently selected fields in the edit pane, (separated by a space character).
This removes whitespace at the start or end of the currently selected fields in the edit pane.
Widespace is when there is more than one space between words, this option removes the additional spaces so that there is only one space between words in the currently selected fields in the edit pane
Set the value of the selected fields to any text that you enter into the pop-up dialog.
Change the case/capitalization of the selected fields.
Change the case to Title case. The letters for most words is capitalized except for a list of words that should not be capitalized configured in Capitalizer Preferences
Swap the data between two predefined columns. Swapping between the most popular columns are defined in this sub menu, alternatively you can use the Swap to swap data between fields in two arbitrary columns
By using the submenus you can empty all the visible fields in a particular column, you can also empty any column by selecting this option from the column header menu.
This menu is available whenever you have selected some fields in two separate columns,selecting it will swap the contents of the fields from one column with the other
This menu is available whenever you have selected some fields in two separate columns,selecting it will copy the contents of the fields in the right column into the start of the fields in the left column (separated by a space character)
This menu is available whenever you have selected some fields in two separate columns,selecting it will copy the contents of the fields in the left column into the start of the fields in the right column (separated by a space character)
This menu is available whenever you have selected some fields in the track no column,selecting it will renumbers the fields starting from the value of the first field (based on the current sort order), or starting from one if the first field has no value. The renumbering is based on the current order of the files, the numbering takes into account your Track No Preferences
This menu allows you to hide or show various components, your configuration is always automatically saved between invocations of Jaikoz without you having to save preferences.
From here you can toggle between showing/hiding the View Pane. By default the View Pane is not shown because hiding it provides a simpler interface,providing more space for editing right away. But showing the View Pane allows you to identify the ID3v1,ID3v2 and MPEG fields and identify the modifications that you have made.
From here you can toggle between showing/hiding the Tag Browser ,by default the Tag Browser is shown
From here you can toggle between showing/hiding the Console Pane. By default the Console Pane is shown, you may wish to hide the Console Pane to provide more space for editing. Everything written to the Console also gets written to the user log file regardless of whether the console is visible for the View Pane.
From here you can toggle between showing/hiding the Toolbar. By default the Toolbar is shown.
From here you can toggle between showing/hiding the ID3 tabs in the View and Edit panels. The ID3 tabs are only useful for MP3 files and are intended for users with an understanding of the ID3 format.
Available if you have songs selected with a MB Unique Id see View this Track at MusicBrainz
Available if you have songs selected with a MB Artist Id see View this Artist at MusicBrainz
Available if you have songs selected with a MB Release Id see View this Album at MusicBrainz
Available if you have songs selected with an Acoustid see View this Acoustic Id at MusicBrainz. Some tracks may have an acoustic id that isn’t actually in the MusicBrainz database so this option may open an empty page.
Available if you have songs selected with an Amazon Id see View this Amazon Id at Amazon
Available if you have songs selected with an Release Wikipedia Url
This Menu is for performing auto correcting tasks.
Runs the AutoCorrecter over all songs performing the tasks as specified in your AutoCorrecter Preferences in the order they were specified. If the task takes a while to complete a
if you want to stop the Auto Correcter click on Cancel and it will not complete the remaining tasks
This menu is for fixing release information for just a single release.
Tries to match all the selected songs to one MusicBrainz Release. This is very useful if your songs are listed as being from various albums but you know they all belong on a single album. Jaikoz will only allow the match if it has been possible to match all songs to another song on the release, and track lengths are approximately the same.
Tries to match all the selected songs to specified MusicBrainz Release. This is very useful if you have already found the MusicBrainz release you want the songs to be linked to. You can also search for a release here, selecting the Search button opens up Advanced Release Search. From here you can do advanced release search, this works the same way as doing an advanced release search on the MusicBrainz website, once you select a good match this is used for matching your songs. It is also useful to force a match to a release that is not allowed by Match Songs to one MusicBrainz Release because Jaikoz will warn you if there are anomalies but allow you to ignore warnings and match anyway.
Tries to match all the selected songs to specified MusicBrainz Release matching on barcode, this is useful if you have been digitising an album and have the physical record available, saves you doing a MusicBrainz search.
Tries to match all the selected songs to specified MusicBrainz Release matching on catalogue no, this is useful if you have been digitising an album and have the physical record available, saves you doing a MusicBrainz search.
Tries to match all the selected songs to one Discogs Release. This is very useful if your songs are listed as being from various albums but you know they all belong on a single album
Tries to match all the selected songs to specified Discogs Release. This is very useful if you have already found the Discogs release you want the songs to be linked to. If your songs are not close matches to the selected release in duration Jaikoz warns you and gives you the chance to match to the release anyway.
Tries to match all the selected songs to specified MusicBrainz Discogs matching on barcode, this is useful if you have been digitising an album and have the physical record available, saves you doing a Discogs search.
This menu is for performing corrections that effect the Metadata but not the filename, and do not require access to the Internet. All these local corrections run very quickly.
Perform a Cross Referencing Correct on the Artist column. More information about the Artist Column can be found here
Perform a Cross Referencing Correct on the Album column. More information about the Album Column can be found here
Perform a Cross Referencing Correct on the Title column. More information about the Title Column can be found here
Perform a Cross Referencing Correct on the Genre column. More information about the Genre Column can be found here
Perform a Local Correct on the Track No column. More information about the Track No Column can be found here
Perform a Cross Referencing Correct on the Recording Time column. More information about the Year Column can be found here
Perform a Cross Referencing Correct on the Composer column. More information about the Composer Column can be found here
Perform a Local Correct on the Artwork column. More information about the Artwork Column can be found here
Modify the base folder field of the selected songs to another existing folder.
This shifts the last folder in the base folder over to become the first folder in the Sub Folder field, this is normally used in conjunction with the Correct Sub Folder From Metadata action.
This shifts the first folder in the sub folder field over to become the last folder in the Base Folder field, this is normally used in conjunction with the Correct Sub Folder From Metadata action.
Renames your sub folder from the information in your fields and the rename mask that you have provided. More information available from here
Renames your filename from the information in your fields and the rename mask that you have provided. More information available from here
Extract information from your filename into your fields, more information from here
Generate acoustids for your the songs (acoustids can be used to match your songs with songs from the MusicBrainz Database). More information is available from here
Matches your songs against the MusicBrainz Database, using the audio fingerprint and/or the song Metadata. More information is available from here
Matches your songs against the Discogs Database, using the song metadata. More information is available from here
Submit your matches to the new AcoustId Database, Jaikoz will start to use this database for matching in the future.
Submit your track and release genres to the MusicBrainz Folksonomy, more information available from Submit MusicBrainz Genres
Adds the selected songs to MusicBrainz, the MusicBrainz Release Editor is opened with all the information from your selected songs already completed, this makes it much easier and quicker to add new releases to MusicBrainz.
Submit your collection (list of releases) to MusicBrainz, more information available from Submit MusicBrainz Collection
Remove the selected releases from your MusicBrainz Collection
Matches your tracks against the MusicBrainz Database, using the audio fingerprint and/or the track Metadata, and provides a list of possible matches that you can select. More information is available from Manual Correct tags from MusicBrainz
Updates the Metadata from the MusicBrainz Database, for tracks that already have a MB Unique Id, or a MB Release Id, see Updates Tags from MusicBrainz for more details.
Updates the Metadata from the MusicBrainz Database, for tracks that already have a Discogs Release url, see Update Tags from Discogs for more details.
Delete duplicates songs based on their MusicBrainz Id and/or Acoustic Id, more details at Delete Duplicates.
Mark Files for deletion, the files will only actually be deleted if you run Save Changes.
This Menu is for filtering and highlighting songs. Filtering restricts the songs that are displayed in the Edit window, subsequent menu options are only applied to the songs still available in the edit window. Highlighting changes the colour of fields to indicate they meet a particular condition.
Menu items within this menu highlight fields in particular columns based on some predefined conditions
When enabled MB Recording Id fields that are the same as at least one other songs are highlighted in orange
When enabled Acoustid Id fields that contain an Acoustic Id that is the same as in at least one other record are highlighted in orange
When enabled Genre fields that contain a non-standard genre are highlighted in orange
Menu items within this menu filter songs to only show those that meet predefined conditions
When enabled only shows songs with non-standard genres, none standard genres are any of the genres not in the list defined in the ID3 specification.
Menu items within this menu filter songs to only show those that meet predefined conditions
When enabled only songs containing a MB Recording Id field that is the same as at least one other song are displayed. This function is very useful for finding and possibly deleting duplicate versions of the same song. This id now only identifies a unique recording, the same exact recording can be found on multiple different albums, each song would have the same MB Recording Id but a different MB Release Id. In fact to accurately identify a particular track on a particular release, the Recording Id, Release Id, Disc no and track no are required.
When enabled only songs that do not contain a MB Recording Id field are shown. This function is useful for finding tracks that have not been matched to MusicBrainz, that may need matching manually
When enabled only songs containing an Acoustid that is the same as at least one other song are displayed, filter status is also shown in the status bar. This filter is very useful for finding and possibly deleting duplicate versions of the same song.
When enabled only songs containing an Acoustid are shown. This filter is useful for listing tracks that have been matched to Acoustid.
When enabled only songs containing a MB Recording Id and Acoustid combination that is the same as at least one other songs are displayed, filter status is also shown in the status bar. This filter is very useful for finding and possibly deleting duplicate versions of the same song.
Export the songs to a spreadsheet file so the details can be archived or modified outside of Jaikoz. More details at Export
Import song information from a spreadsheet file replacing any modified values with the ones in the spreadsheet. More details at Import
Empty the database cache. The database stores the details of artists, albums and tracks that have been downloaded from MusicBrainz and songs that have previously been loaded into Jaikoz. This allows subsequent lookup to be done locally and much more quickly, but you may wish to empty the cache to ensure that Jaikoz gets any updates to MusicBrainz since the information was originally downloaded. It also speeds up the reloading of files into Jaikoz from your computer.
This will create a list of albums from the tracks that you have selected that have been successfully matched to MusicBrainz, and the list the tracks within each album that you do not appear to have, more details from here
This menu contains access to information about Jaikoz and a number of 3rd party websites that may be useful to you.
All tabs have similar format. At the bottom of the window are three buttons
-
OK saves any changes made.
-
Cancel closes the window without making any changes
-
Reset loads the current tab with the defaults, you need to select OK to save these changes.
![]()
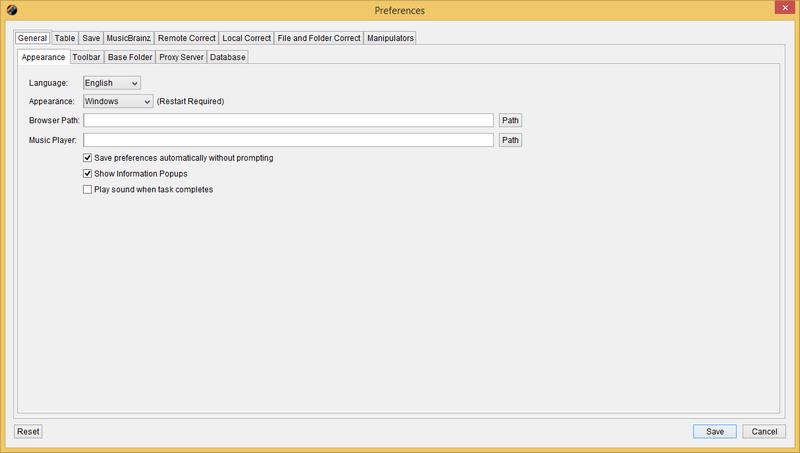
Select the Language used in the Jaikoz: about fifteen languages are currently supported.
Jaikoz provides two different Appearances. By default Jaikoz runs as you would expect on the operating system you are using. But if you use Jaikoz on more than one computer (For example an Apple Mac and a Windows PC).there is a generic Appearance which makes Jaikoz look the same on all operating systems (Windows,Linux,Mac OS X) called Cross Platform If you change this option changes will not take place until you restart Jaikoz.
Specifies the Music Player used to process from the Play Song option.
Jaikoz will try to find and use the Default Browser but this is not always possible. Browser Path allows you to specify the path of the browser that you would like to use and overrides any browser Jaikoz finds automatically.
If Save preferences automatically without prompting is selected, any changes made by you in the Preferences will automatically be saved this is the default. If you uncheck this option you will be prompted when you exit to save any unchanged preferences if you would like to
If Show Information Popups is selected then a pop-up is shown at the end of running a task summarizing what was changed, if you disable it then the information is just added to the console.
If Play sound when task completes is enabled there is a beep on task completion to alert you
![]()
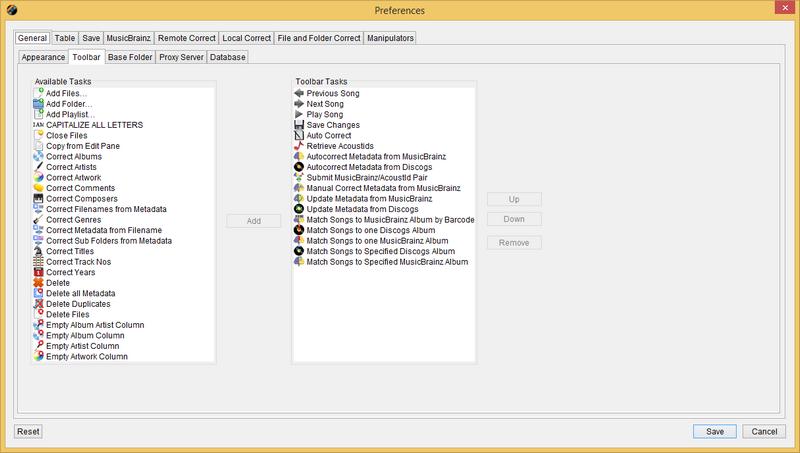
Configure the toolbar with the most importnat actions for you, over ninety tasks can be added to the toolbar.
The list of Base Folders means that any folders containing one of these base folder as a root will have their folder path split so that the first part of the path is put into the Base Folder field and the rest into the Sub Folder field, only the Sub Folder field is replaced if later on you use Correct Sub Folder from Metadata. This list is added to automatically whenever you load a new folder in Jaikoz, but you can manually modify the list for when Jaikoz makes incorrect decision about how to split a folder path into base and sub components.
The Default Read Folder specifies the location Jaikoz will look in by default. You can either type in a folder or use the Select Folder button to open a file browser to find the folder you require. If Include Sub Folders when searching for Songs is selected Songs within the sub folders will also be loaded.
If Load from this Folder on Startup is selected when Jaikoz starts it will automatically load songs from this folder
![]()
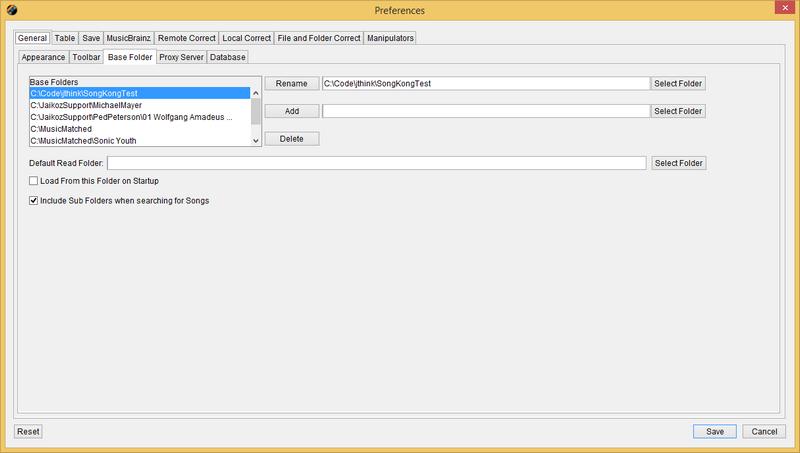
In some environments you many need to use a proxy server to access the Internet from Jaikoz. If so select Use Web Proxy and enter the Proxy Server and Proxy Port. Some proxies additionally require you to enter an username and password
![]()
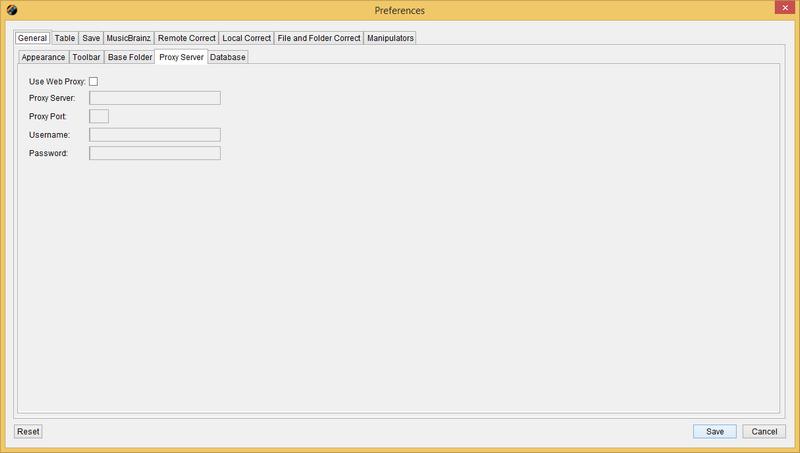
The Jaikoz database caches details of the songs you load into Jaikoz, and release lookups from MusicBrainz and Discogs, so it can get very large, you can specify the location of the Jaikoz database in the Database Folder field, this will take effect when you restart Jaikoz. It is not recommended to store the database in a network location because this will slowdown Jaikoz. The database cannot be used by multiple installations of Jaikoz it is only intended for use by a single installation of Jaikoz, however if you have installed a second copy of Jaikoz you could copy the database to the new installation so that it could make use of data already cached from MusicBrainz.
![]()
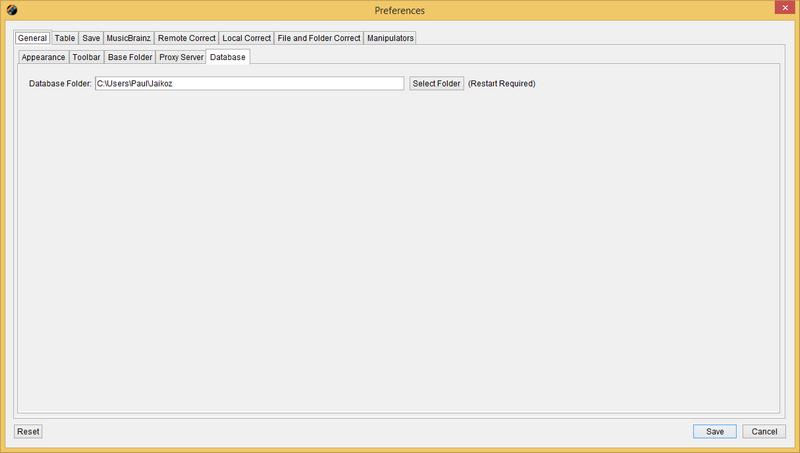
This allows you to set how the data tables look and work
From here you can decide which columns are displayed, the order they are displayed in and the width of the column
To change the order of a field select it and then drag it to the new location. (A field will still be saved to a tag whether it is visible or not)
To hide a field or display a hidden field select it and then double-click on the Visible checkbox
To adjust the width of a field select , then double-click on the Width field and enter the new width, this is measured in pixels
![]()
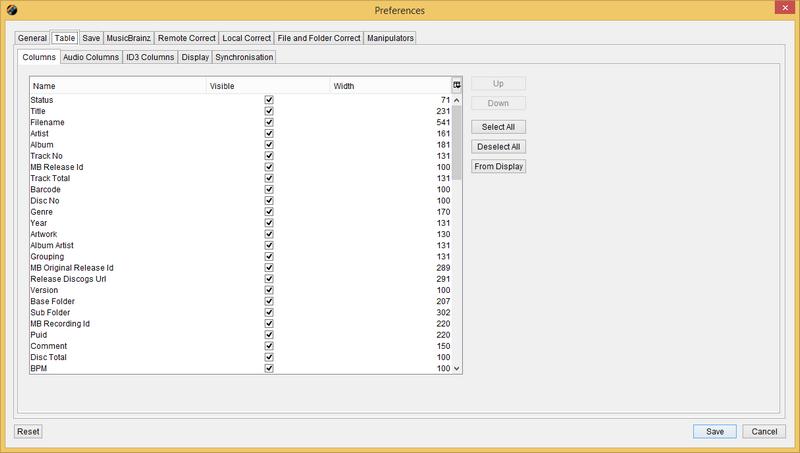
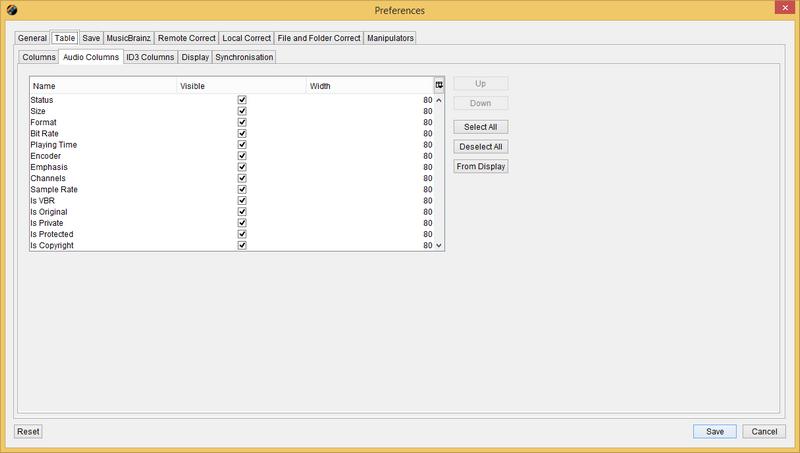
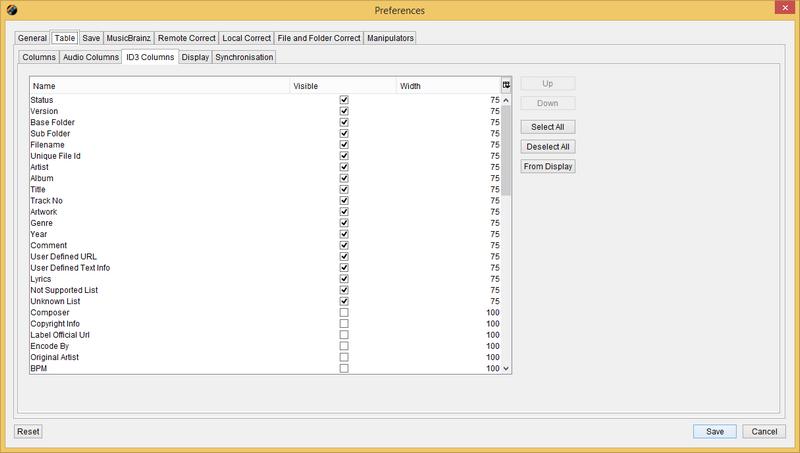
Fields have different colour based on their status, you can modify the colours here. Select the 'Select Colour' button to choose the new colour
![]()
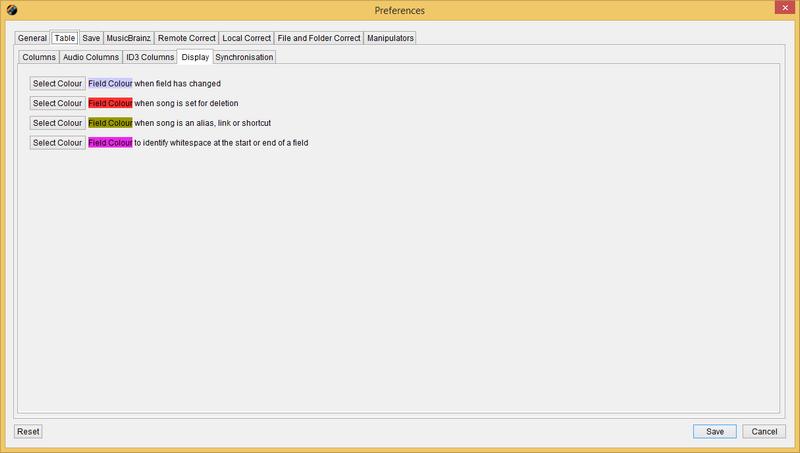
You can change the synchronisation settings here by selecting/deselecting the relevant checkbox.
![]()
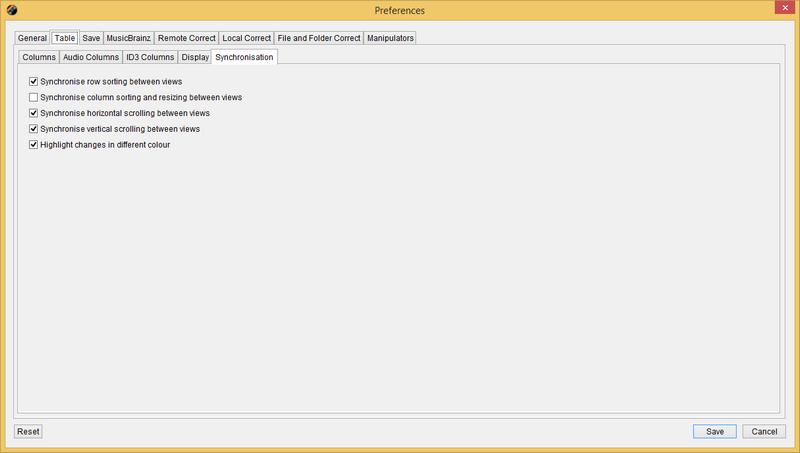
the meaning of these is explained here
ID3v1 is the original tagging system used with MP3 files.
Specifies the default tag versions to save. What tags you save depends upon how you use the songs. ID3v1 is supported by most Audio applications however it is a very limited system, most applications now support ID3v2 tags in some form so there is a strong case for removing your ID3v1 tags from your file so you do not have two datasets to maintain. If your application supports ID3v2.4 you should save your tags to this version as it is the latest and greatest version, however many applications only support ID3v2.3 and ID3v2.2 so you need to take this into account when making a decision.
For ID3v1 tags you can elect to remove them, always write them or to keep if already exist.
![]()
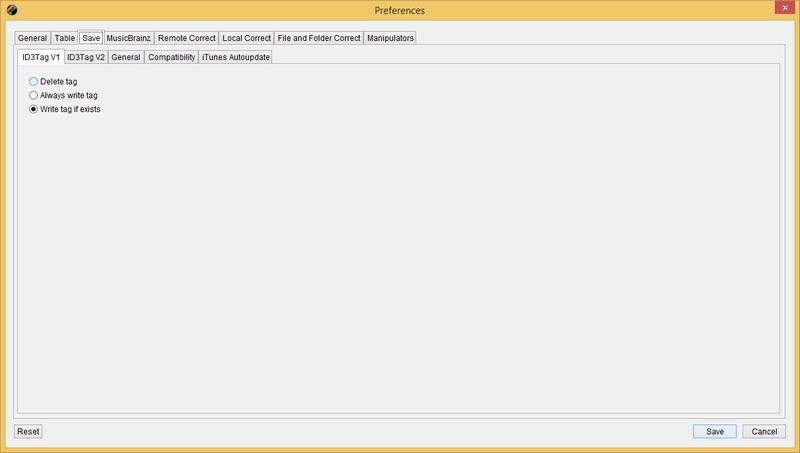
ID3v2 is the newer tagging system used with MP3 files. ID3v23 is more widely supported than ID3v22 or ID3v24.
For ID3v2 tags you can elect to always write a particular tag version or to keep the existing tag version and provide a default if the tag does not exist.
For ID3v2 you can select the text encoding to use. Most of the time the IS08859 encoding can be used but if you have values that use special characters or that are written in a language other than English one of the UTF encodings will sometimes have to be used instead. The difference is that IS08859 uses one byte per character, UTF16 uses two bytes per character so that it can store a wider range of characters - but requires more space. UTF8 uses one byte where it can, but two bytes otherwise.
The Default Text Encoding ... options are what Jaikoz will use when creating any new fields if it can, if you have also selected the Save existing fields using this encoding option then Jaikoz will use this text encoding for any existing fields if it can. When you have text that cannot be encoded in IS08859 ID3v23 will automatically use UTF16 there is no offer choice, but for ID3v24 you can choose between UTF16, UTF16BE and UTF8 with Text Encoding to use when need to write Unicode ID3v24 tags, if you have already set Default Text Encoding to use when writing ID3v24 tags to anything other than ISO8859 then this option will have no effect because UTF will be used anyway.
![]()
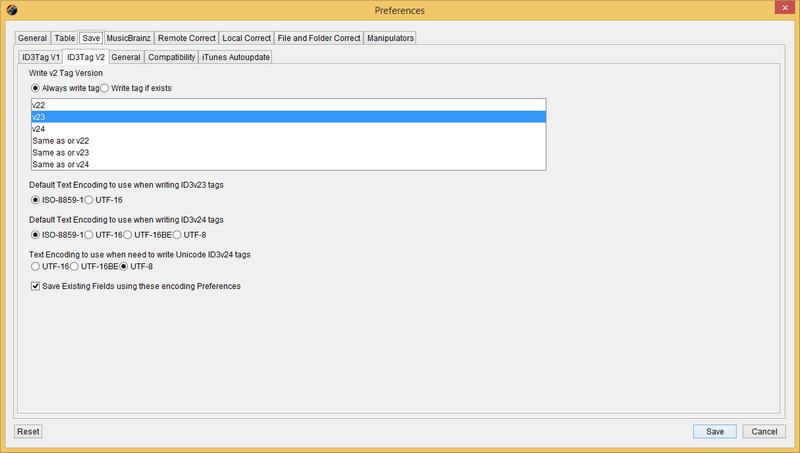
Pad Numbers with zero Track and Disc Nos are always padded in Jaikoz for readability but the ID3, OggVorbis and Flac formats allow you to specify if you want to store the zeroes in the files themselves
If enabled Delete empty folders on save automatically deletes folders that are now empty because the songs that were in there previously have been renamed or moved. This is powerful way of housekeeping you filesystem but may not always be desired so it is disabled by default.
With Move files marked for deletion to the deletions folder instead of actually deleting them is enabled you can specify a folder that deleted files are moved to instead of them being removed from your computer completely. It is like having a Recycle Bin or Trash Can just for Jaikoz. Specify the folder to use in the Deletion Folder field.
If you move your songs to another folder Jaikoz also move other files found in the same folder as they may be artwork , liner notes or other files linked to the songs , but you can disable this default behaviour by unchecking Move associated files
If using the Save and Move task within the Autocorrecter you need to specify where the songs should be moved to in the Move Folder field.
![]()
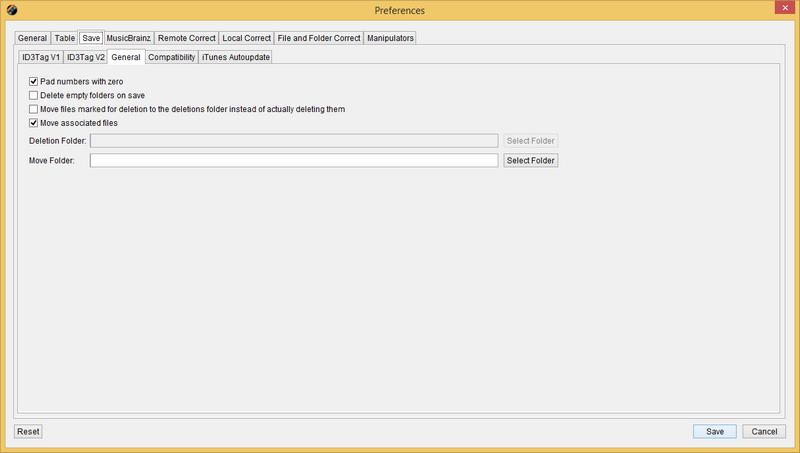
The compatibility tab allows you to make adjustments to your preferences so that your files work best with different players, by default this tab is configured so that your files work best with iTunes.
If the Do not unsynchronise ID3 tags option is enabled the tags will not be unsynchronised. Unsynchronisation is required when there is Metadata which could be misinterpreted as the start of the actual audio data, extra bytes are inserted so no misinterpretation will happen. But if you are using an application that does not understand unsynchronisation then the Metadata can be misinterpreted instead, this problem is most likely to occur if you have added cover art, the end result will be an image that does not display properly in some applications. Enabling this option will not usually cause problems with the audio because most players will correctly identify the start of the audio even there is Metadata which could be misinterpreted as the start of the actual audio data.
Usually Genres selected from a the Genres list are stored internally as a number but if the Save genres in an iTunes-friendly Format option is enabled than Jaikoz will ensure that when genres are saved they will store the genre as a String if it is one of the additional genres defined by Winamp to ensure that iTunes recognises it.
The Always write Mp4 Genres as text option means that for Mp4s we never used the internal ID3 genres keys, we always write the text for maximum compatibility.
Unfortunately different Music Players use different internal values to represent ratings, so a particular value that might denotes 5 stars in iTunes would only denote 2 stars in Windows Explorer. To solve this issue Jaikoz lets you specify how to interpret the values when they are loaded using the Upload and Save ratings so compatible with option, this will interpret the ratings as they are loaded and save the ratings using that format. You can also use it to convert ratings, for example if you load songs that have ratings stored in Windows Media format and you want to use them in iTunes set the option to Windows Media Player, load the files into Jaikoz, change the option to iTunes and save your changes.
To further complicate things, many players do not actually store their ratings in the songs themselves instead they store therm in their own internal database, Jaikoz provides a solution for this problem if you are using iTunes. If Jaikoz is configured to update changes to iTunes and you have changed the rating field then on save this field is used to update the rating within the iTunes database, giving you a way to modify your iTunes ratings outside of iTunes itself. If you make further changes to the files in Jaikoz but do not modify the ratings field then on save it will not overwrite the rating within iTunes (unless you do Force Save), this means you can make subsequent changes to the ratings within iTunes without being concerned that Jaikoz will replace the values. Remember that iTunes does not store it's ratings in the files themselves, and ratings stored in the iTunes database are not read by Jaikoz
![]()
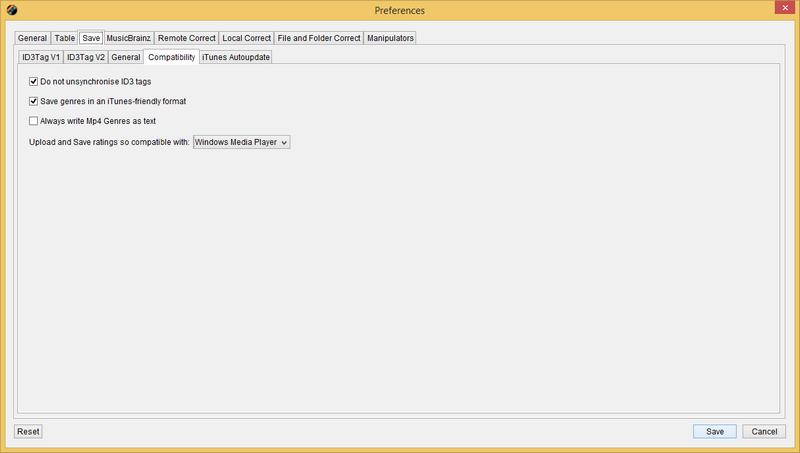
Here we specify preferences to be used for updating iTunes from Jaikoz, a full understanding of these sections can be found in ITunes chapter
Here we specify preferences to be used with MusicBrainz, a full understanding of these sections can be found here
Preferences that apply to remote correct and are not specific to Musicbrainz which has its own preferences section.
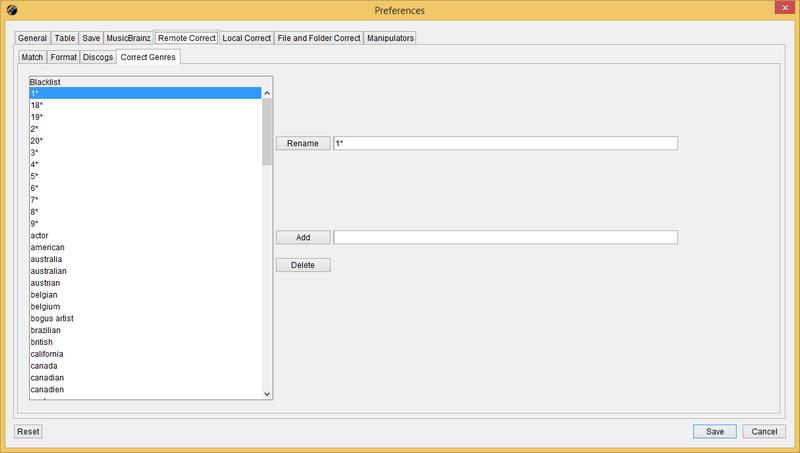
The items in this sub menu allow you adjust the settings used when you run the associated local Correct task
Here we specify preferences to be used when matching tracks when local correcting the Artist, Album, Title, Genre, Composer or Comment fields. The meaning of these sections can be found here
![]()
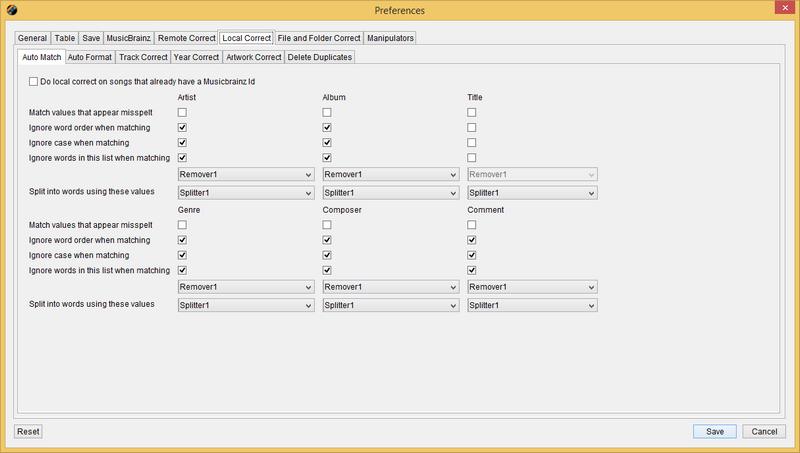
Here we specify preferences to be used when formatting matches performed by the local correcter for the Artist, Album, Title, Genre, Composer or Comment fields. The meaning of these sections can be found here
![]()
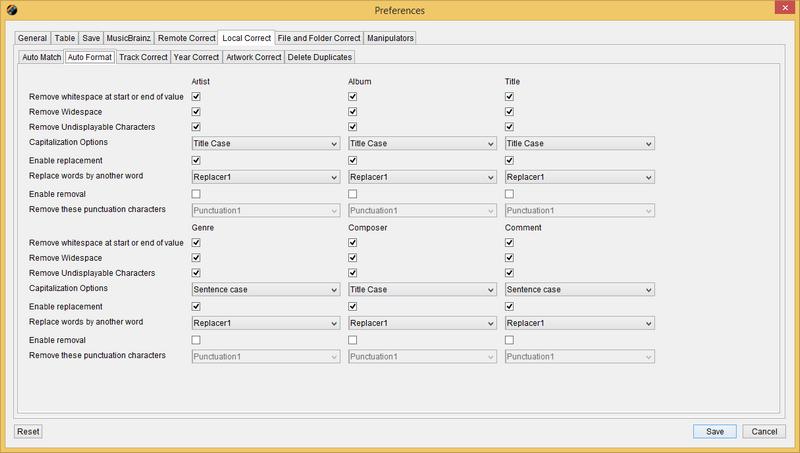
The only setting you can change is to specify removal of undisplayable characters but running the Correcter will also validate the Recording Time Column and if it can not fix it will set it empty
![]()
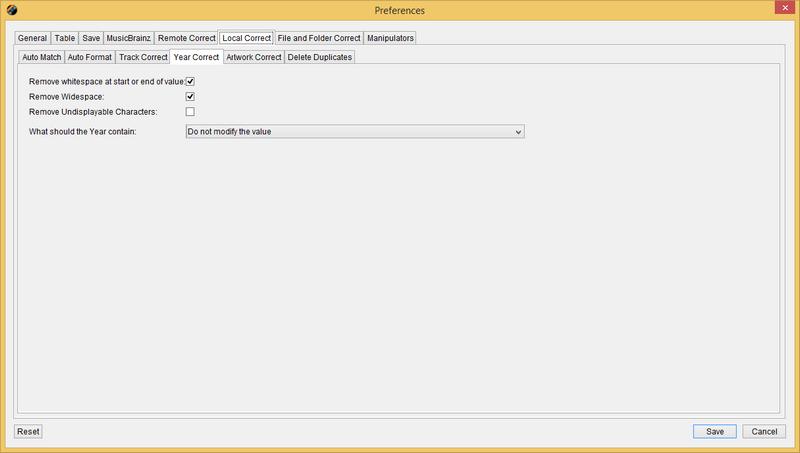
Settings for Local Correct of the Artwork field, the options are explained in Correct Artwork
Some characters may not be compatible with the file names on some file-systems so the Simplify non-standard characters option replaces such characters with their simpler equivalent (i.e. é -> e, ℮ ->e and ◀ -> <) if Simplify non-standard characters is enabled. Simplification of file names can make managing your files easier and provide greater compatibility with other applications.
This option is similar to the Convert to ASCII option found in some applications but ASCII only supports a subset of the Latin character set , characters sets such as Chineses, Korean and Arabic cannot be converted to ASCII so we do not try, but we can simplify file names in four main ways.
-
We simplify Latin charset by removing diacritics such as accents ad circumflexes (é -> e)
-
Sometimes complex characters can be represented as a combined character (NFC) or two different characters (NFD) we always convert NFD to NFC
-
We simplify unusual representations of letters and numbers such as subscript or superscript (℮ ->e)
-
We replace symbols and graphic characters with simpler representations ( ◀ -> <)
If Replace 'From' Character with 'To' Character is enabled you can then specify pairs of from and to words to map to.
![]()
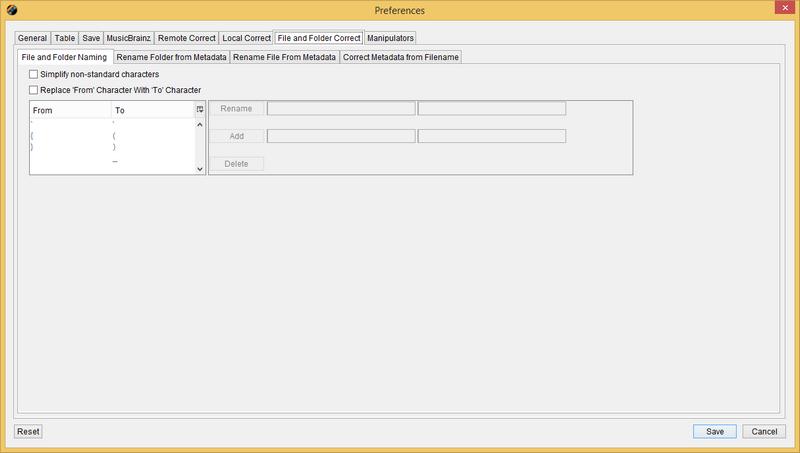
Here we specify a format to be used when the sub folder name is generated from the metadata. You can edit the text box directly and select masks from the list which will automatically append the value. There are two different masks, the Compilation Rename mask is used if the song has the Is Compilation field set, this is useful for keeping your compilation albums in a different location to your original albums, the Rename mask is used for all other songs.
The mask is defined using the standard Javascript Expression language, this allows some very flexible and powerful masks to be created. There is a list of fields that can be included in the mask and you can simply append fields with the '+' character or use them as parameters to standard Javascript functions or user-defined functions defined before the mask.
The default rename mask is
ifnotempty2(album artist,artist,folderseparator) + ifnotempty(album,folderseparator) + (disctotal>1 ? discno + folderseparator : '')
This means output the album artist if it exists, otherwise use the artist. Then output a folder separator, this is '/' for OSX and Linux, and '\' on Windows. Then if it has value output the album value and another separator, then if it is a multidisc album output the discno and another folder separator.
Note the functions ifnotempty and ifnotempty2 are user defined functions defined just before the rename mask this makes the masks more readable.
![]()
Here we specify a format to be used when the filename name is generated from the metadata. You can edit the text box directly and select masks from the list which will automatically append the value There are two different masks, the Compilation Rename mask is used if the song has the Is Compilation field set, this is useful for naming your compilation albums songs differently to your original albums.
The mask is defined using the standard Javascript Expression language, this allows some very flexible and powerful masks to be created. There is a list of fields that can be included in the mask and you can simply append fields with the '+' character or use them as parameters to standard Javascript functions or user-defined functions defined before the mask.
The default rename mask is
ifnotempty2(album artist,artist,' - ') + ifnotempty(album,' - ') + ifnotempty(pad(trackno,2),' - ') + title
This means output the album artist if it exists, otherwise use the artist. Then output ' - '. Then if it has value output the album value and another' - ', then output the trackno padded with zeros for better sorting (so track 1 would display as 01 ectera) and then the song title.
![]()
Here we specify settings to be used by when AutoCorrecting metadata from filename, the meaning of these sections can be found here
![]()
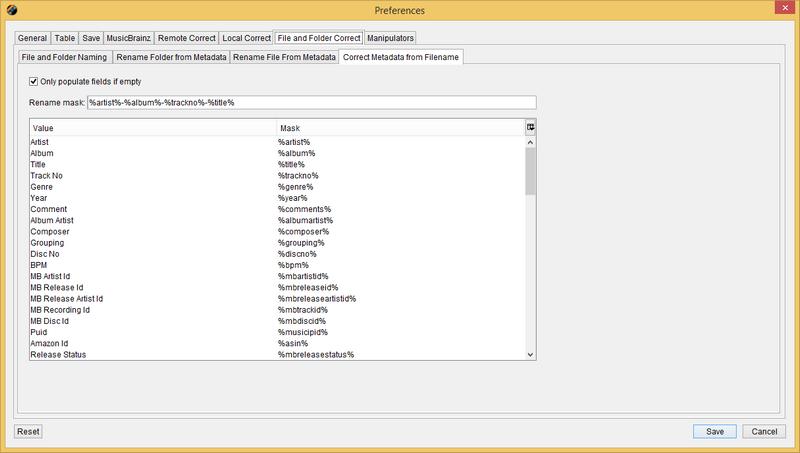
Jaikoz can perform a number of corrections automatically these can be batched up into the Auto Correcter task. Here we can specify which tasks to perform and in what order. Jaikoz comes with a default list that performs all local auto corrections, some corrections are performed twice this is because the output from one task can effect the input of another task. For example we do the following order:
| Correct Artist |
| Tags From File |
| Correct Artist |
| Correct File from Metadata |
Correct Artist will find matches between Artist fields, Tag from File will populate missing Artist fields if possible from the filename it will use the values currently in the Artist column to get as accurate a match as possible. We then run Correct Artist again to take into account of any new matches, we then write the updated Artist fields to the filename with Correct Artist from Metadata
![]()
The left hand side lists all the Available tasks, the right hand side your current Auto Correcter Tasks
To add tasks to your Auto Correcter Tasks select the task from Available Tasks you want to add then use either Add to or drag them over to the AutoCorrecter tasks.
To remove tasks from your Auto Correcter Tasks selecting an item(s) and select Remove.
To sort tasks in your Auto Correcter Tasks select the item you want to move and either use the Up and Down buttons to move it in the list or simply drag and drop it.
Word Removers are used by Auto Match, they ignore words listed in a word remover when comparing field values. From here we can specify one or more word remover lists and the words they contain. The Window is split horizontally, the top half specifies the Word remover lists (a default called 'Default ' is provided) when you select a list the bottom half of the window shows all the words that will removed. Use the Add,Rename and Delete buttons in the half to create, rename or delete new word lists. use the Add,Rename and Delete in the bottom half to create, rename or delete a value from the word list
![]()
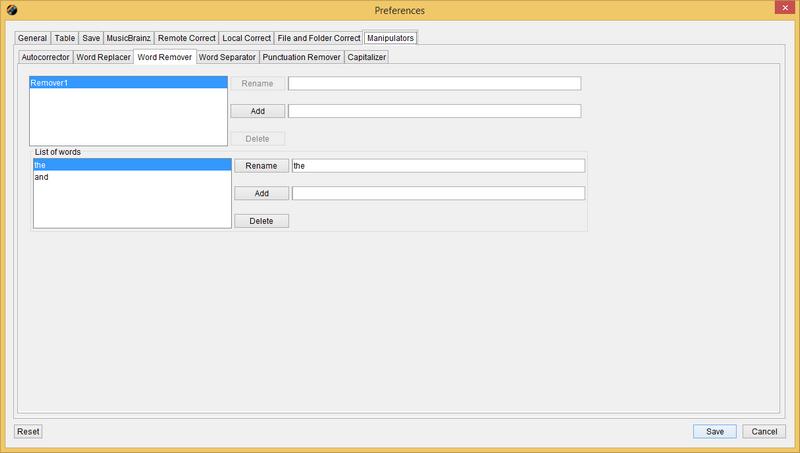
You may wish to define multiple word removers for different columns or for different dataset. For example if you are dealing with songs in a different language you could define a word remover specifically for that language
Word Separators are used by Auto Match to identify when a word ends, words are separated by the values. From here we can specify one or more Word Separator lists and the Word Separators they contain. The Window is split horizontally the top half specifies the Word Separator lists (a default called 'Default ' is provided), when you select a list the bottom half of the window shows all the characters that are used to separate words. Use the Add,Rename and Delete buttons in the half to create, rename or delete new Word Separators. use the Add,Rename and Delete in the bottom half to create, rename or delete a value from the word list, only single characters are allowed.
![]()
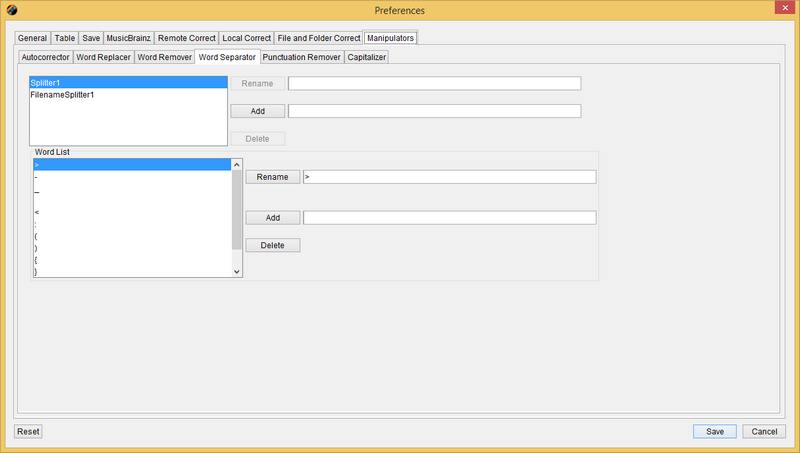
You may wish to define multiple Word Separators for different columns or for a different dataset. For example two Default Word Separators are provided,one is used by the File Name to tag correcter to split a filename into separate components. In this case we do not want to include the ' ' character because this would break up song titles into different words whereas we want to keep the Title as a single word for this auto correction.
Word Replacers are used by Auto Format to replace words with another word. From here we can specify one or more word replacer lists and the words replacers they contain. The Window is split horizontally the top half specifies the Word Replacers lists (a default called 'Default ' is provided) ,when you select a list the bottom half of the window shows all the words that will be replaced and by what they will be replaced by. Use the Add,Rename and Delete buttons in the half to create, rename or delete new word replacers. Use the Add,Rename and Delete in the bottom half to create, rename or delete a valuepair from the word list, you have to specify what the word is and what you want to replace it by.
![]()
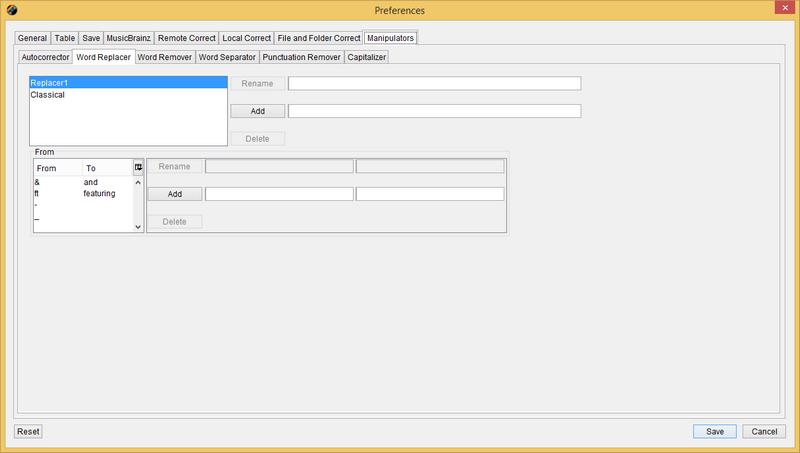
You may wish to define multiple word replacers for different columns or for a different dataset. For example if you are dealing with songs in a different language you could define a word replacer specifically for that language.
Punctuation Removers are used by Auto Format to remove characters we do not want. From here we can specify one or more Punctuation Removers lists and the Punctuation Removers they contain. The Window is split horizontally the top half specifies the Punctuation Removers lists (a default called 'Default ' is provided) , when you select a list the bottom half of the window shows all the punctuation that will be removed. Use the Add,Rename and Delete buttons in the half to create, rename or delete new punctuation removers. use the Add,Rename and Delete in the bottom half to create, rename or delete by a value from the list, only single character are allowed.
![]()
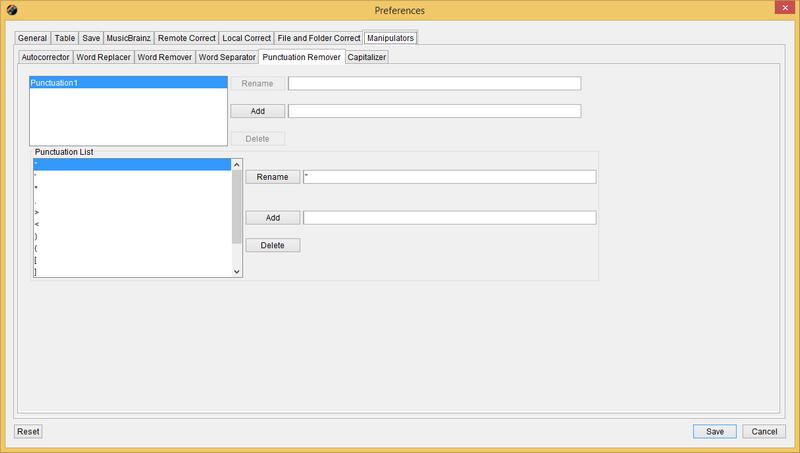
You may wish to define different punctuation removers for different columns or for a different dataset. For example if you are dealing with songs in a different language you could define a punctuation remover specifically for that language.
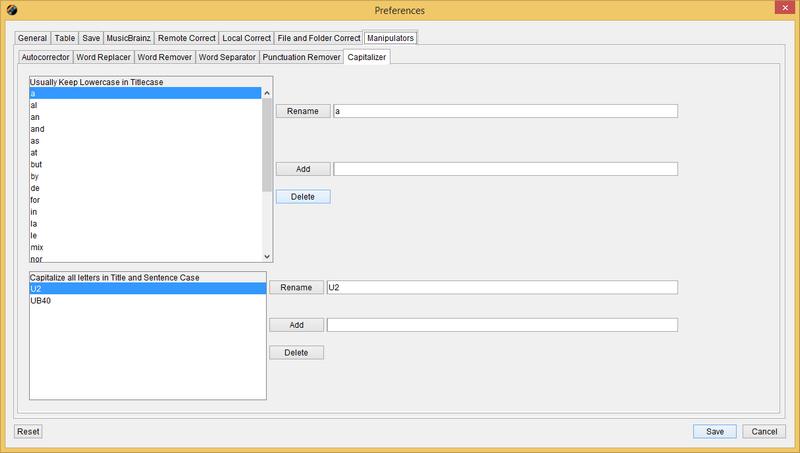
Popup Menus allow you to do some tasks straightaway from where you are based on what you have currently selected.
In the Read Panel you can invoke this Menu from the row number, it will effect all row numbers you have selected.
-
Close Files,close all the selected files
In the Read Panel Table you can bring up a Popup Menu to act on all selected fields in the table
-
Close Files,close all the selected files
In the Edit Panel you can invoke this Menu from the row number, it will effect all row numbers you have selected.
-
Close Files,close all the selected files
![]()
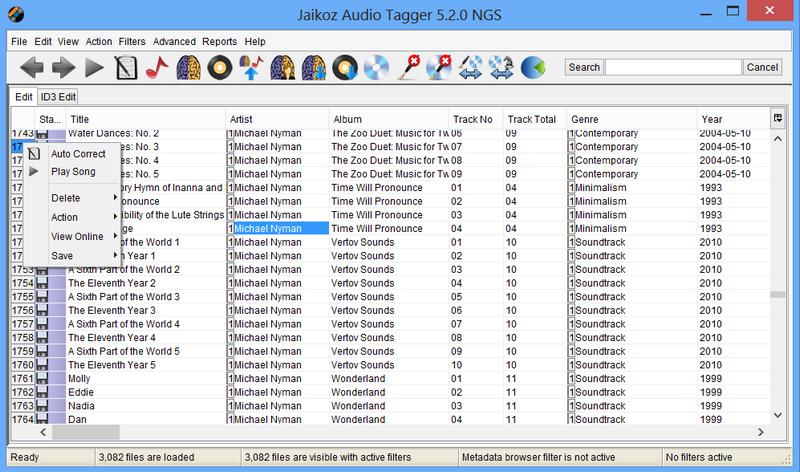
In the Edit Panel Table you can bring up a Popup Menu to act on all selected fields in the table
![]()
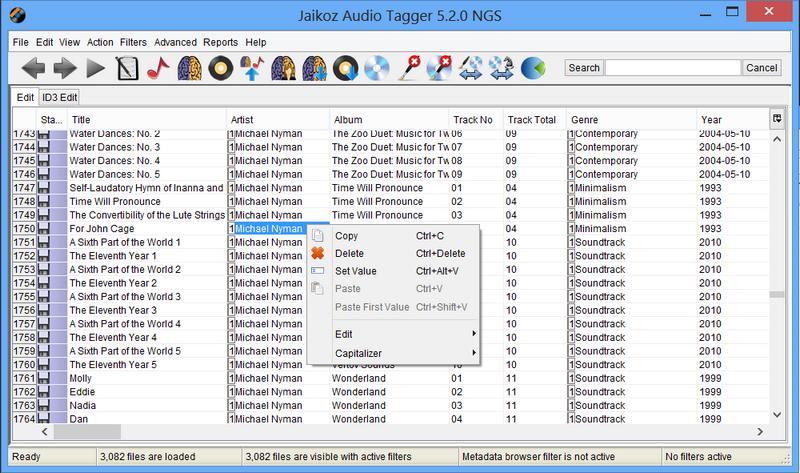
Table of Contents
The keyboard can be used to perform most functions
Table 11.3. Table Keyboard Actions
| Key | Task |
|---|---|
| Esc | Return field prior to editing |
| Enter | Start Editing current field |
| Cntrl+C | Copy information in selected field into clipboard |
| Cntrl+V | Paste first value from clipboard into selected field(s) |
| Shift+V | Paste all value from clipboard into selected field(s) |
| Cntrl+D | Delete selected field |
| Cntrl+J | For multiple value fields open the associated Popup Window |
| Tab | Move to next field |
| Right Arrow | Move to next field |
| Shift+Tab | Move to previous field |
| Left Arrow | Move to previous field |
| Home | Move to first field in row |
| End | Move to last field in row |
| Cntrl+Home | Move to first field in table |
| Cntrl+End | Move to last field in table |
| Cntrl+A | Select all fields in table |
| Shift+Up/Down | Extend selection one row |
Table 11.4. Shortcut keys for tasks
| Key | Task |
|---|---|
| Cntrl+O | Open Folder |
| Cntrl+Alt+O | Add Folder |
| Cntrl+Shift+O | Open Files |
| Cntrl+Alt+Shift+O | Add Files |
| Cntrl+K | Open Playlist |
| Cntrl+AltK | Add Playlist |
| Cntrl+Shift+S | Save Preferences |
| Cntrl+Alt+W | Close Files |
| Cntrl+S | Save Changes |
| Cntrl+Alt+S | Force Save |
| Cntrl+Q | Exit |
| Cntrl+Shift+T | Show View Pane |
| Cntrl+B | Show Column Browser |
| Cntrl+Shift+M | Show Detail Pane |
| Cntrl+Alt+T | Show ToolBar |
| Cntrl+U | View Artwork Full-size |
| Cntrl+Shift+L | View this Track at MusicBrainz |
| Cntrl+Alt+L | View this Artist at MusicBrainz |
| Cntrl+L | View this Album at MusicBrainz |
| Cntrl+1 | Auto Correct |
| Cntrl+2 | Retrieve Acoustic Ids |
| Cntrl+5 | Auto Correct Metadata from MusicBrainz |
| Cntrl+7 | Auto Correct Metadata from Discogs |
| Cntrl+Shift+5 | Manual Correct Metadata from MusicBrainz |
| Cntrl+6 | Update Metadata from MusicBrainz Id |
| Cntrl+8 | Update Metadata from Discogs |
| Cntrl+9 | AutoCorrect the SubFolder from Tag |
| Cntrl+Shift+9 | AutoCorrect the Filename from Tag |
| Cntrl+0 | Delete Duplicates |
| Cntrl+F9 | Delete Files |
| Cntrl+Shift+F9 | Undelete Files |